Step 2 - Create a theme for a car variant
In this step of the tutorial you learn how to use one Kanzi Studio project for two variants of a product. In the previous step you created two themes (Classic and Modern) for the gasoline variant of the car. In this step you modify that project and create the themes for the hybrid variant of the car.
Theme the cluster structure
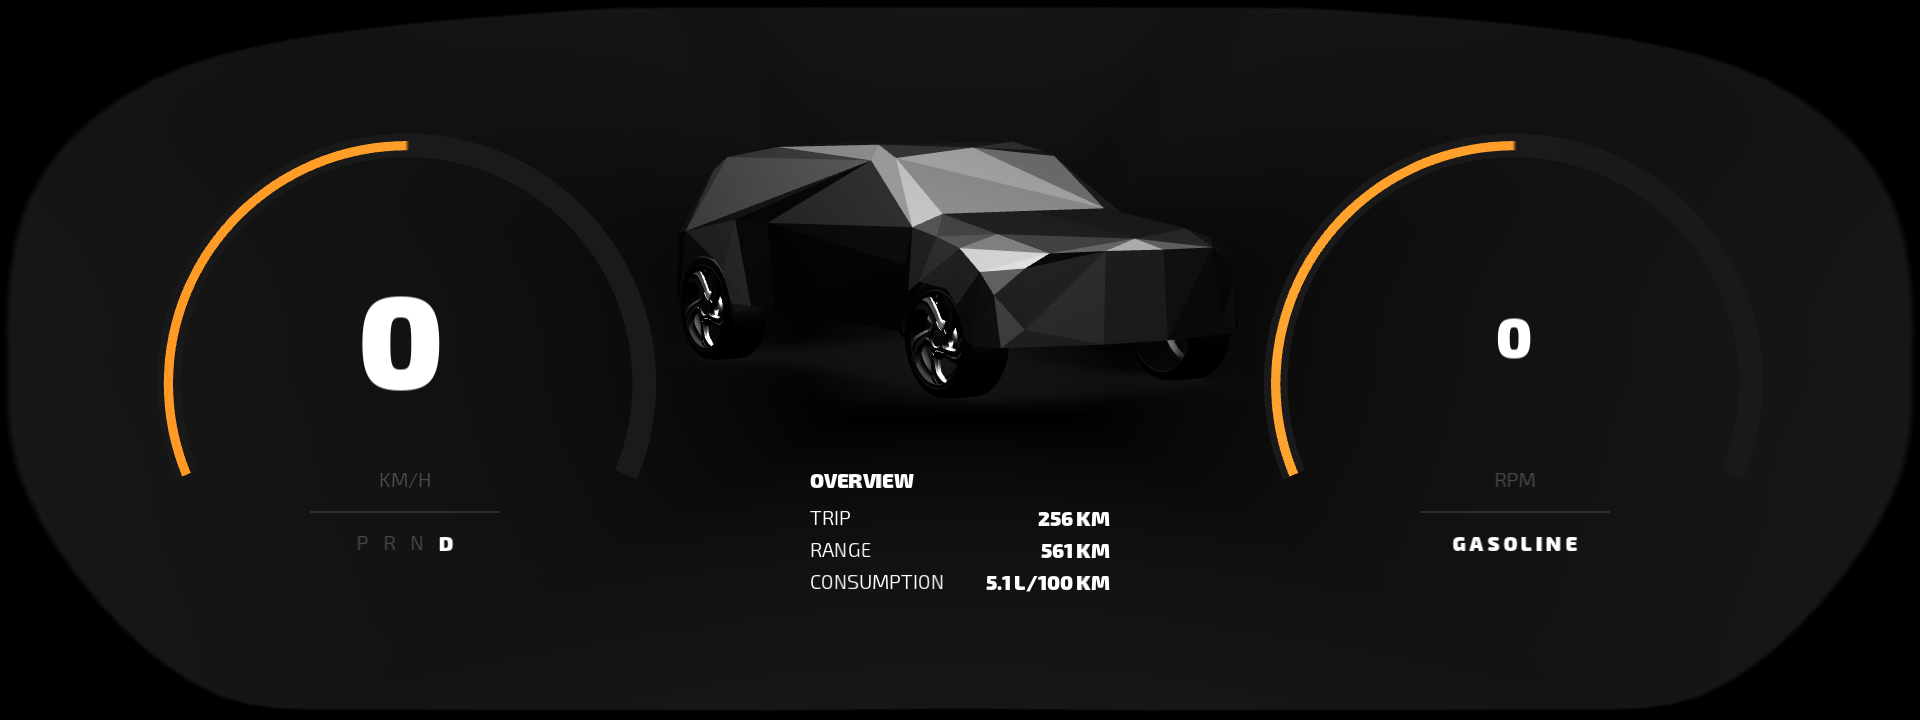
In this section you set for each car variant the visual appearance of the cluster background, the car model shown between the primary gauges, and the car variant name shown in the center of the RPM gauge.
To theme the cluster structure:
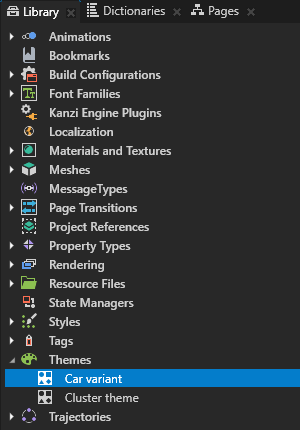
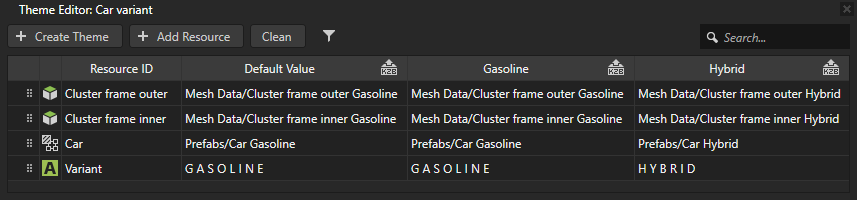
In the Library press Alt and right-click Themes, select Theme Group, and name it Car variant.
Open the Car variant theme group in the Theme Editor and create two themes: Gasoline and Hybrid.

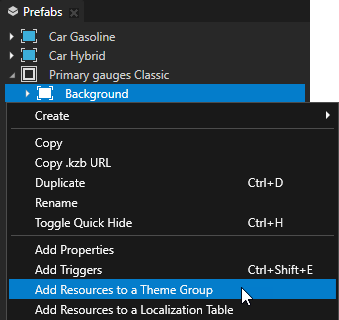
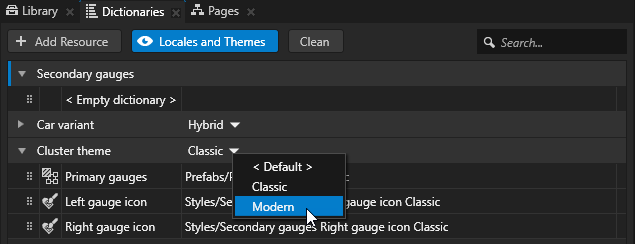
In the Prefabs right-click Primary gauges Classic > Background and select Add Resources to a Theme Group.
Here you add to the Car variant theme group the resources for the cluster background.

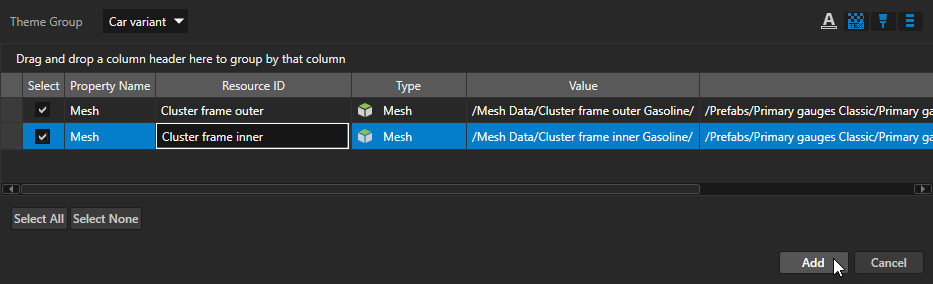
In the Add Resources to a Theme Group window:
Set the Theme Group to Car variant.
Rename the resource IDs:
Cluster frame inner.Model3D.Mesh to Cluster frame inner
Cluster frame outer.Model3D.Mesh to Cluster frame outer
Click Add.
Tip
When you use for resource IDs names which are meaningful in the context of your project, you create a project that is easier to theme and maintain. If you cannot pick a good name when you add a resource ID to a theme group, you can rename resource IDs in the Theme Editor.
In the Theme Editor for the Car variant theme group set the resource IDs:
For the Gasoline theme set:
The Cluster frame outer resource ID to point to the Cluster frame outer Gasoline mesh
The Cluster frame inner resource ID to point to the Cluster frame inner Gasoline mesh
For the Hybrid theme set:
The Cluster frame outer resource ID to point to the Cluster frame outer Hybrid mesh
The Cluster frame inner resource ID to point to the Cluster frame inner Hybrid mesh

In the Prefabs right-click Primary gauges Classic > Car and select Add Resources to a Theme Group.
Here you add to the Car variant theme group the resources for the car model shown between the primary gauges.
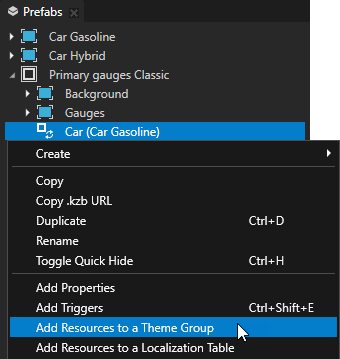
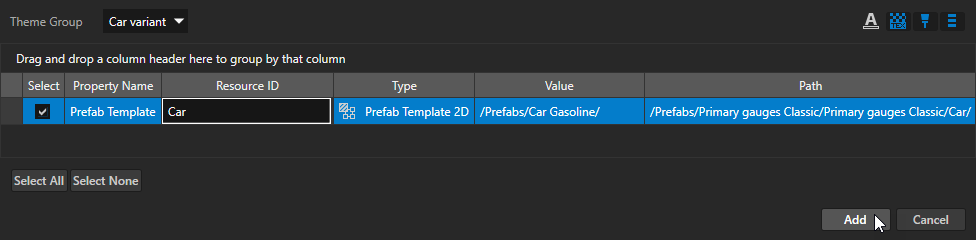
In the Add Resources to a Theme Group window:
Set the Theme Group to Car variant.
Rename the Car.PrefabViewConcept.Prefab resource ID to Car.
Click Add.
Tip
If you accidentally add resource IDs to a wrong theme group, in the Dictionaries click
 next to the resource ID you want to move, and drop the resource ID in the theme group where you want to use it.
In the Theme Editor for the Car variant theme group set the Car resource ID:
For the Gasoline theme set the resource ID to point to the Car Gasoline prefab.
For the Hybrid theme set the resource ID to point to the Car Hybrid prefab.

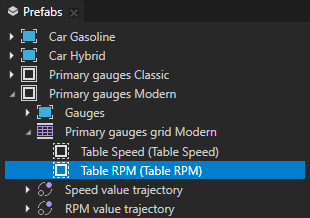
In the Prefabs right-click Primary gauges Classic > Primary gauges grid Classic > Table RPM and select Add Resources to a Theme Group.
Here you add to the Car variant the resources for the car variant name shown in the center of the RPM gauge.
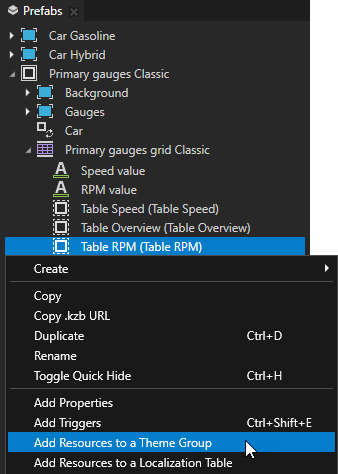

In the Add Resources to a Theme Group window:
Set the Theme Group to Car variant.
Click
 to enable the viewing of the Text Block nodes.
In the top right part of the window, you can select which types of resources you want to show in the window.
Select and rename the G A S O L I N E resource ID to Variant.
Click Add.

In the Theme Editor for the Car variant theme group double-click the cell for each theme and enter the text for the Variant resource ID:
For the Gasoline theme enter G A S O L I N E.
For the Hybrid theme enter H Y B R I D.
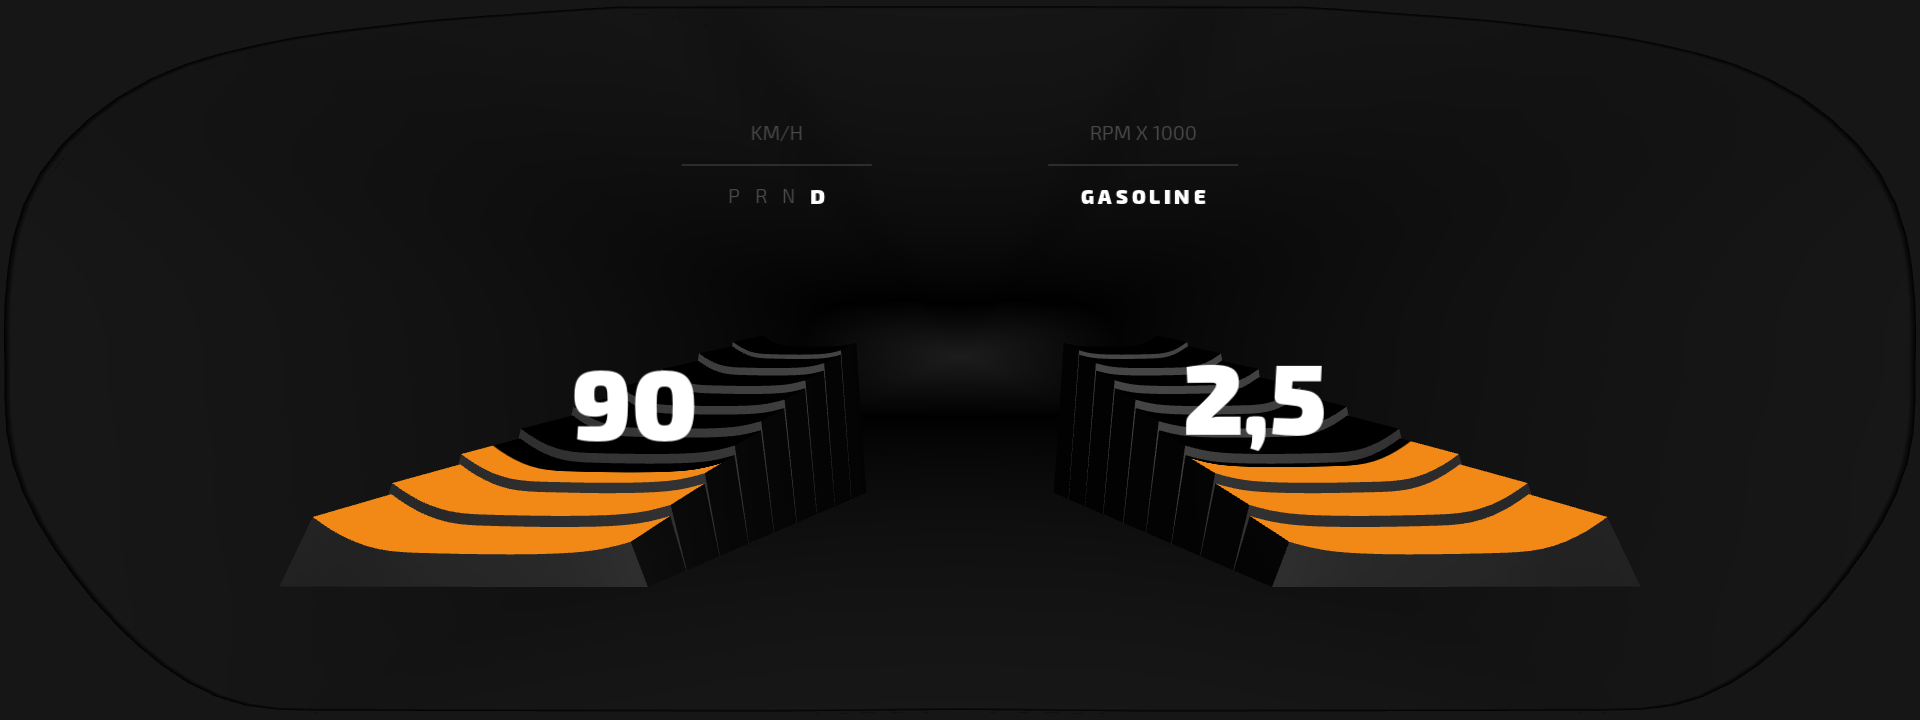
Now when you select in the Dictionaries a theme in the Car variant theme group, the Preview shows the resources you defined so far for the two car variants.
Theme the color of the primary gauges
In this section you set for each car variant the color of the primary gauges.

To theme the color of the primary gauges:
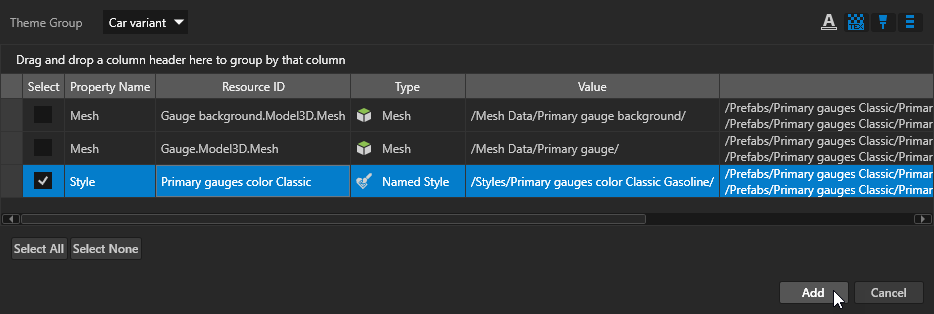
In the Prefabs right-click Primary gauges Classic > Gauges and select Add Resources to a Theme Group.
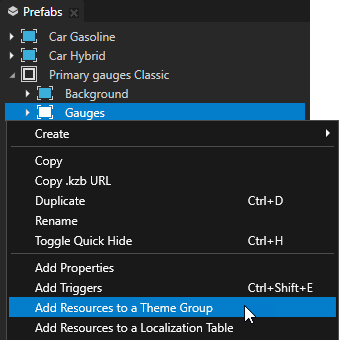
In the Add Resources to a Theme Group window:
Set the Theme Group to Car variant.
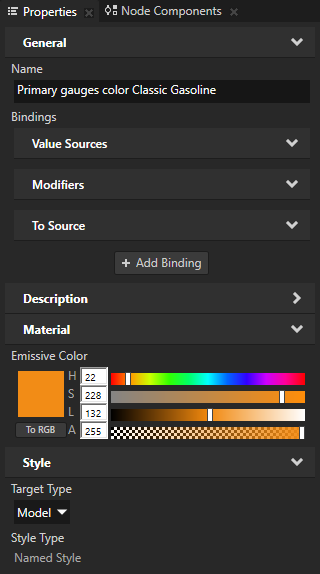
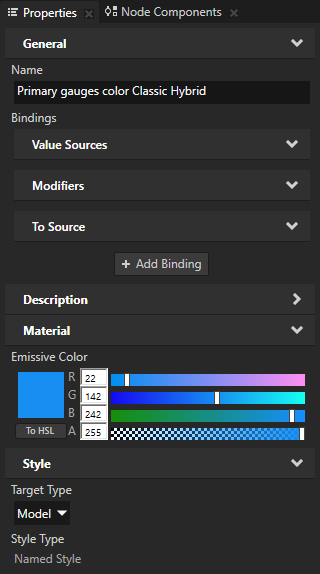
Select and rename the Gauge.Node.Style resource ID to Primary gauges color Classic.
Click Add.
In the Theme Editor for the Car variant theme group set the Primary gauges color Classic resource ID:
For the Gasoline theme set the resource ID to point to the Primary gauges color Classic Gasoline style.
For the Hybrid theme set the resource ID to point to the Primary gauges color Classic Hybrid style.
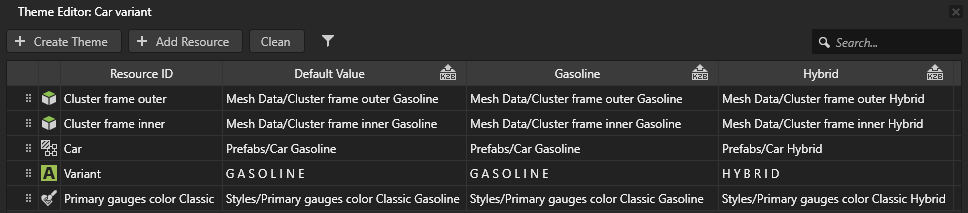
These styles set the Emissive Color property for the material which the Gauge Model nodes which define both primary gauges use.
Now when you select in the Dictionaries a theme in the Car variant theme group, the Preview shows the resources you defined so far for the two car variants.
Theme the secondary gauges
In this section you set for each car variant the visual appearance of the secondary gauges to enable the changing of:
The color of the gauges
The icon for the left gauge
The source of the value, the gauge scale, and the unit of the left secondary gauge
To theme the secondary gauges:
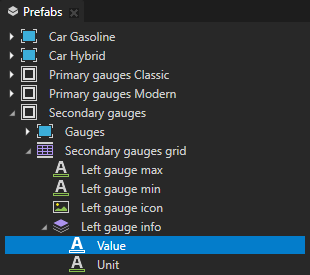
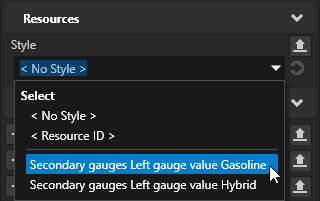
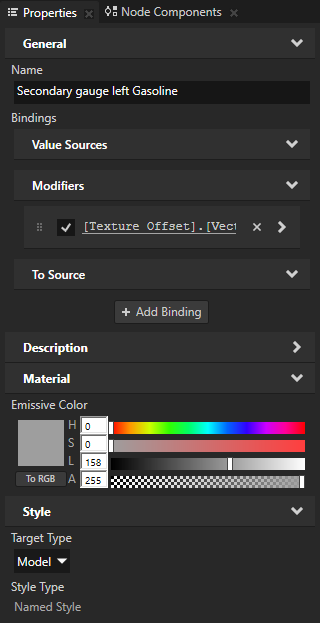
In the Prefabs select the Secondary gauges > Secondary gauges grid > Left gauge info > Value, in the Properties add the Style property, and set it to the Secondary gauges Left gauge value Gasoline style.
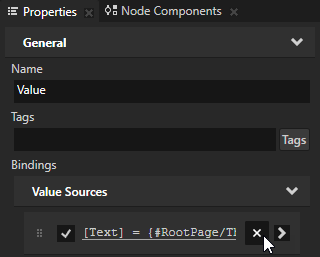
The Secondary gauges Left gauge value Gasoline style targets only the Text Block 2D nodes and uses a binding to get the value for the engine temperature gauge from the Temperature property in the RootPage node.
In the Properties > Bindings, next to the binding that sets the value of the Text property, click
 to remove that binding.
You remove the binding because you use the Secondary gauges Left gauge value Gasoline style to set the binding.
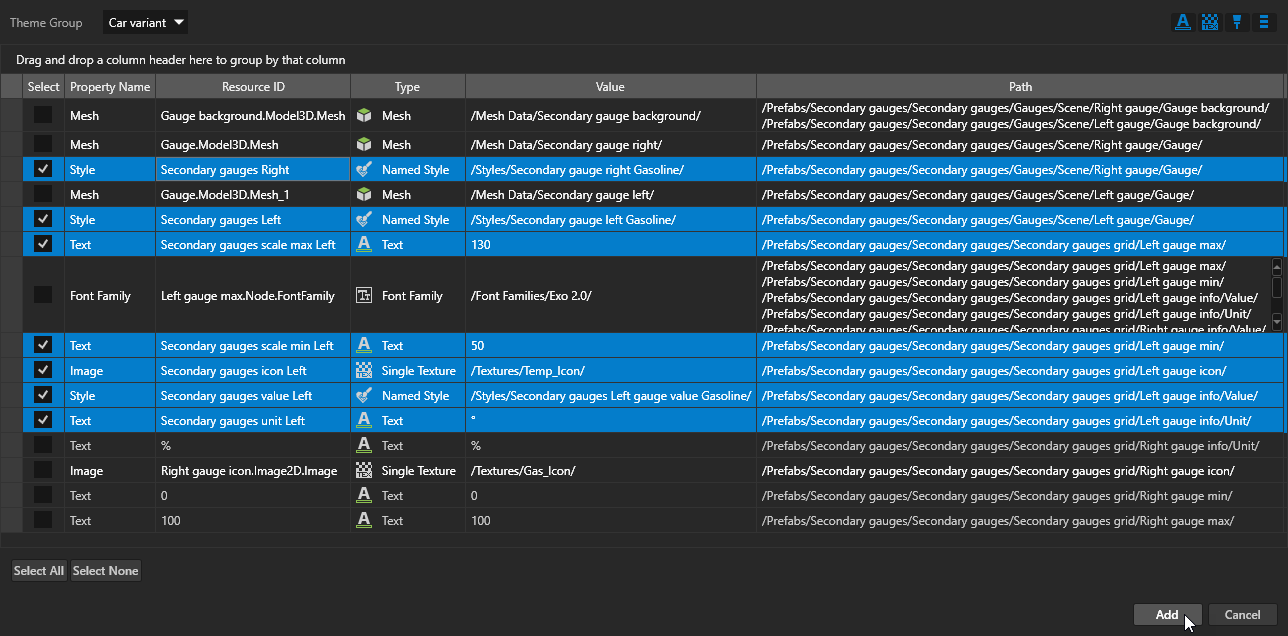
In the Prefabs right-click Secondary gauges, select Add Resources to a Theme Group, and in the Add Resources to a Theme Group window:
Set the Theme Group to Car variant.
Click
to enable the viewing of the Text Block nodes.Select and rename these resource IDs:
Gauge.Node.Style to Secondary gauges Right
Gauge.Node.Style_1 to Secondary gauges Left
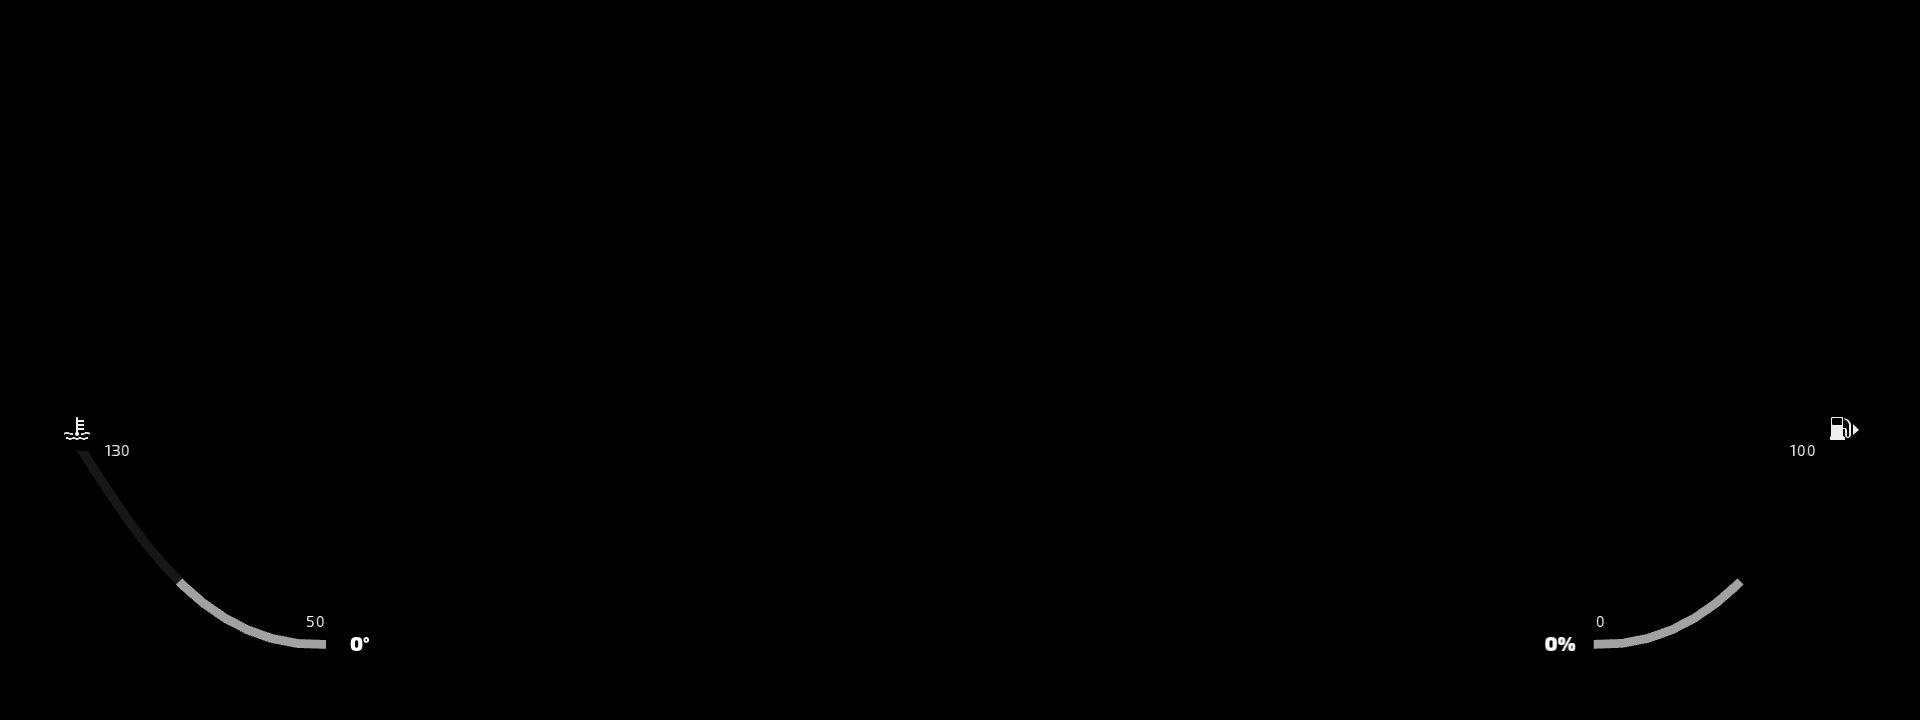
130 to Secondary gauges scale max Left
50 to Secondary gauges scale min Left
Left gauge icon.Image2D.Image to Secondary gauges icon Left
Value.Node.Style to Secondary gauges value Left
° to Secondary gauges unit Left
Click Add.
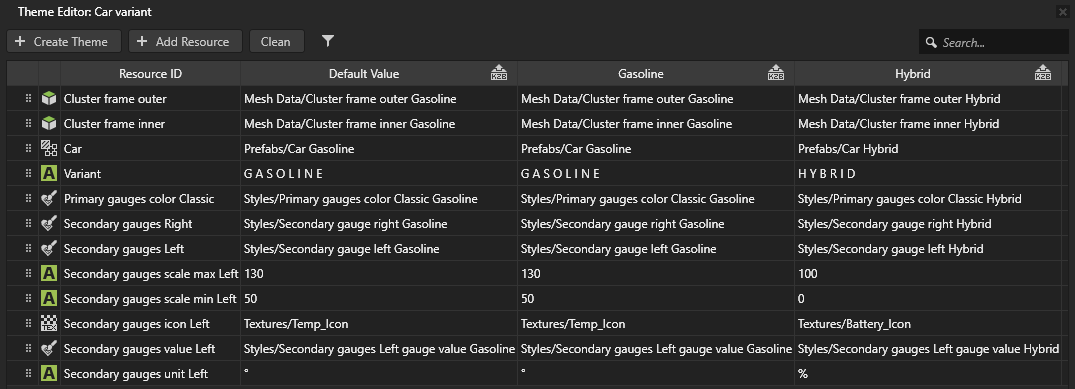
In the Theme Editor for the Car variant theme group set the resource IDs that you added in the previous step:
For the Gasoline theme set:
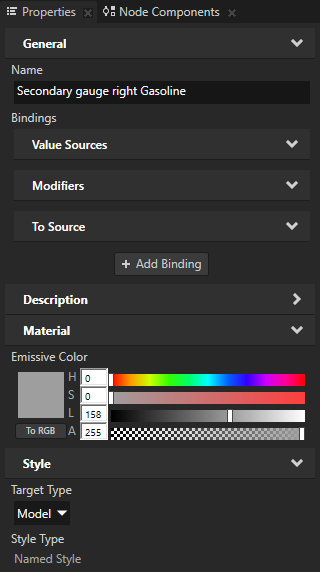
Secondary gauges Right to point to the Secondary gauge right Gasoline style
This style sets the Emissive Color property for the material which the Gauge Model node which defines the right secondary gauge uses.
Secondary gauges Left to point to the Secondary gauge left Gasoline style
This style sets the binding to get the value for the engine temperature gauge from the Temperature property in the RootPage node and sets the Emissive Color property for the material which the Gauge Model node which defines the left secondary gauge uses. The Secondary gauges > Gauges > Scene > Left gauge > Gauge Model node uses the value from the binding to set the position of the gauge bar.
Secondary gauges scale max Left to 130
Secondary gauges scale min Left to 50
Secondary gauges icon Left to the Temp_Icon texture
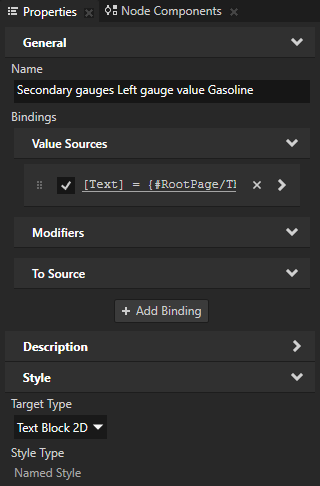
Secondary gauges value Left to the Secondary gauges Left gauge value Gasoline style
This style sets the binding to get the value for the engine temperature gauge from the Temperature property in the RootPage node. The Secondary gauges > Secondary gauges grid > Left gauge info > Value Text Block 2D node shows this value.
Secondary gauges unit Left to °
For the Hybrid theme set:
Secondary gauges Right to point to the Secondary gauge right Hybrid style
Secondary gauges Left to point to the Secondary gauge left Hybrid style
Secondary gauges scale max Left to 100
Secondary gauges scale min Left to 0
Secondary gauges icon Left to the Battery_Icon texture
Secondary gauges value Left to the Secondary gauges Left gauge value Hybrid style
Secondary gauges unit Left to %
Now when you select in the Dictionaries a theme in the Car variant theme group, the Preview shows the resources you defined so far for the two car variants.
Change the Primary gauges Modern prefab
In this section you change the Primary gauges Modern prefab so that you can use the same prefab for both the Gasoline and Hybrid car variant themes.
To change the Primary gauges Modern prefab:
(Optional) In the Dictionaries set the Cluster theme to Modern so that you can see in the Preview the changes you make to the Primary gauges Modern prefab.
In the Primary gauges Modern prefab replace the resources with the resource IDs.
You created and added these resource IDs to the Car variant theme group when you themed the Primary gauges Classic prefab in the first section of this tutorial step.
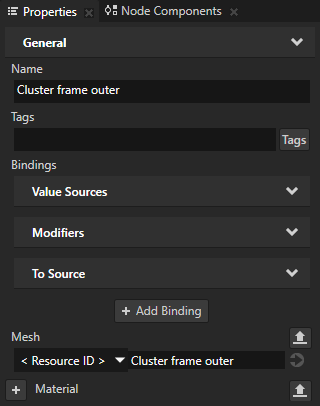
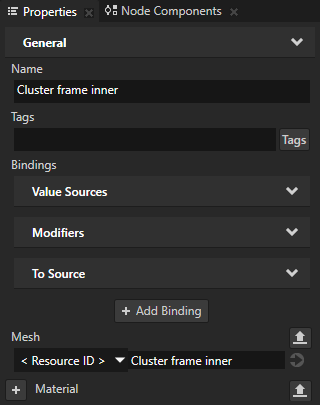
In the Prefabs select Primary gauges Modern > Gauges > Scene > Cluster frame outer and in the Properties set the Mesh property to <ResourceID> and use the Cluster frame outer resource ID.
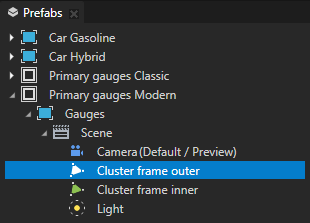
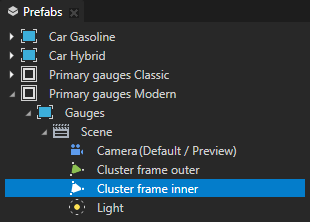
In the Prefabs select Primary gauges Modern > Gauges > Scene > Cluster frame inner and in the Properties set the Mesh property to <ResourceID> and use the Cluster frame inner resource ID.
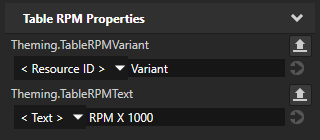
In the Prefabs select Primary gauges Modern > Primary gauges grid Modern > Table RPM and in the Properties add and set the Theming.TableRPMVariant property to <ResourceID> and use the Variant resource ID.
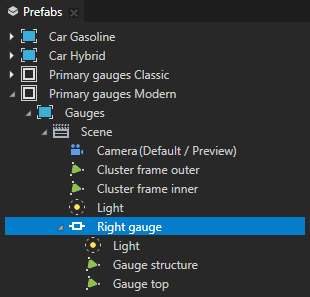
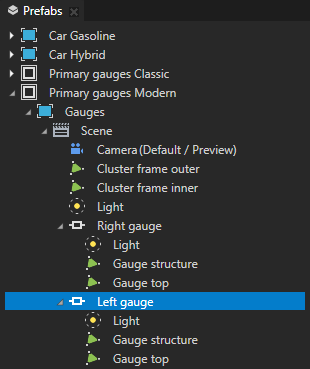
In the Primary gauges Modern > Gauges > Scene > Right gauge and Left gauge nodes replace the Render Transformation property with a style:
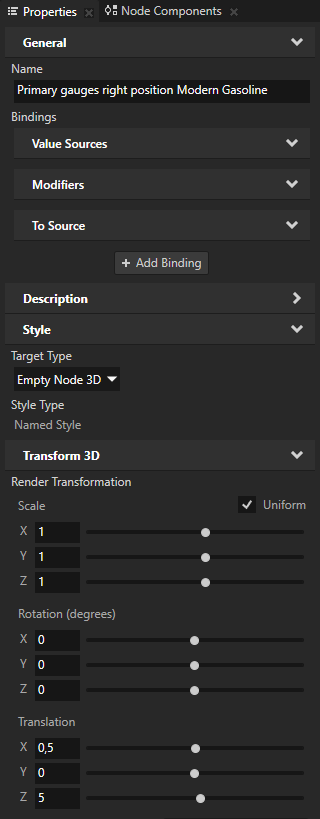
In the Prefabs select the Primary gauges Modern > Gauges > Scene > Right gauge, in the Properties add the Style property, and set it to the Primary gauges right position Modern Gasoline style.
This style sets the value of the Render Transformation property.
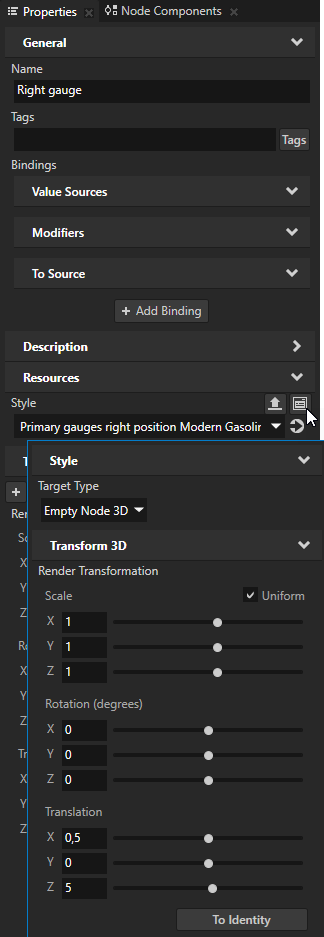
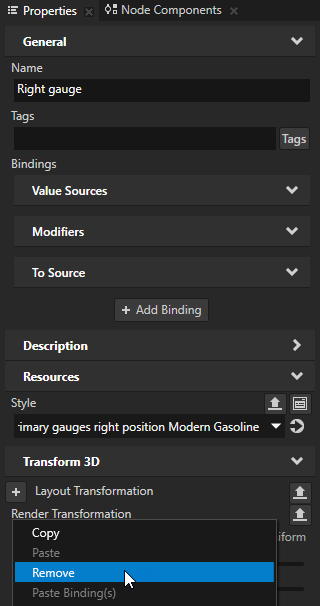
Remove the Render Transformation property form the Right gauge node.
You remove this property because you use the Primary gauges right position Modern Gasoline style to set the value of this property.
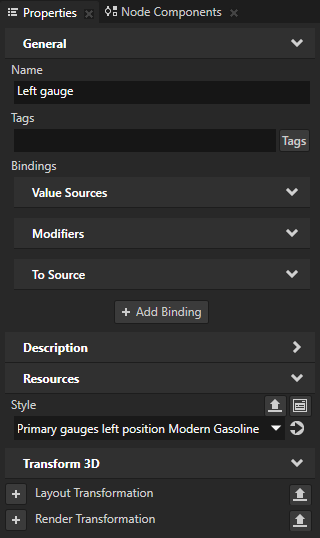
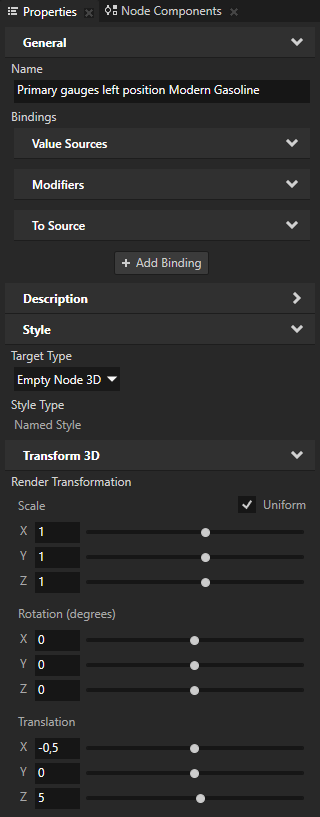
Repeat the previous two steps for the Primary gauges Modern > Gauges > Scene > Left gauge node, but use the Primary gauges left position Modern Gasoline style.
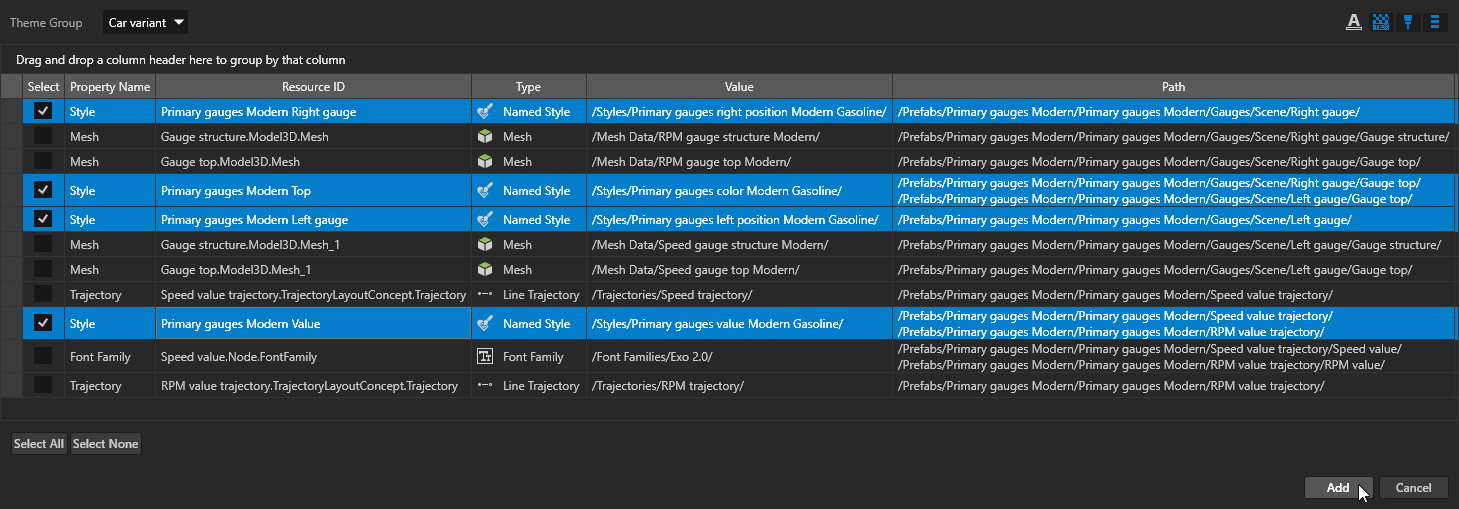
In the Prefabs right-click Primary gauges Modern, select Add Resources to a Theme Group, and in the Add Resources to a Theme Group window:
Set the Theme Group to Car variant.
Select and rename these resource IDs:
Right gauge.Node.Style to Primary gauges Modern Right gauge
Gauge top.Node.Style to Primary gauges Modern Top
Left gauge.Node.Style to Primary gauges Modern Left gauge
Speed value trajectory.Node.Style to Primary gauges Modern Value
Click Add.
In the Theme Editor for the Car variant theme group set the resource IDs that you added in the previous step:
For the Gasoline theme set:
Primary gauges Modern Right gauge to point to the Primary gauges right position Modern Gasoline style
This style sets the position of the right primary gauge using the Render Transformation property.
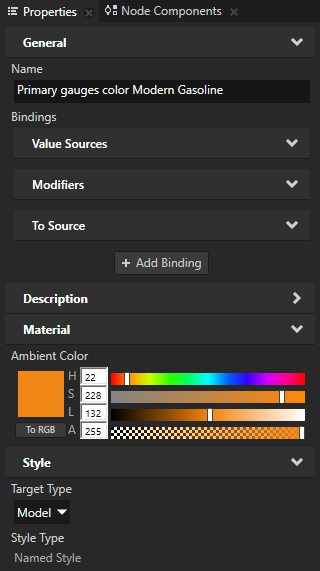
Primary gauges Modern Top to point to the Primary gauges color Modern Gasoline style
This style sets the Ambient Color property for the material which the Gauge top Model nodes which define the top layer of both gauges use.
Primary gauges Modern Left gauge to point to the Primary gauges left position Modern Gasoline style
This style sets the position of the left primary gauge using the Render Transformation property.
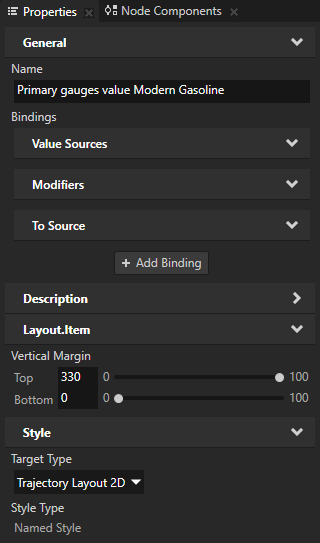
Primary gauges Modern Value to point to the Primary gauges value Modern Gasoline style
This style sets the position of the Speed value trajectory and RPM value trajectory Trajectory Layout nodes using the Vertical Margin property. The primary gauge speed and RPM values move along these Trajectory Layout nodes.
For the Hybrid theme set:
Primary gauges Modern Right gauge to point to the Primary gauges right position Modern Hybrid style
Primary gauges Modern Top to point to the Primary gauges color Modern Hybrid style
Primary gauges Modern Left gauge to point to the Primary gauges left position Modern Hybrid style
Primary gauges Modern Value to point to the Primary gauges value Modern Hybrid style
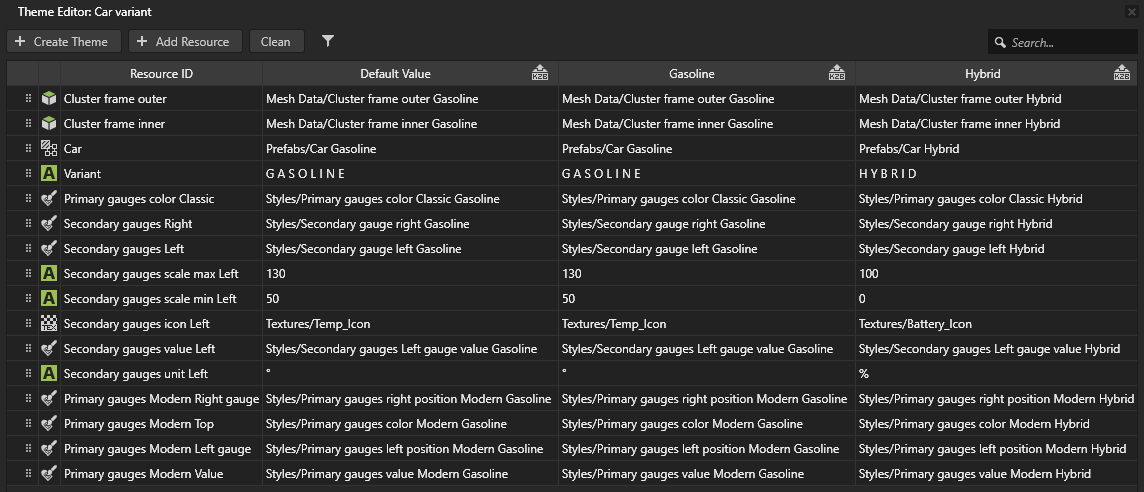
Now when you select in the Dictionaries Modern theme in the Cluster theme theme group and change the theme in the Car variant theme group, the Preview shows the resources for the two car variants in the Modern theme.