Tutorial: Data Sources for Android
In this tutorial you learn how to create a data source for Kanzi applications for Android. You learn how to:
Create a data source using Kanzi Java API.
Use Android APIs to back the data source.
Ensure compatibility with the Kanzi Studio Preview where the Android APIs are not available.
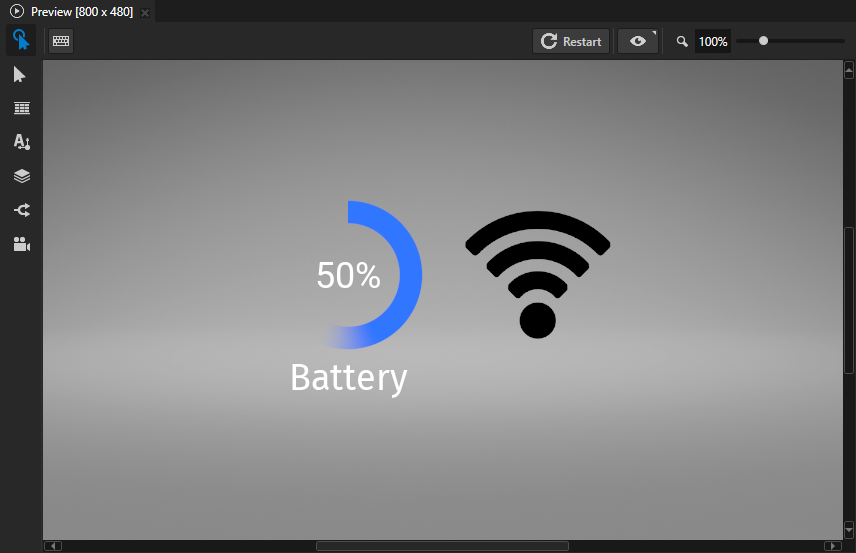
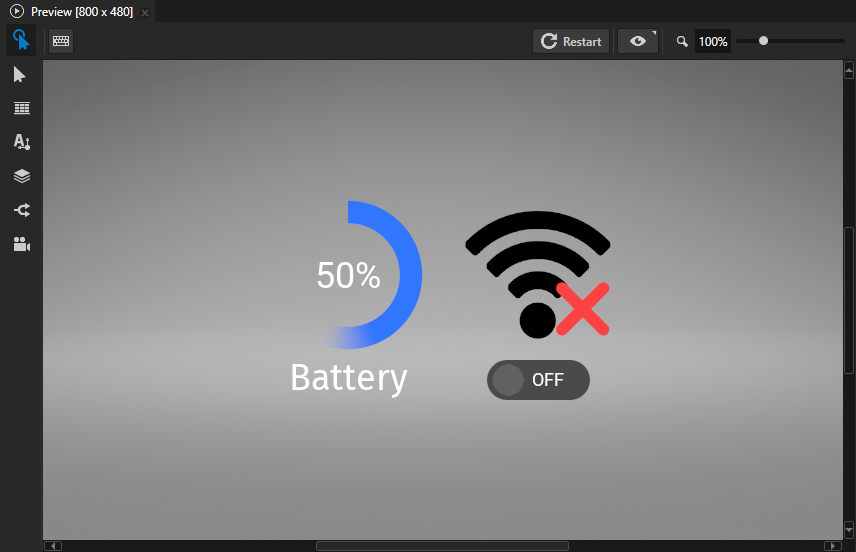
This video shows the result of the tutorial.
This tutorial assumes that you are familiar with developing Android applications, Java programming language, and that you understand the basics of working with Kanzi Studio. The best entry points for getting familiar with Kanzi Studio are:
Before you start this tutorial, make sure that you have your Kanzi development environment for Android set up. For developing application logic with Kanzi Engine for Android, you need:
Android Studio 4.1.3 or newer stable version
You can download and install Android Studio from here.
Android Gradle plugin 4.1.3 or newer
Gradle 6.7.1 or newer
64-bit JDK 8 or 11.
We recommend using JDK 11 that is installed with Android Studio.
Kanzi does not yet support JDK 17 installed by Android Studio Flamingo or newer. In this case, you need to install a JDK yourself. You can check the version of JDK installed with Android Studio in the About window. See Troubleshooting Android application development with Kanzi.
CMake 3.10.2.4988404 from Android Studio or newer
Android API level:
Kanzi Android framework (droidfw) requires Android API level 26 (Android version 8.0.0) or newer.
Kanzi application framework (appfw) requires Android API level 21 (Android version 5.0) or newer.
Java language version:
Kanzi Android framework (droidfw) requires Java 8 (1.8) or higher.
Kanzi application framework (appfw) requires Java 7 (1.7) or higher.
See Requirements for Android application development with Kanzi.
To run the application that you create in this tutorial in an Android virtual device, set the virtual device:
API level to 29 or higher
Internal storage to at least 8 GB
Assets for the tutorial
You can find the completed tutorial in the <KanziWorkspace>/Tutorials/Android data source/Completed directory.
Create a one-way data source
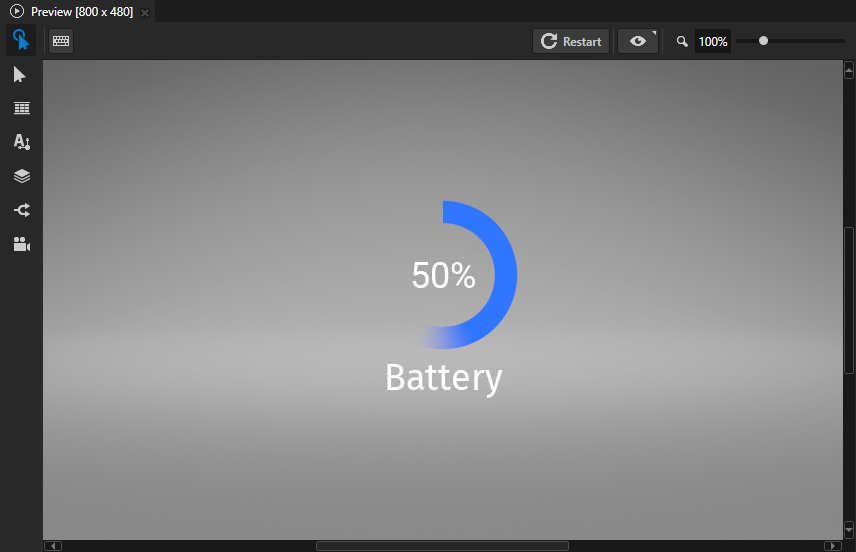
In this section you create a data source that you can read from a Kanzi application. You create a widget that shows the battery level of an Android device.
To create a one-way data source:
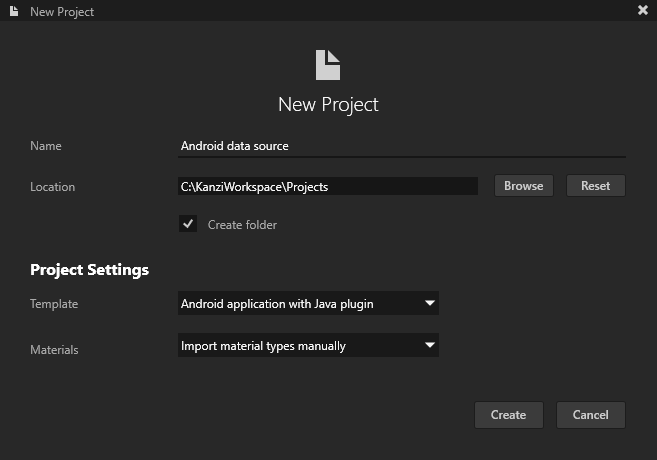
In Kanzi Studio create a project and in the New Project window set:
Name to Android data source
Template to Android application with Java plugin
Use this template to start building a Kanzi Java API data source.
Android application with Java plugin template creates a Kanzi Studio project with a Kanzi Android framework-based application that contains a Kanzi Engine Java plugin.
Use the Kanzi Android framework (droidfw) when you want to create an application for the Android platform, and you intend to use Android APIs and services extensively.
Kanzi Android framework (droidfw) is a framework dedicated for developing Kanzi applications for Android. It exposes the Kanzi Java API, which allows you to write application and plugin code entirely in Java or Kotlin. You do not need to write any C++ or JNI code, but you can still use native Kanzi plugins. Kanzi Android framework (droidfw) provides strong integration with the Android UI, including support for multiple simultaneous Kanzi-based Views and flexible composition of Kanzi and Android UI elements. Kanzi Android framework (droidfw) integrates with the Android Choreographer which runs the Kanzi main loop tasks in the Android UI thread. This enables you to use the Kanzi Java API from your application code without the need for dispatcher mechanisms.
In Android Studio:
Open the
Android data source/Application/configs/platforms/android_gradleproject.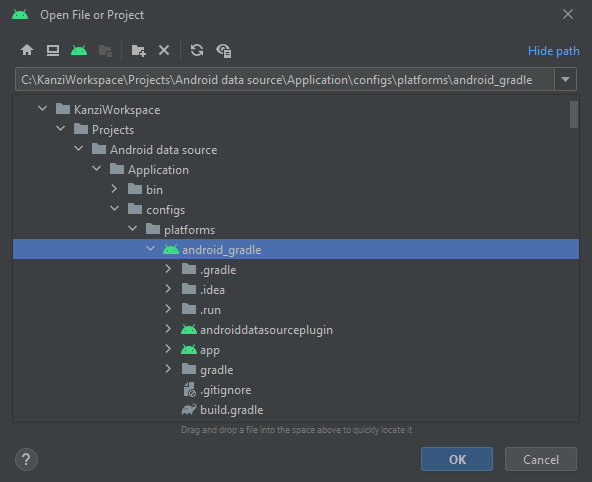
In
androiddatasourceplugin>java>com.example.androiddatasourcepluginin theAndroidDataSourceDataSourceclass:Add a constant that defines the name of the battery level data object.
static String BATTERY_LEVEL = "BatteryLevel";
In the
initialize()method, replace the existing data source setuproot.addChild(DataObjectInt.create(domain, "Integer value", 1).get()); root.addChild(DataObjectString.create(domain, "String value", "dummy value").get()); root.addChild(DataObjectReal.create(domain, "Real value", 0.5).get());
with
root.addChild(DataObjectReal.create(domain, BATTERY_LEVEL, 0.5f).get());
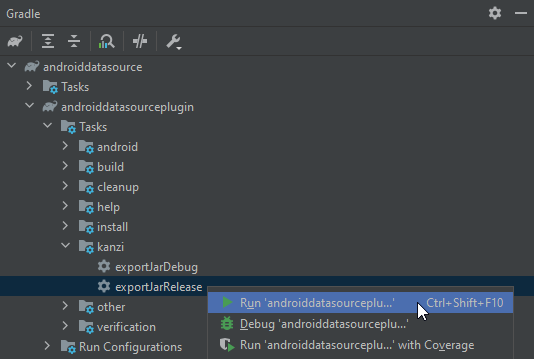
In the Gradle tool window in androiddatasource > androiddatasourceplugin > Tasks > kanzi right-click either exportJarDebug or exportJarRelease and select Run.
Android Studio builds the Kanzi Engine data source plugin JAR that you use in Kanzi Studio.
In Kanzi Studio create the content to show the value of the data source that you defined in Android Studio.
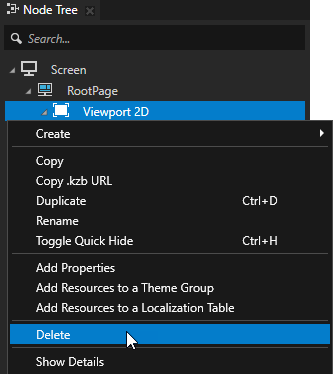
In the Node Tree delete the Viewport 2D node.
You can delete the Viewport 2D node because you do not create any 3D content in this tutorial.
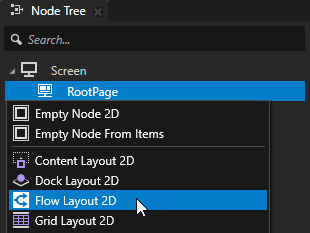
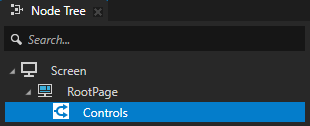
In the Rootpage create a Flow Layout 2D node and name it Controls.
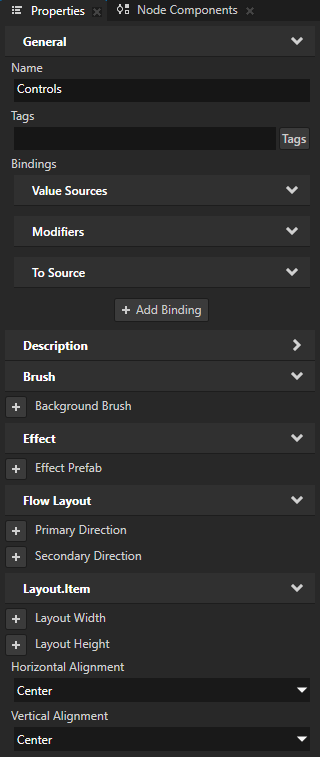
In the Properties add and set the Horizontal Alignment and Vertical Alignment properties to Center.
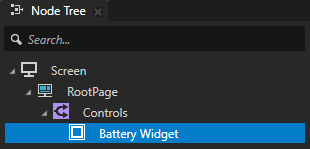
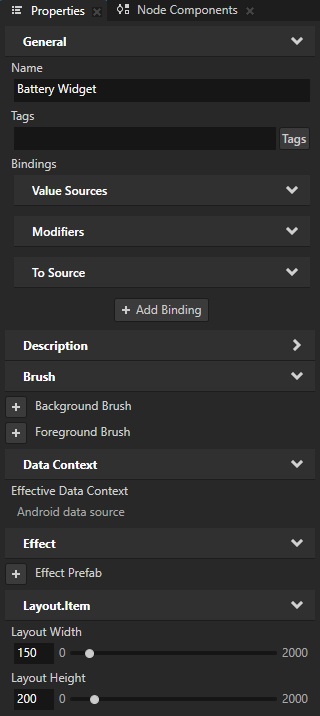
In the Node Tree in the Controls node create an Empty Node 2D node, name it Battery Widget, and in the Properties add and set:
Layout Width to 150
Layout Height to 200
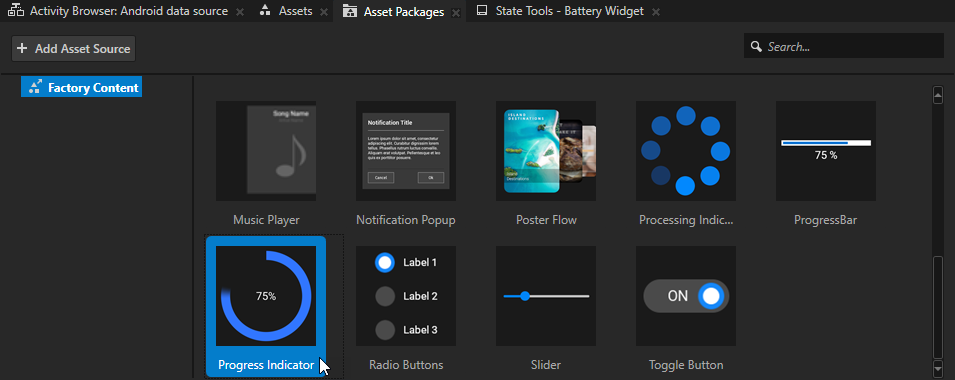
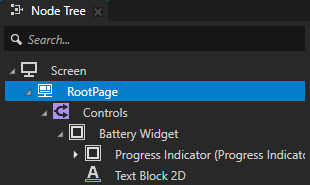
From the Asset Packages > Factory Content drag the Progress Indicator to the Battery Widget node in the Node Tree.
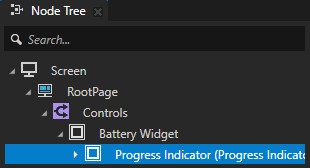
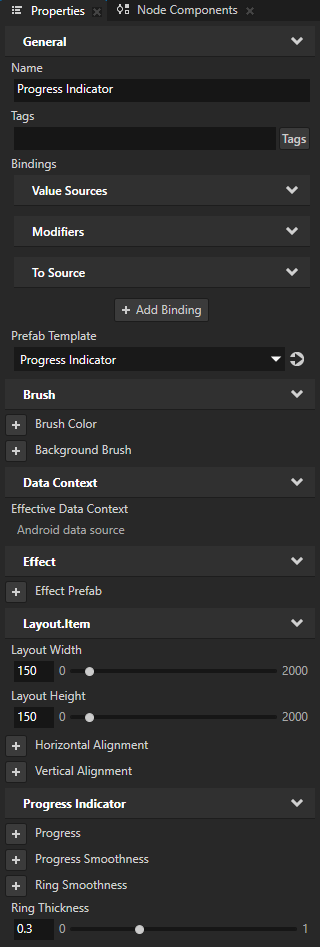
In the Node Tree select the Progress Indicator prefab placeholder, and in the Properties add and set:
Layout Width to 150
Layout Height to 150
Ring Thickness to 0.3
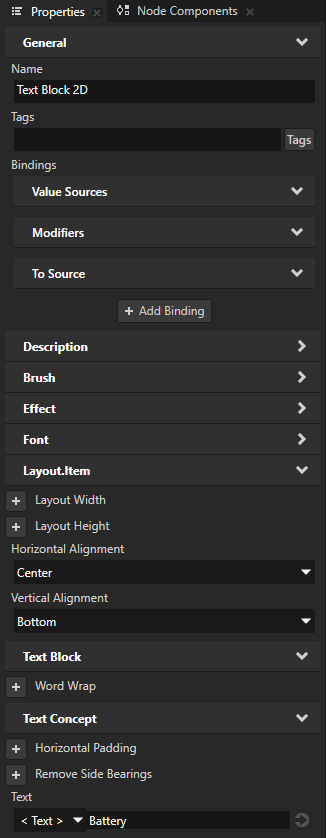
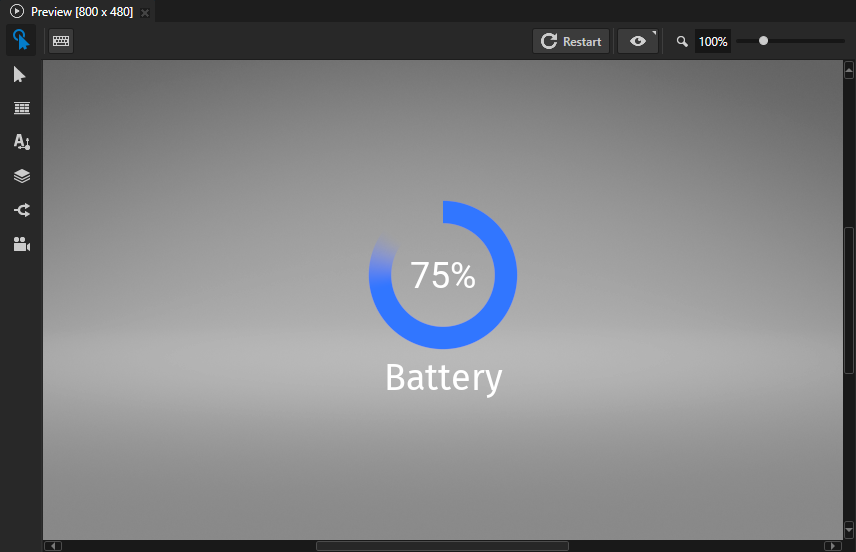
In the Node Tree in the Battery Widget node create a Text Block 2D node, and in the Properties add and set:
Horizontal Alignment to Center
Vertical Alignment to Bottom
Text to Battery

In Kanzi Studio create a data source and take it into use:
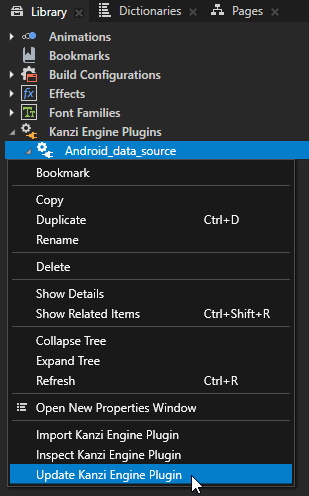
In the Library > Kanzi Engine Plugins right-click the Android_data_source plugin and select Update Kanzi Engine Plugin.
This way you update the load the plugin that includes the changes that you made in the Android Studio plugin project.
To take the plugin changes into use, restart the Preview.

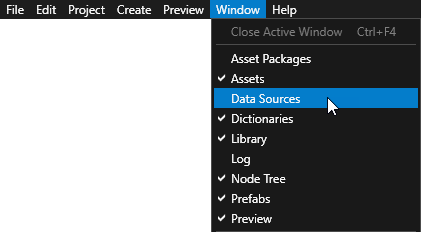
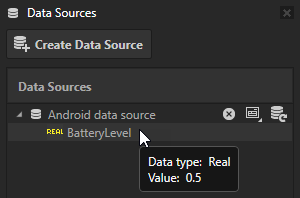
In the Window main menu select Data Sources.
Use the Data Sources window to create, set, and delete the data sources in your project, and to connect data objects from a data source to nodes and resources in your project.
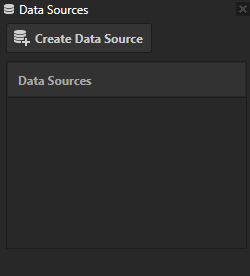
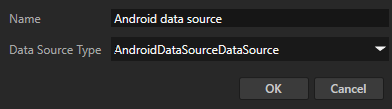
In the Data Sources window click Create Data Source and create a data source with these settings:
Name to Android data source
Data Source Type to AndroidDataSourceDataSource
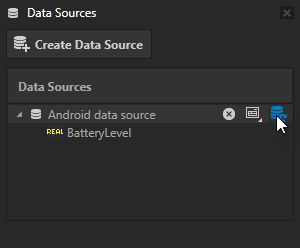
In the Data Sources window you can see the BatteryLevel data object that you defined in Android Studio.
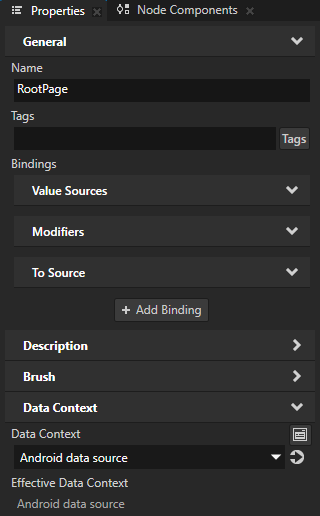
In the Node Tree select the RootPage node, in the Properties add the Data Context > Data Context property, and set it to Android data source.
By setting the Data Context property you tell your application from which data source it receives data. When you set the Data Context property for a node, all its child nodes inherit the value of the Data Context property. If you want to use a different data context for one of the child nodes, add the Data Context property to that node and set it to the data context you want to use.
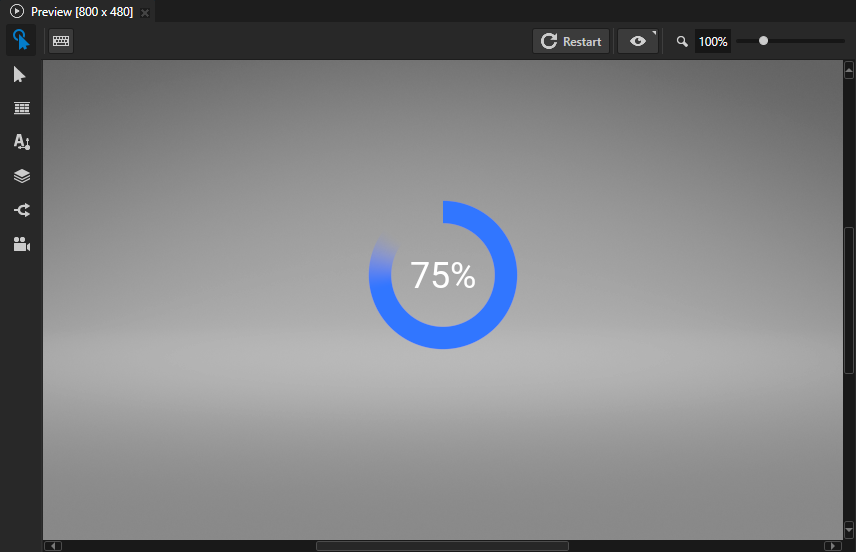
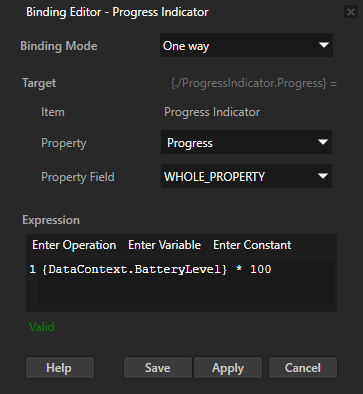
In the Node Tree select the Progress Indicator node, in the Properties click + Add Binding, and in the Binding Editor set:
Property to Progress
Expression to
{DataContext.BatteryLevel} * 100Click Save.
In Kanzi Studio select File > Export > Export KZB.

Update the data source to get the battery level from the Android system APIs.
A data source that uses the Android API causes the Kanzi Studio Preview to terminate on Windows because the Android APIs are unavailable. The approach in this tutorial shows how you can use the Android APIs on Android and still allow the data source to return placeholder data when you use the plugin in the Kanzi Studio Preview.
In Android Studio, create an interface named
DataProvider.package com.example.androiddatasourceplugin; interface DataProvider { float getBatteryLevel(); }
To create a placeholder implementation of the interface to use on non-Android platforms, create a class named
DummyDataProvider.package com.example.androiddatasourceplugin; class DummyDataProvider implements DataProvider { @Override public float getBatteryLevel() { return 0.5f; } }
To create an Android implementation of the interface that the application uses when it is running on an Android device, create a class named
AndroidDataProvider.package com.example.androiddatasourceplugin; import android.content.Context; import android.os.BatteryManager; class AndroidDataProvider implements DataProvider { private final BatteryManager mBatteryManager; public AndroidDataProvider(Object context) { Context androidContext = (Context) context; mBatteryManager = (BatteryManager) androidContext.getSystemService(Context.BATTERY_SERVICE); } @Override public float getBatteryLevel() { int batLevel = mBatteryManager.getIntProperty(BatteryManager.BATTERY_PROPERTY_CAPACITY); return ((float) batLevel) / 100.0f; } }
Update the
AndroidDataSourceDataSourceto use the new providers.Import the Kanzi classes that provide the functionality for the content that you want create.
import com.rightware.kanzi.Platform;
Add a data member for the data provider:
private DataProvider mDataProvider;
In the
initialize()method immediately aftersuper.initialize();add this code to select the data provider:// Construct the proper DataProvider for the current platform. if (Platform.isAndroid()) { mDataProvider = new AndroidDataProvider(getDomain().getPlatformContext()); } else { mDataProvider = new DummyDataProvider(); }
Update the definition of the battery level data object to retrieve the value from the interface:
root.addChild(DataObjectReal.create(domain, BATTERY_LEVEL, mDataProvider.getBatteryLevel()).get());
In Android Studio, build and run the app.
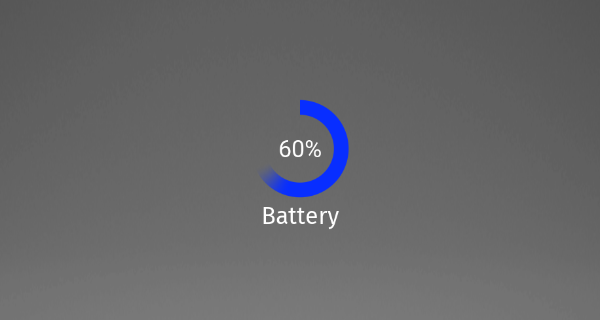
When you run the application on an Android device, the battery widget shows the current battery level of that device.
Create a two-way data source
In this section you create a widget that you can use to control the Wi-Fi connectivity state off an Android device.
To create a two-way data source:
In Android Studio update the data source to include the Wi-Fi related information:
In the
DataProviderinterface add:boolean isWifiEnabled(); boolean isNetworkConnected(); void setWifiEnabled(boolean enabled);
In the
DummyDataProviderclass add:private boolean mWifiEnabled = false; @Override public boolean isWifiEnabled() { return mWifiEnabled; } @Override public boolean isNetworkConnected() { return mWifiEnabled; } @Override public void setWifiEnabled(boolean enabled) { mWifiEnabled = enabled; }
In the
AndroidDataProviderclass:Import the Android classes that provide the functionality for the content that you want create.
import android.net.ConnectivityManager;
import android.net.wifi.WifiManager;
import android.net.NetworkCapabilities;
Add these members:
private final ConnectivityManager mConnectivityManager;
private final WifiManager mWifiManager;
Change these constructors:
mConnectivityManager =
    (ConnectivityManager) androidContext.getSystemService(Context.CONNECTIVITY_SERVICE);
mWifiManager = (WifiManager) androidContext.getSystemService(Context.WIFI_SERVICE);
Add these methods:
@Override
public void setWifiEnabled(boolean enabled)
{
    mWifiManager.setWifiEnabled(enabled);
}

@Override
public boolean isWifiEnabled()
{
    return mWifiManager.isWifiEnabled();
}

@Override
public boolean isNetworkConnected()
{
    NetworkCapabilities capabilities =
    mConnectivityManager.getNetworkCapabilities(mConnectivityManager.getActiveNetwork());
    if (capabilities == null)
        return false;
    return capabilities.hasTransport(NetworkCapabilities.TRANSPORT_WIFI);
}
In the
AndroidDataSourceDataSourceclass:Import the Kanzi classes that provide the functionality for the content that you want create.
import com.rightware.kanzi.DataObjectBool;
Add these members:
static String NETWORK_CONNECTED = "NetworkConnected";
static String WIFI_ENABLED = "WifiEnabled";
In the
initialize()function update the data source:root.addChild( DataObjectBool.create(domain, NETWORK_CONNECTED, mDataProvider.isNetworkConnected()).get()); ObjectRef<DataObjectBool> enabledRef = DataObjectBool.create(domain, WIFI_ENABLED, mDataProvider.isWifiEnabled()); root.addChild(enabledRef.get()); // Register a Notification handler to update Wi-Fi state when Data Source changes. DataObjectBool wifiEnabled = enabledRef.get(); wifiEnabled.addModifiedNotificationHandler(new ModifiedSubscriptionFunction() { @Override public void handle() { mDataProvider.setWifiEnabled(wifiEnabled.getValue()); } });
In the androiddatasourceplugin >
manifests>AndroidManifest.xmland app >manifests>AndroidManifest.xmlfiles add these permissions:<uses-permission android:name="android.permission.ACCESS_WIFI_STATE"/> <uses-permission android:name="android.permission.CHANGE_WIFI_STATE"/> <uses-permission android:name="android.permission.ACCESS_NETWORK_STATE" />
In the Gradle tool window in androiddatasource > androiddatasourceplugin > Tasks > kanzi right-click either exportJarDebug or exportJarRelease and select Run.
Android Studio builds the Kanzi Engine data source plugin JAR that you use in Kanzi Studio.
In Kanzi Studio update the plugin:
In the Library > Kanzi Engine Plugins right-click the AndroidDataSource plugin and select Update Kanzi Engine Plugin.
This way you update and load the plugin that includes the changes that you made in the Android Studio plugin project.
To take the plugin changes into use, restart the Preview.
In Kanzi Studio in the Data Sources window click the Refresh button to read the updated data source contents from the plugin.

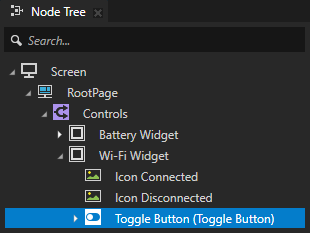
In Kanzi Studio create the user interface for the Wi-Fi widget:
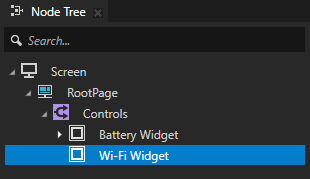
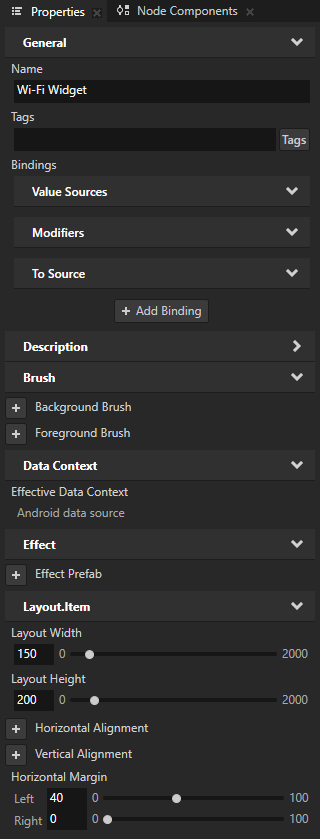
In the Node Tree press Alt and right-click Controls node, create an Empty Node 2D node, name it Wi-Fi Widget, and in the Properties add and set:
Layout Width to 150
Layout Height to 200
Layout.Item > Horizontal Margin property Left property field to 40
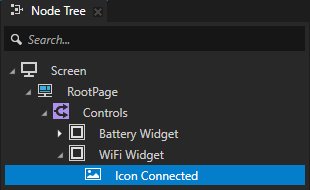
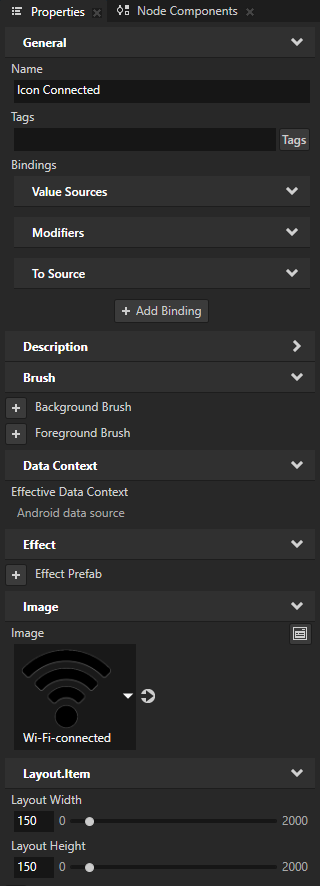
In the Node Tree press Alt and right-click Wi-Fi Widget node, create an Image node, name it Icon Connected, in the Properties add and set:
Image to + Import Image... and select
<KanziWorkspace>/Tutorials/Android data source/Assets/Wi-Fi-connected.pngLayout Width to 150
Layout Height to 150
In the Properties add a binding and set:
Property to Visible
Expression to
BOOL({DataContext.NetworkConnected})
Click Save.
With this binding you make the Icon Connected image visible when the value of the NetworkConnected data object is
true.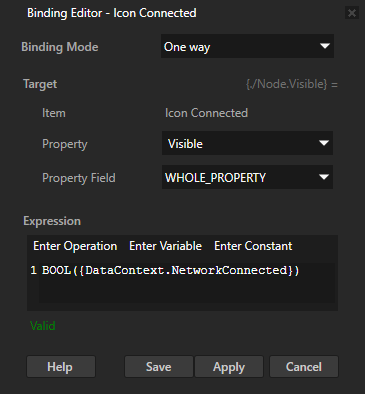
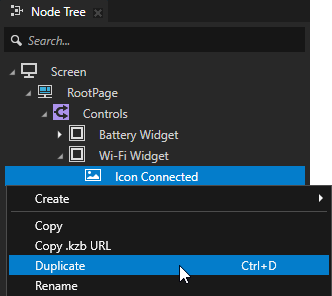
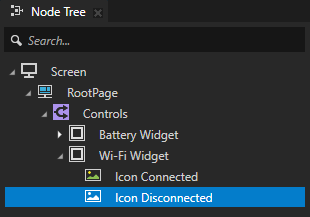
In the Node Tree duplicate the Icon Connected node and rename it to Icon Disconnected.
In the Node Tree select the Icon Disconnected node and in the Properties:
Click the binding and in the Binding Editor add
!to the beginning of the binding expression.Click Save.
With this binding you make the Icon Disconnected image visible when the value of the NetworkConnected data object is
false.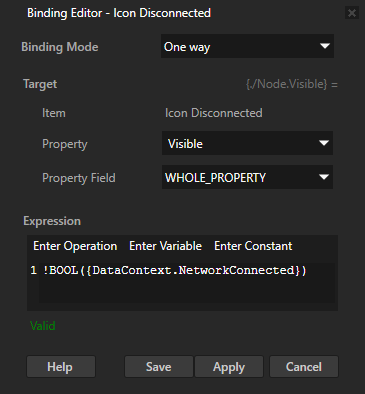
Set the Image property to + Import Image... and select
<KanziWorkspace>/Tutorials/Android data source/Assets/Wi-Fi-disconnected.png.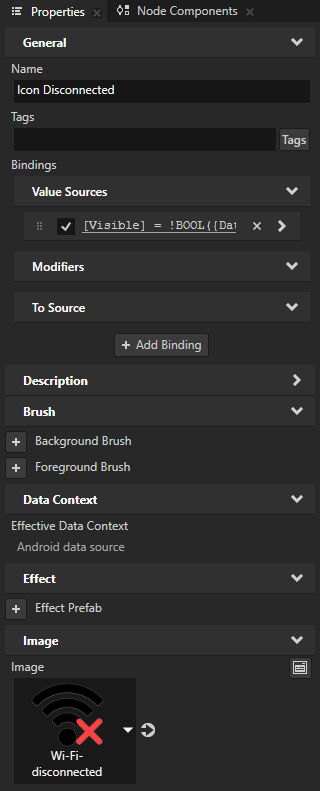
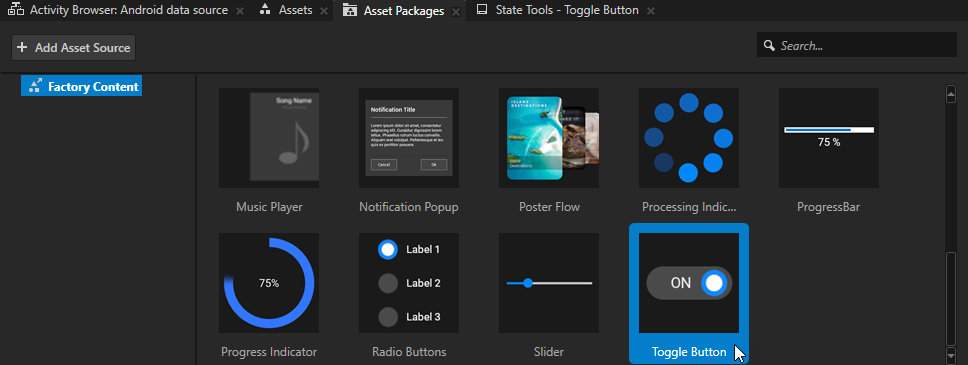
From the Asset Packages > Factory Content drag the Toggle Button to the Node Tree and drop it on the Wi-Fi Widget.
You use this toggle button to control the Wi-Fi connectivity.
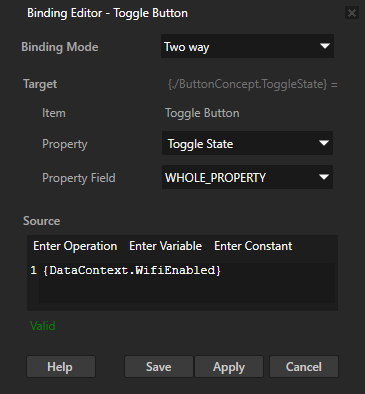
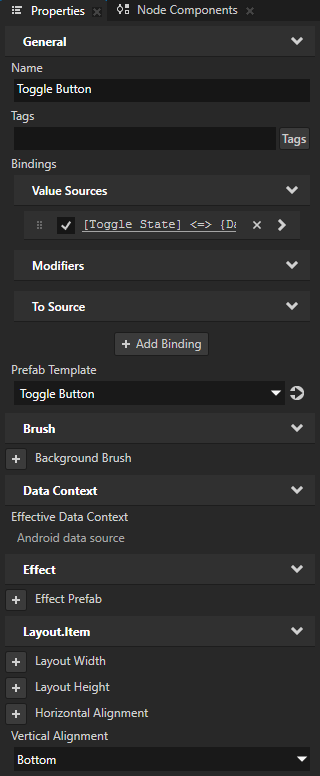
In the Node Tree select the Toggle Button node and in the Properties:
Create a binding and set:
Binding Mode to Two way
Property to Toggle State
Expression to
{DataContext.WifiEnabled}
Click Save.
With this binding you create a two-way connection between the toggle state of the Toggle Button node and the WifiEnabled data object.
Add the Vertical Alignment property and set it to Bottom
In Kanzi Studio select File > Export > Export KZB.
In Android Studio, build, and run the app.
When you run the application on an Android device, the Wi-Fi widget shows the icon that indicates the Wi-Fi connectivity status of that device.
Update data sources based on external changes
In the previous section you added the functionality to read constant data from an Android device at application startup. In this section you set the data source to respond to Android callbacks and update the data source when the Wi-Fi or battery level changes.
To update data sources based on external changes:
Create an interface named
DataChangeListener.This interface accepts data changes when they occur.
package com.example.androiddatasourceplugin;

interface DataChangeListener {
    void updateBatteryLevel(float batteryLevel);
    void updateNetworkConnection(boolean isConnected);
    void updateWifiEnabled(boolean isEnabled);
}
Modify the
AndroidDataProviderclass to receive the updated data from Android.Import the Android classes that provide the functionality for the content that you want create.
import android.content.BroadcastReceiver;
import android.net.Network;
import android.content.Intent;
import android.content.IntentFilter;
Add a member that holds a reference to a
DataChangeListener.private final DataChangeListener mDataChangeListener;
Modify the
AndroidDataProviderconstructor to receive and store theDataChangeListener.public AndroidDataProvider(Object context, DataChangeListener listener) { mDataChangeListener = listener;
Add listener callbacks for the Wi-Fi state and battery level:
// Battery level listener
private final BroadcastReceiver mBatteryReceiver = new BroadcastReceiver() {
    @Override
    public void onReceive(Context context, Intent intent)
    {
        int level = intent.getIntExtra(BatteryManager.EXTRA_LEVEL, -1);
        int scale = intent.getIntExtra(BatteryManager.EXTRA_SCALE, -1);
        float batteryLevel = level / (float) scale;

        mDataChangeListener.updateBatteryLevel(batteryLevel);
    }
};

// Wi-Fi state listener that indicates whether Wi-Fi is enabled.
private final BroadcastReceiver mWifiStateReceiver = new BroadcastReceiver() {
    @Override
    public void onReceive(Context context, Intent intent)
    {
        int wifiStateExtra =
            intent.getIntExtra(WifiManager.EXTRA_WIFI_STATE, WifiManager.WIFI_STATE_UNKNOWN);
        switch (wifiStateExtra)
        {
            case WifiManager.WIFI_STATE_ENABLED:
                mDataChangeListener.updateWifiEnabled(true);
                break;
            case WifiManager.WIFI_STATE_DISABLED:
                mDataChangeListener.updateWifiEnabled(false);
                break;
        }
    }
};

// Network state listener that indicates whether Internet connection is available.
private final ConnectivityManager.NetworkCallback mNetworkCallback =
    new ConnectivityManager.NetworkCallback() {
        @Override
        public void onAvailable(Network network)
        {
            super.onAvailable(network);
            NetworkCapabilities capabilities = mConnectivityManager.getNetworkCapabilities(network);
            if (capabilities != null)
            {
               mDataChangeListener.updateNetworkConnection(capabilities.hasTransport(NetworkCapabilities.TRANSPORT_WIFI));
            }
        }

        @Override
        public void onLost(Network network)
        {
            super.onLost(network);
            mDataChangeListener.updateNetworkConnection(false);
        }
    };
To register the callbacks with Android, add this code to the
AndroidDataProviderconstructor:// To get the Wi-Fi connectivity state changes, register the Wi-Fi state receiver. IntentFilter intentFilter = new IntentFilter(WifiManager.WIFI_STATE_CHANGED_ACTION); androidContext.registerReceiver(mWifiStateReceiver, intentFilter); // Listen to the connectivity state changes. mConnectivityManager.registerDefaultNetworkCallback(mNetworkCallback);
Modify
AndroidDataSourceDataSourceclass to handle data updates:Change the class to implement the
DataChangeListenerinterface.public class AndroidDataSourceDataSource extends DataSource implements DataChangeListener {
Add an implementation of the
DataChangeListenerinterface.private boolean mUpdateInProgress = false; @Override public void updateBatteryLevel(float batteryLevel) { DataObjectReal batteryObject = (DataObjectReal) mRoot.get().lookupDataContext(BATTERY_LEVEL); if (batteryObject != null) { mUpdateInProgress = true; batteryObject.setValue(batteryLevel); mUpdateInProgress = false; } } @Override public void updateNetworkConnection(boolean isConnected) { DataObjectBool networkConnected = (DataObjectBool) mRoot.get().lookupDataContext(NETWORK_CONNECTED); if (networkConnected != null) { mUpdateInProgress = true; networkConnected.setValue(isConnected); mUpdateInProgress = false; } } @Override public void updateWifiEnabled(boolean isEnabled) { DataObjectBool wifiEnabled = (DataObjectBool) mRoot.get().lookupDataContext(WIFI_ENABLED); if (wifiEnabled != null) { mUpdateInProgress = true; wifiEnabled.setValue(isEnabled); mUpdateInProgress = false; } }
In the
initialize()method, addthisas an argument to theAndroidDataProviderconstructor.mDataProvider = new AndroidDataProvider(getDomain().getPlatformContext(), this);
In the
initialize()method, modify the existing notification handler to add themUpdateInProgressvariable to prevent recursive updates.wifiEnabled.addModifiedNotificationHandler(new ModifiedSubscriptionFunction() { @Override public void handle() { if (!mUpdateInProgress) { mDataProvider.setWifiEnabled(wifiEnabled.getValue()); } } });
In Android Studio, build, and run the app.
When you run the application on an Android device, the Wi-Fi widget updates when the network connection state changes. To test this, enable and disable network connections through the device user interface, or use the toggle button in the Wi-Fi widget.
What's next?
In this tutorial you learned how to:
Create a data source using Kanzi Java API.
Use Android APIs to back the data source.
Ensure compatibility with the Kanzi Studio Preview where the Android APIs are not available.
To learn more about how to use Kanzi Android framework (droidfw) and Java API see:
See also
To learn more about developing Kanzi applications for Android, see Developing Kanzi applications for Android.
To learn more about using Java Kanzi Engine API, see Using Java and Kotlin.