Tutorial: Getting started with Kanzi Android framework (droidfw)
In this tutorial you learn how to start developing Android applications using Kanzi Android framework (droidfw). You learn how to:
Show a Kanzi prefab in an Android view
Access and modify application using Kanzi Java API
Create an Android activity and show Kanzi content in that activity
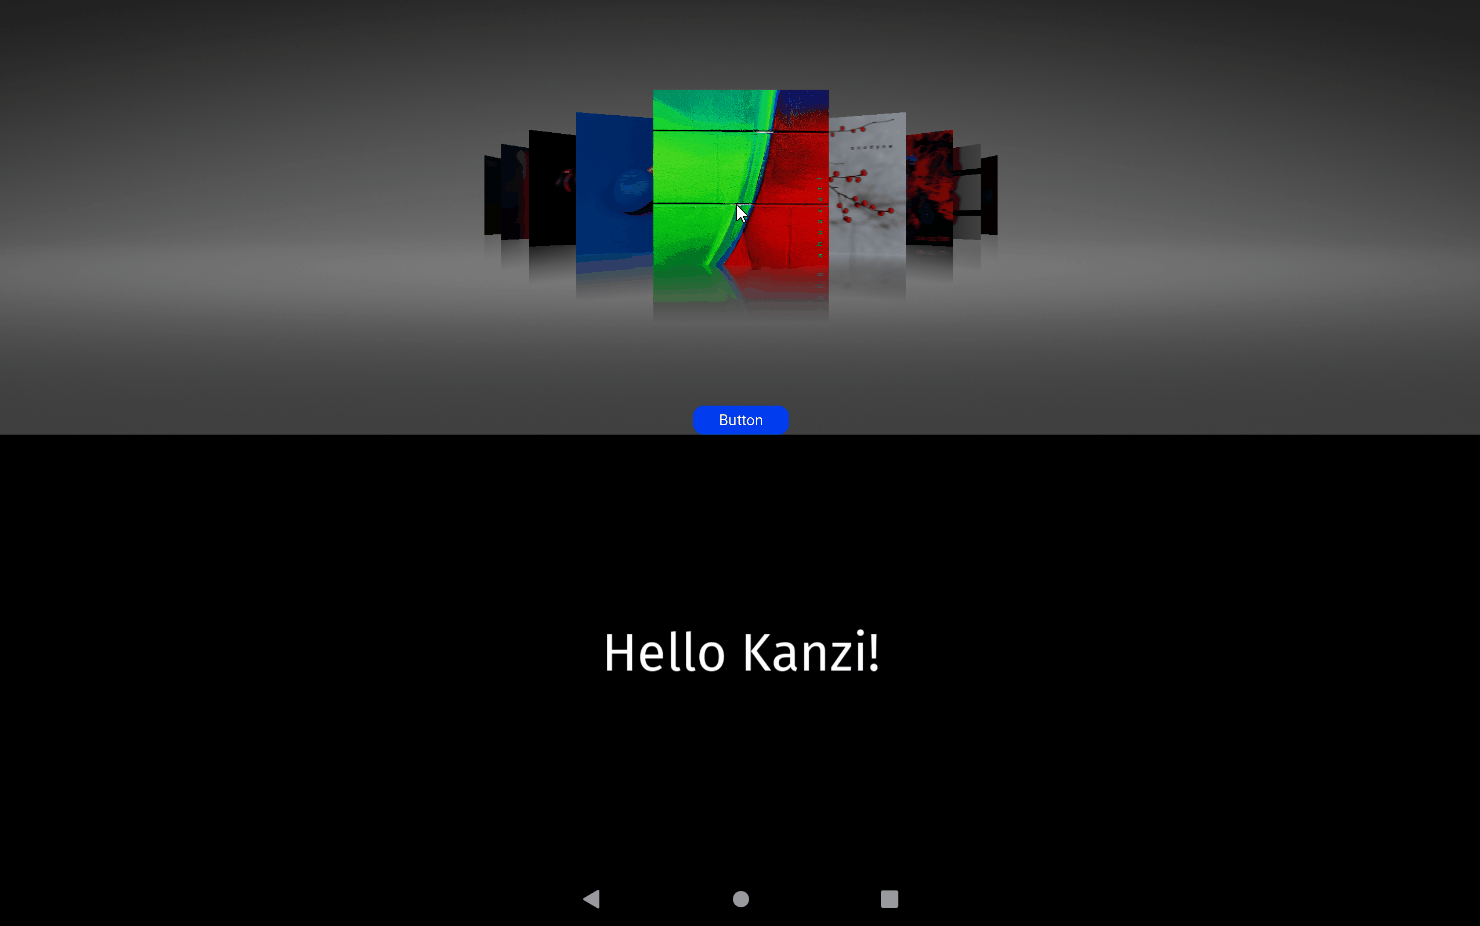
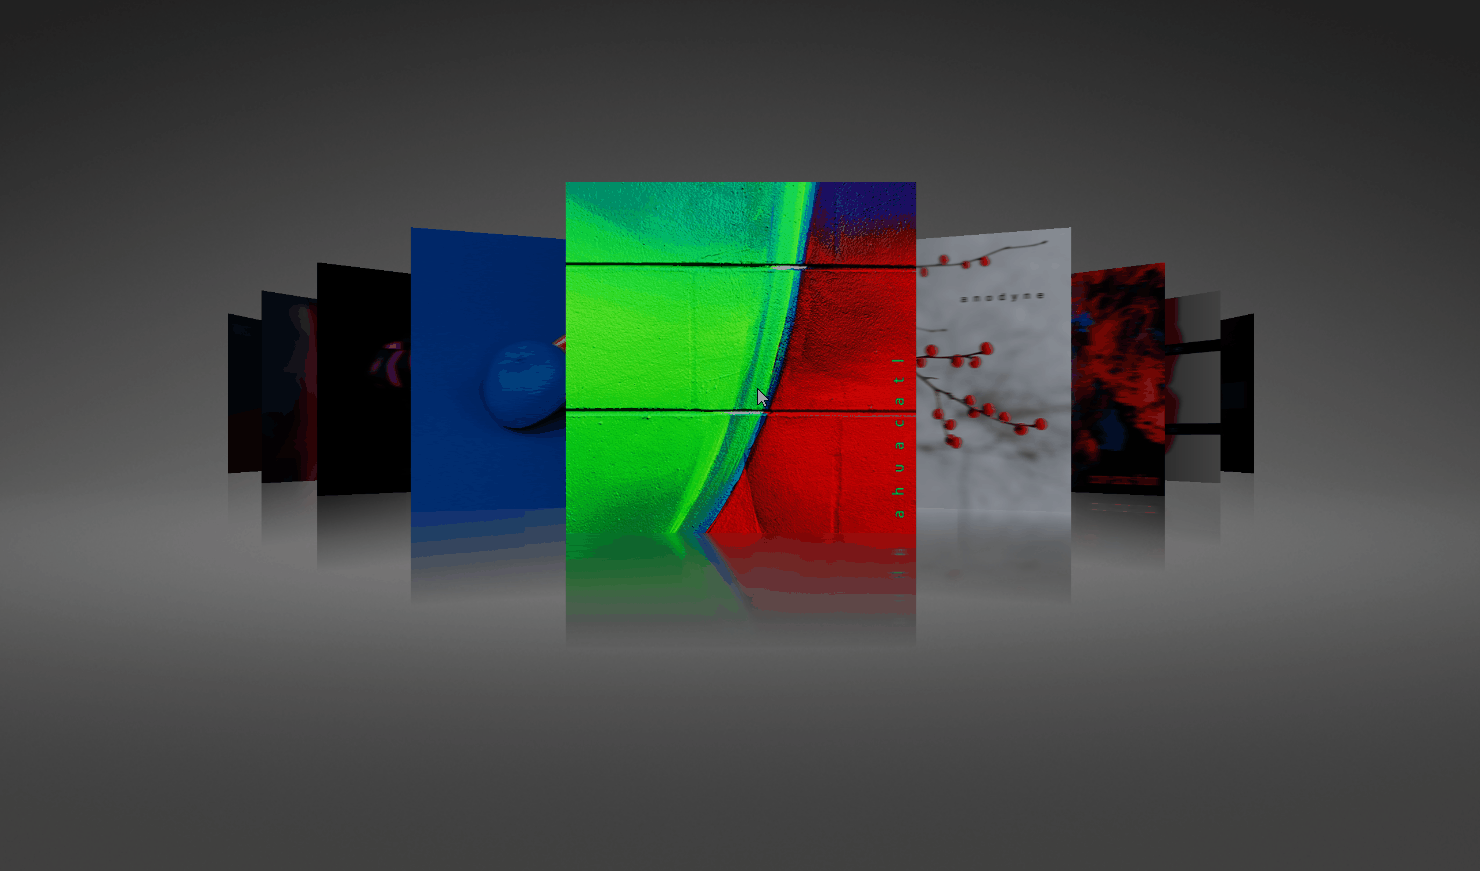
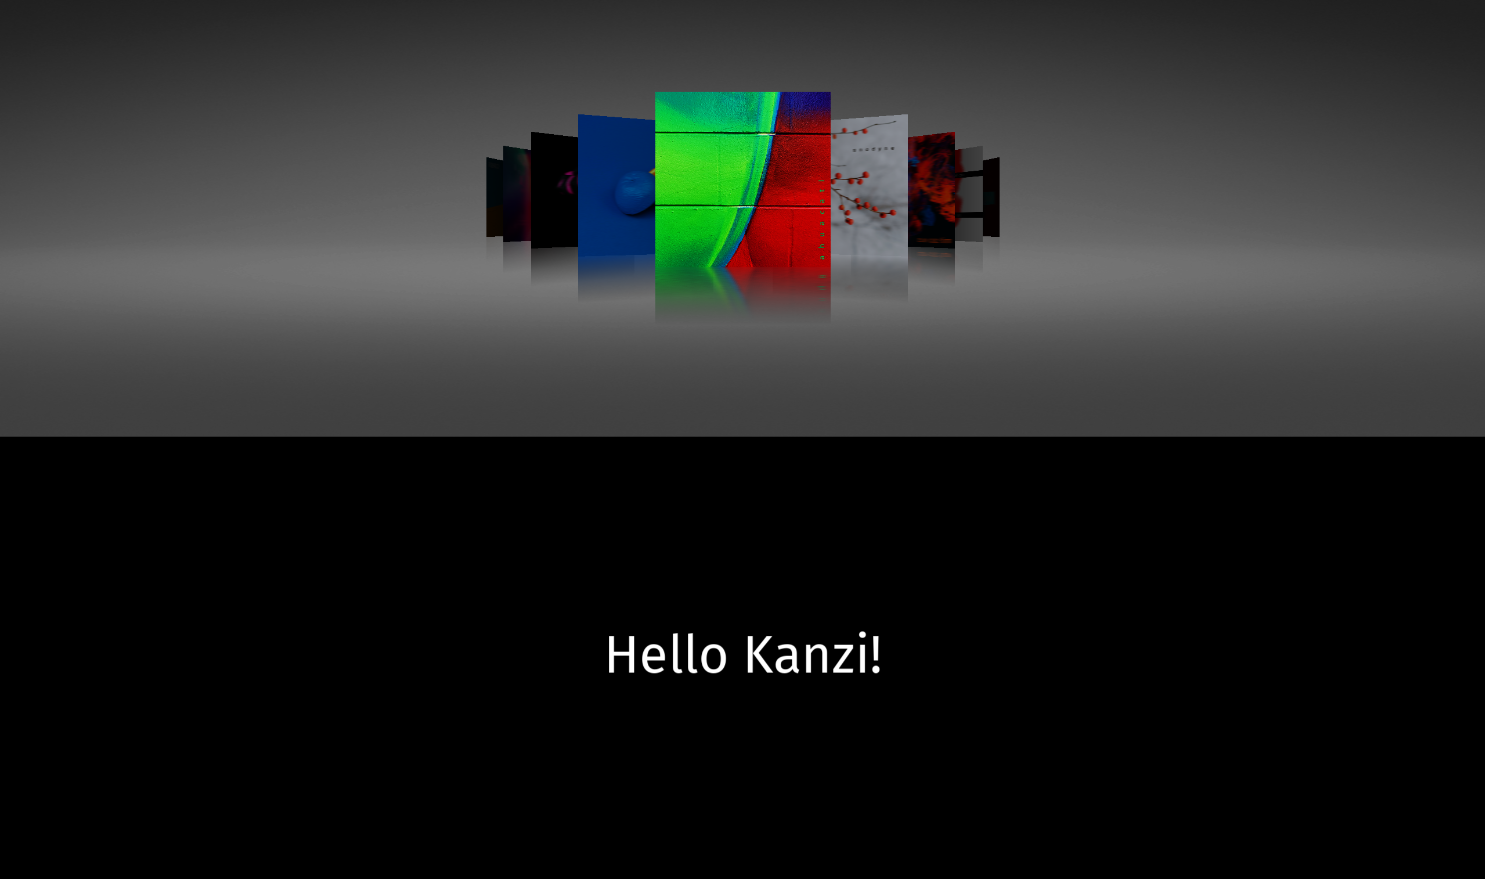
This video shows the result of the tutorial.
This tutorial assumes that you are familiar with developing Android applications, Java programming language, and that you understand the basics of working with Kanzi Studio. The best entry point for getting familiar with Kanzi Studio is the Tutorial: Getting started with Kanzi Studio.
Before you start this tutorial, make sure that you have your Kanzi development environment for Android set up. For developing application logic with Kanzi Engine for Android, you need:
Android Studio 4.1.3 or newer stable version
You can download and install Android Studio from here.
Android Gradle plugin 4.1.3 or newer
Gradle 6.7.1 or newer
64-bit JDK 8 or 11.
We recommend using JDK 11 that is installed with Android Studio.
Kanzi does not yet support JDK 17 installed by Android Studio Flamingo or newer. In this case, you need to install a JDK yourself. You can check the version of JDK installed with Android Studio in the About window. See Troubleshooting Android application development with Kanzi.
CMake 3.10.2.4988404 from Android Studio or newer
Android API level:
Kanzi Android framework (droidfw) requires Android API level 26 (Android version 8.0.0) or newer.
Kanzi application framework (appfw) requires Android API level 21 (Android version 5.0) or newer.
Java language version:
Kanzi Android framework (droidfw) requires Java 8 (1.8) or higher.
Kanzi application framework (appfw) requires Java 7 (1.7) or higher.
See Requirements for Android application development with Kanzi.
Assets for the tutorial
You can find the completed application of this tutorial in the <KanziWorkspace>/Tutorials/Android Getting Started/Completed directory.
Show a Kanzi prefab in an Android view
In this section you create an application in Kanzi Studio, create content in Kanzi Studio, and show that content in an Android view.
To show a Kanzi prefab in an Android view:
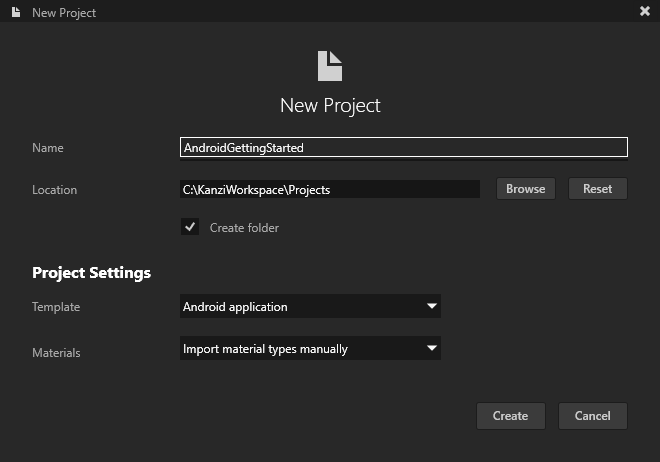
In Kanzi Studio create a project and in the New Project window set:
Name to AndroidGettingStarted
Template to Android application
Android application template creates a Kanzi Studio project with a Kanzi Android framework-based application.
Use the Kanzi Android framework (droidfw) when you want to create an application for the Android platform, and you intend to use Android APIs and services extensively.
Kanzi Android framework (droidfw) is a framework dedicated for developing Kanzi applications for Android. It exposes the Kanzi Java API, which allows you to write application and plugin code entirely in Java or Kotlin. You do not need to write any C++ or JNI code, but you can still use native Kanzi plugins. Kanzi Android framework (droidfw) provides strong integration with the Android UI, including support for multiple simultaneous Kanzi-based Views and flexible composition of Kanzi and Android UI elements. Kanzi Android framework (droidfw) integrates with the Android Choreographer which runs the Kanzi main loop tasks in the Android UI thread. This enables you to use the Kanzi Java API from your application code without the need for dispatcher mechanisms.
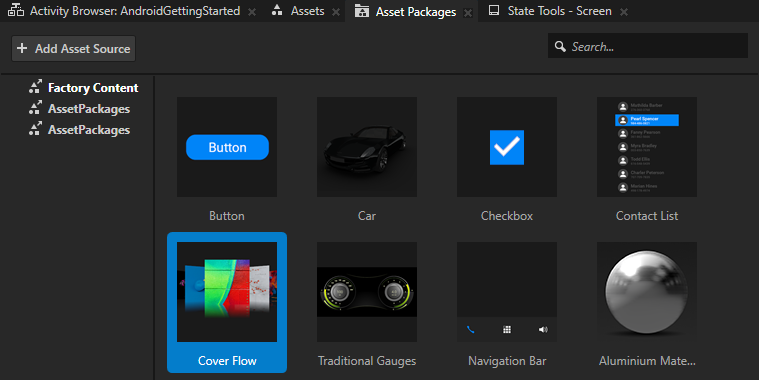
Create content that you want to show in a Kanzi view of the Android application.
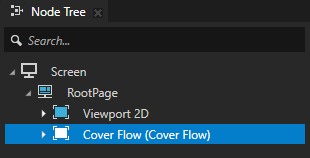
For example, in Kanzi Studio from the Asset Packages drag the Cover Flow to the Preview.
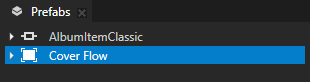
Kanzi Studio creates a prefab and instantiates it in the Node Tree in the Screen > RootPage node.
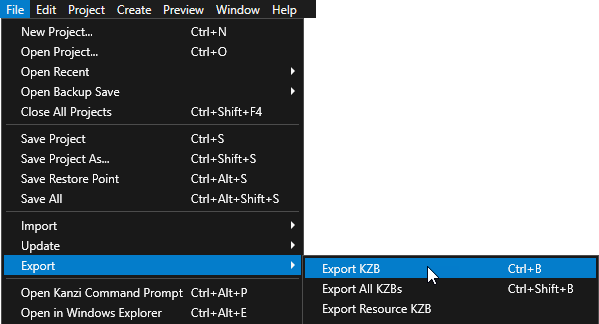
In Kanzi Studio select File > Export > Export KZB.
In Android Studio open the
AndroidGettingStarted/Application/configs/platforms/android_gradleproject, start a virtual Android device or connect your Android device to your computer, and run the application.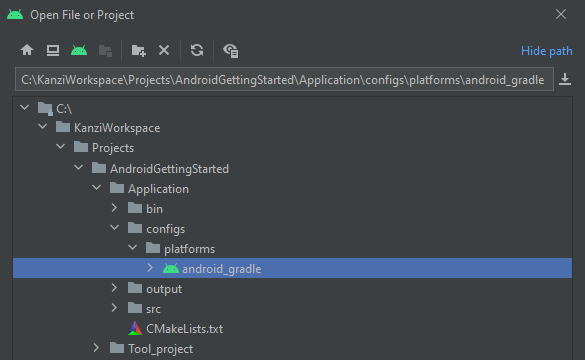
In the app > res > layout > activity_main.xml the StartupPrefab in the startupPrefabUrl attribute refers to the nodes in the Node Tree.
<?xml version="1.0" encoding="utf-8"?>
<androidx.constraintlayout.widget.ConstraintLayout xmlns:android="http://schemas.android.com/apk/res/android"
    xmlns:app="http://schemas.android.com/apk/res-auto"
    xmlns:tools="http://schemas.android.com/tools"
    android:layout_width="match_parent"
    android:layout_height="match_parent"
    tools:context=".MainActivity">

    <com.rightware.kanzi.KanziSurfaceView
        android:id="@+id/androidgettingstartedview"
        android:layout_width="match_parent"
        android:layout_height="match_parent"
        app:name="AndroidGettingStarted"
        app:kzbPathList="androidgettingstarted.kzb"
        app:startupPrefabUrl="kzb://androidgettingstarted/StartupPrefab" />
   </androidx.constraintlayout.widget.ConstraintLayout>
Modify content using the Kanzi Java API
In this section you use the Kanzi Java API to modify Kanzi content in the Android application.
You can use Kanzi from multiple views within multiple activities or fragments of an Android application. When you use Kanzi in such way, the Android application uses the same Kanzi instance and resources.
To modify content using the Kanzi Java API:
In Android Studio in the app > res > layout > activity_main.xml:
Create another
KanziSurfaceView.Use a unique name for the view.
For example, set
android:idto@+id/textblock.Set the views so that they take equal amount of screen space.
<?xml version="1.0" encoding="utf-8"?>
<androidx.constraintlayout.widget.ConstraintLayout xmlns:android="http://schemas.android.com/apk/res/android"
    xmlns:app="http://schemas.android.com/apk/res-auto"
    xmlns:tools="http://schemas.android.com/tools"
    android:layout_width="match_parent"
    android:layout_height="match_parent"
    tools:context=".MainActivity">

    <com.rightware.kanzi.KanziSurfaceView
        android:id="@+id/androidgettingstartedview"
        android:layout_width="match_parent"
        android:layout_height="0dp"
        app:kzbPathList="androidgettingstarted.kzb"
        app:layout_constraintTop_toTopOf="parent"
        app:layout_constraintBottom_toTopOf="@id/textblock"
        app:layout_constraintVertical_weight="1"
        app:name="TextBlock"
        app:startupPrefabUrl="kzb://androidgettingstarted/StartupPrefab" />

    <com.rightware.kanzi.KanziSurfaceView
        android:id="@+id/textblock"
        android:layout_width="match_parent"
        android:layout_height="0dp"
        app:kzbPathList="androidgettingstarted.kzb"
        app:layout_constraintBottom_toBottomOf="parent"
        app:layout_constraintVertical_weight="1"
        app:layout_constraintTop_toBottomOf="@+id/androidgettingstartedview"
        app:name="AndroidGettingStarted" />
</androidx.constraintlayout.widget.ConstraintLayout>
In the app > java > com.example.androidgettingstarted > MainActivity.java create Kanzi content that you want to show in the application.
For example, create a Text Block 2D node that shows Hello Kanzi!.
Import the Kanzi classes that provide the functionality for the content that you want create.
import com.rightware.kanzi.Node;
import com.rightware.kanzi.ObjectRef;
import com.rightware.kanzi.TextBlock2D;
Get a reference to your view.
Replace
KanziView view = findViewById(R.id.androidgettingstartedview);
with
KanziView view = findViewById(R.id.textblock);
In the
onAttachedToWindowcallback create a Text Block 2D node that shows Hello Kanzi!:public void onAttachedToWindow(View view, Domain domain) { // Create a Text Block 2D node named "Text Block 2D". ObjectRef<TextBlock2D> textBlockRef = TextBlock2D.create(domain, "Text Block 2D"); TextBlock2D textBlock = textBlockRef.get(); // Set the Text Block 2D node as the root of the Kanzi view. ((KanziView) view).setRoot(textBlock); // Position the Text Block 2D node in the center of the Kanzi view. textBlock.setProperty(Node.HorizontalAlignmentProperty, Node.HorizontalAlignment.Center); textBlock.setProperty(Node.VerticalAlignmentProperty, Node.VerticalAlignment.Center); // Set the size of the font of the Text Block 2D node. textBlock.setProperty(TextBlock2D.SizeProperty, 90.0f); // Set the text that the Text Block 2D node shows. textBlock.setText("Hello Kanzi!"); }
By default, Kanzi initializes the
KanziRuntimeandDomainonly when a Kanzi view is attached. This enables you to use the Kanzi Java API in theonAttachedToWindow()or later. Alternatively, to get access to the Kanzi Java API immediately, set an application to acquire its own reference toKanziRuntime.
When you run the application from Android Studio, you can see both Kanzi views, each taking half of the device screen.
Create another Android activity
In this section you create another Android activity and a control to go to that activity.
To create another Android activity:
In Kanzi Studio create a prefab that contains the content that you want to show in another Android activity:
In Kanzi Studio from the Asset Packages drag the Car to the Prefabs.
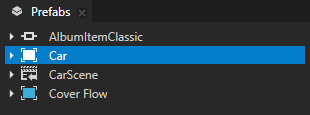
In the Prefabs select the Car prefab, in the Properties add the Background Brush property, and set it to the DefaultBackground Texture Brush.
In Android Studio create an Android activity:
Right-click app > java > com.example.androidgettingstarted and select New > Activity > Empty Activity.
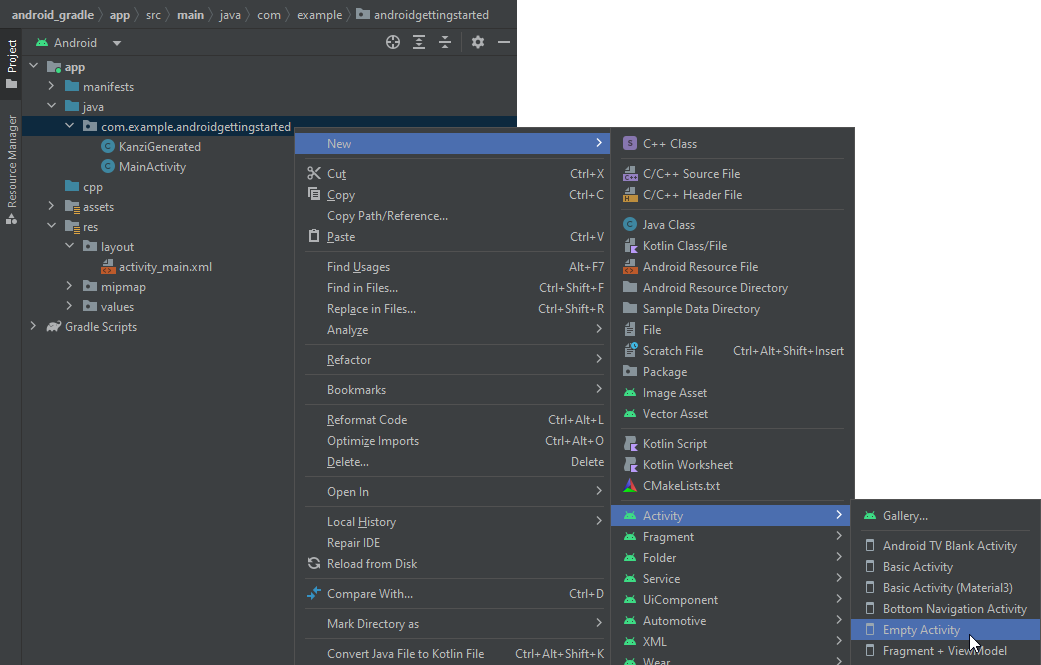
Name the activity
SecondActivityand click Finish.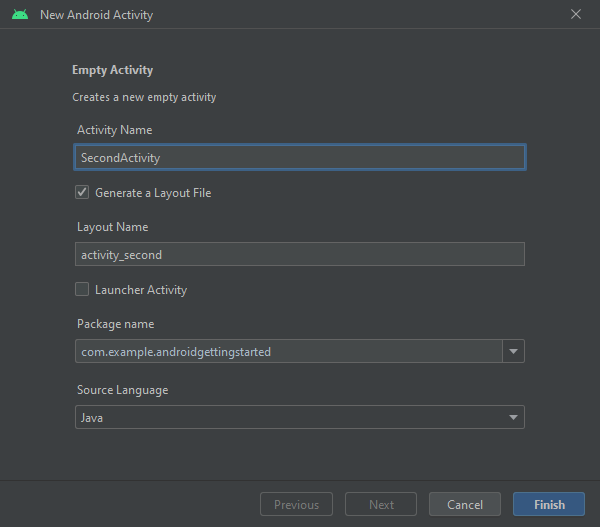
In app > res > layout > activity_second.xml add a Kanzi view to the constraint layout
<com.rightware.kanzi.KanziSurfaceView
    android:layout_width="match_parent"
    android:layout_height="match_parent"
    tools:context=".SecondActivity"
    app:kzbPathList="androidgettingstarted.kzb"
    app:startupPrefabUrl="kzb://androidgettingstarted/Prefabs/Car" />
Make sure that the kzb URL in
startupPrefabUrlpoints to the prefab that you want to show in this activity.Create the control to transition to the activity:
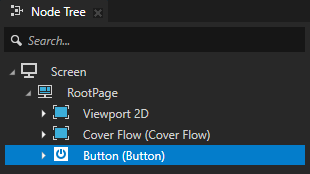
In Kanzi Studio from the Asset Packages drag the Button to the RootPage.

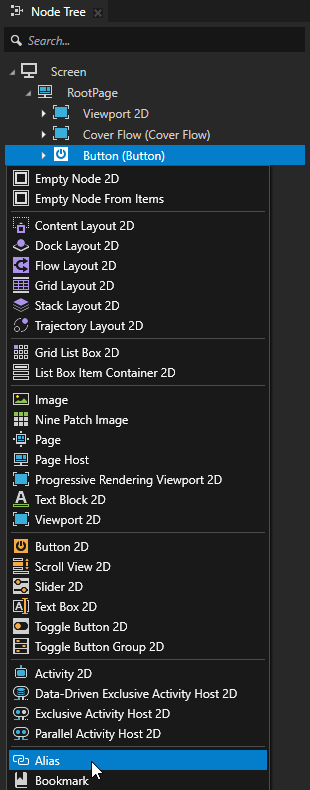
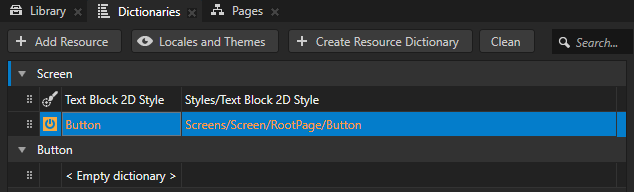
In the Node Tree press Alt and right-click the Button and select Alias.
In Kanzi Studio select File > Export > Export KZB.
In Android Studio in app > java > com.example.androidgettingstarted > MainActivity.java:
Import these classes:
import com.rightware.kanzi.Node2D;
import com.rightware.kanzi.Button2D;

import android.content.Intent;
In the end inside the
onCreatefunction add:// Get a reference to the androidgettingstartedview view. KanziView view2 = findViewById(R.id.androidgettingstartedview); view2.addListener(new KanziViewListener() { @Override public void onAttachedToWindow(View view, Domain domain) { } @Override public void onStartupPrefabLoaded(View view, Domain domain) { // Get the RootPage root node. Node2D root = ((KanziView) view).getRoot(); // Get and set up the button to transition to the SecondActivity. Button2D button = root.lookupNode("#Button"); // Position the Button node in the bottom of the Kanzi view. button.setProperty(Node.VerticalAlignmentProperty, Node.VerticalAlignment.Bottom); // Set the Button node to go to the second activity when user clicks the button. button.addMessageFilter(Button2D.ClickMessage, messageArguments -> { Intent intent = new Intent(((View) view).getContext(), SecondActivity.class); startActivity(intent); }); } });
Kanzi loads the startup prefab of views asynchronously, and invokes the callback
onStartupPrefabLoaded()when it is done loading and instantiating the prefab. If you intend to modify the start prefab, do so in this callback.
When you run the application from Android Studio, to transition to the second activity, click the button.
What's next?
In this tutorial you learned how use the Kanzi Android framework (droidfw) to:
Access and modify nodes using Kanzi Java API
Create a Kanzi view in Android and show Kanzi content in that view
Create an Android activity and show Kanzi content in that activity
To learn more about how to use Kanzi Android framework (droidfw) and Java API see:
See also
To learn more about developing Kanzi applications for Android, see Developing Kanzi applications for Android.
To learn more about using Java Kanzi Engine API, see Using Java and Kotlin.