Overview of Kanzi Studio plugin interface
Here you can find an overview of the Kanzi Studio plugin interface.
Kanzi Studio plugins extend the functionality of Kanzi Studio and run in Kanzi Studio.
Kanzi Studio command plugins are plugins that you execute as commands and do not have a user interface. For example, use the command plugins to execute a command on the entire or the selected part of the node tree in your project.
See Kanzi Studio plugins and Creating Kanzi Studio command plugins.
After you create the base for a plugin, use this overview and Kanzi Studio plugin interface reference to add functionality to your plugin so that it does something useful. See Creating the base for a Kanzi Studio command plugin and Kanzi Studio plugin interface API reference.
Kanzi Studio data model
Kanzi Studio project is a hierarchical structure of project nodes. Each node has a set of properties and can have a set of child nodes or items. Different types of project items, such as nodes, models, textures, and animations have their own characteristics. For example, textures specify the image used in the texture and filtering. To change the data in the project Kanzi Studio uses commands. For example, set values to properties, or create new items.
Kanzi Studio provides the KanziStudio object to plugins. The KanziStudio object is the root object for data access and provides the current project, available commands, global undo and redo, and events related to project opening and closing.
You can access the nodes, resources, and properties in the project using the current project node. Use libraries for different types of nodes and factory for new project nodes and resources. Nodes provide the access to properties, child nodes and items, changes in the current node and descendants, and events.
In all functions replace this line with the code you want to execute:
throw new NotImplementedException();
Make sure that your plugin handles all its internal exceptions and does not let them reach the Kanzi Studio interface.
Kanzi Studio
Use the studio object to access the Kanzi Studio interface. For example, use it when you want to write a message to the Log window, get input from the user, to undo and redo changes in a project, and so on.
Getting user input
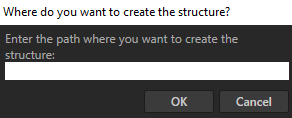
Use GetUserInput to display a dialog box which prompts the user to provide input. For example, you can use GetUserInput to get the path of a node where you want your plugin to start executing its commands.
To display a dialog box which prompts the user to provide input:
In the Visual Studio solution of your plugin open the class library file that implements the
PluginCommandinterface and in theExecutefunction useGetUserInputto display a dialog box with a message.public void Execute(PluginCommandParameter parameter) { studio.GetUserInput("Where do you want to create the structure?", "Enter the path where you want to create the structure:"); }
When you run the plugin, it prompts the user to provide input.
Writing a message to the Kanzi Studio Log window
To write a message to the Kanzi Studio Log window:
In the Visual Studio solution of your plugin open the class library file that implements the
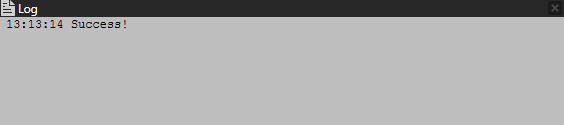
PluginCommandinterface and in theExecutefunction useLogto write to the Log window.public void Execute(PluginCommandParameter parameter) { studio.Log("Success!"); }
When you run the plugin, it prints Success! to the Kanzi Studio Log window.
Showing a dialog box with a message
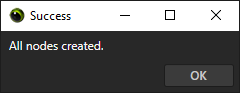
Use ShowMessageBox when you want to display a dialog box with a message.
For example, to display a modal dialog box with a title and message:
In the Visual Studio solution of your plugin open the class library file that implements the
PluginCommandinterface and in theExecutefunction use ShowMessageBox to display a modal dialog box with a title and message.public void Execute(PluginCommandParameter parameter) { studio.ShowMessageBox("All nodes created.", "Success", true); }
When you run the plugin, it displays the dialog box in Kanzi Studio.
Creating nodes
For example, to create an Empty Node 2D node with a Kanzi Studio plugin:
In the Visual Studio solution of your plugin open the class library file that implements the
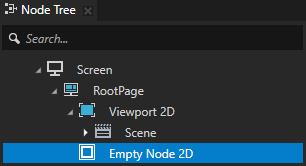
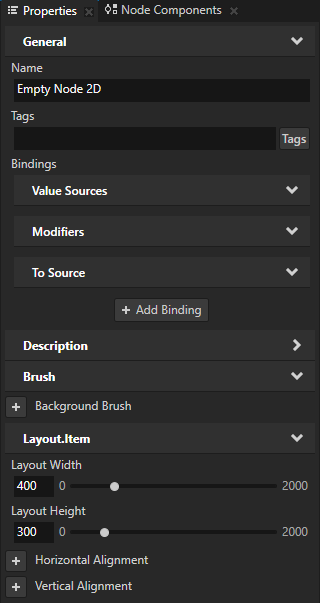
PluginCommandinterface and create the function that creates an Empty Node 2D node.private ProjectItem CreateEmptyNode2D(ProjectItem parentNode) { // Create an Empty Node 2D node. You use the Project as a factory. // The first parameter defines the name of the node. Use the GenerateUniqueChildName // function, because the names of sibling nodes must be unique. // The second parameter defines the location of the parent node of the Empty Node 2D // node that you create. You pass this parameter to the CreateEmptyNode2D function // when you call it. var emptyNode2D = studio.ActiveProject.CreateProjectItem<EmptyNode2D>( parentNode.GenerateUniqueChildName("Empty Node 2D"), parentNode); // Make the Empty Node 2D 300 pixels high by setting its Layout Height property. emptyNode2D.Set(Properties.NodeHeight, 300.0f); // Make the Empty Node 2D 400 pixels wide by setting its Layout Width property. emptyNode2D.Set(Properties.NodeWidth, 400.0f); return emptyNode2D; }
In the
Executefunction call the function you created in the previous step. Add to theExecutefunction the code you want your plugin to run.public void Execute(PluginCommandParameter parameter) { // Get the RootPage node in the node tree. This is the parent node of the Empty Node 2D // node that this plugin creates. var rootNode = studio.ActiveProject.GetProjectItem("Screens/Screen/RootPage"); // Call the function that creates an Empty Node 2D node. The function takes a parameter // to set where the plugin creates the Empty Node 2D node. CreateEmptyNode2D(rootNode); }
Build and run the plugin. See Building and running a Kanzi Studio plugin.
When you run the plugin, it creates in the Screen > RootPage node an Empty Node 2D node which is 300 pixels high and 400 pixels wide. The plugin names the Empty Node 2D node Empty Node 2D. You can extend this example by creating a Color Brush and use it to set the background color of the Empty Node 2D node by setting its Background Brush property to that Color Brush. See Creating resources.
Creating resources
For example, to create a Color Brush resource with a Kanzi Studio plugin:
In the Visual Studio solution of your plugin, in the Solution Explorer right-click the project name, select Add > Reference, and add the reference to the
PresentationCoreassembly.Kanzi Studio plugin uses this assembly to define the color you use in a Color Brush.
In Visual Studio open the class library file that implements the
PluginCommandinterface and add the using directive for theSystem.Windows.Mediain theWindowsMedianamespace to prevent conflicts with the KanziPluginInterfacenamespace.using WindowsMedia = System.Windows.Media;
In the same class library file define the function that creates a Color Brush.
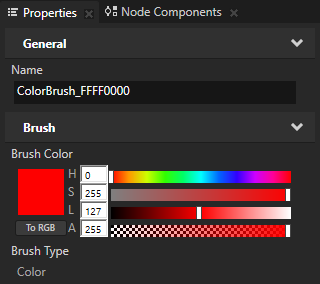
private Brush CreateColorBrush(WindowsMedia.Color color)
{
    // Get the Brushes library in the Library > Materials and Textures which stores all the
    // brushes in a Kanzi Studio project.
    var brushLibrary = studio.ActiveProject.BrushLibrary;
    // Set the name of the Color Brush to be ColorBrush_ followed by
    // the hexadecimal ARGB values of the color in which you create the Color Brush.
    var brushName = "ColorBrush_" + color;
    // Check whether a brush with this name already exists in the Brushes library. If yes,
    // return that brush.
    var colorBrush = brushLibrary.GetChild(brushName) as Brush;

    // If a brush with the same name does not already exist create a new Color Brush.
    if (colorBrush == null)
    {
        // Create a Color Brush.
        // The first parameter defines the name of the resource.
        // Use the GenerateUniqueChildName function, because the names of resources in the
        // same library must be unique.
        // The second parameter defines in which library to create the brush.
        // The third parameter defines the type of the brush.
        colorBrush = studio.ActiveProject.CreateBrush(
            brushLibrary.GenerateUniqueChildName(brushName),
            brushLibrary,
            BrushTypeEnum.COLOR);
        // Set the color of the Color Brush to the color you pass to the CreateColorBrush
        // function when you call it.
        colorBrush.Set(colorBrush.PropertyTypes.ColorBrushColor, color);
    }

    return colorBrush;
}
In the
Executefunction define the color for the Color Brush and call the function you created in the previous step.Add to the
Executefunction the code you want your plugin to run.public void Execute(PluginCommandParameter parameter) { // Define the color for the Color Brush as red. Use values in range from 0 to 255. var myColor = WindowsMedia.Color.FromArgb(255, 255, 0, 0); // Call the function that creates a Color Brush. // The function takes a parameter to set the color of the Color Brush. CreateColorBrush(myColor); }
Build and run the plugin. See Building and running a Kanzi Studio plugin.
When you run the plugin, it creates in the Library > Materials and Textures > Brushes a Color Brush in the color you defined in the
myColorvariable. The plugin names the Color Brush ColorBrush_<HexadecimalColorCode>.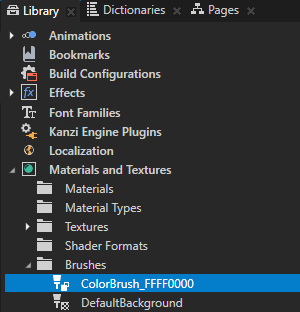
Creating node components
For example, to use the Click trigger and Click Manipulator input manipulator component to create a clickable node:
In the Visual Studio solution of your plugin open the class library file that implements the
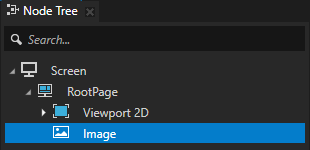
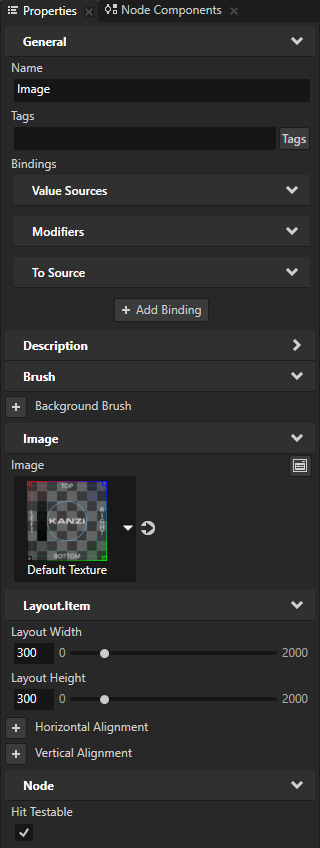
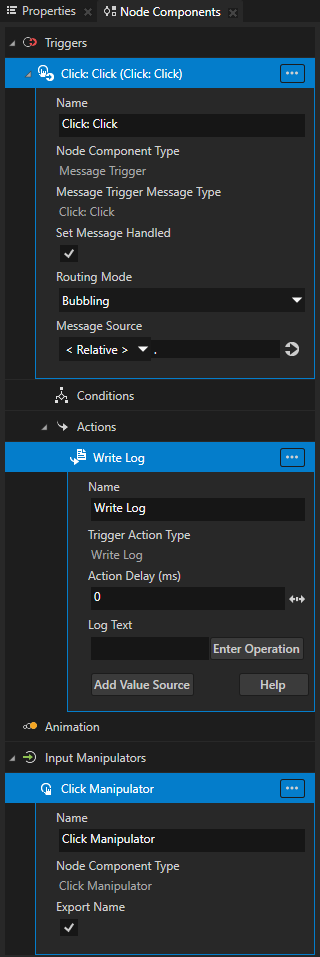
PluginCommandinterface and create the function that creates a clickable Image node and adds to the node a Click trigger with a Write Log action.private ProjectItem CreateClickableImage(ProjectItem parentNode) { // Create an Image node. You use the Project as a factory. // The first parameter defines the name of the node. Use the GenerateUniqueChildName // function, because the names of sibling nodes must be unique. // The second parameter defines the parent node of the Image node that you create. // You pass this parameter to the CreateClickableImage function when you call it. var image = studio.ActiveProject.CreateProjectItem<Image2D>( parentNode.GenerateUniqueChildName("Image"), parentNode); // Make the Image node 300 pixels high and wide, by setting its Layout Height and // Layout Width properties. image.Set(Properties.NodeHeight, 300.0f); image.Set(Properties.NodeWidth, 300.0f); // To enable the click gesture for a node: // - Add and enable the Hit Testable property. // - Add to the node the Click Manipulator input manipulator component. // In the Image node add and enable the Hit Testable property. image.Set(Properties.NodeHitTestable, true); // Get the Click Manipulator node component type. var clickManipulatorType = studio.ActiveProject.NodeComponentTypeLibrary.GetItemByName(NodeComponentTypeNames.ClickManipulatorComponent); // In the Image node create a Click Manipulator input manipulator component. image.CreateNodeComponent(image.GenerateUniqueChildName("Click Manipulator"), clickManipulatorType); // In the Image node create a Message Trigger. var clickTrigger = image.CreateTrigger( studio.ActiveProject.NodeComponentTypeLibrary.GetItemByName(NodeComponentTypeNames.MessageTrigger)); // In the Message Trigger set the Message Trigger Message Type property to Click. clickTrigger.Set(Properties.TriggerMessageType, studio.ActiveProject.MessageTypeLibrary.GetItemByName(MessageTypeNames.MessageClick)); // In the Click Message Trigger create a Write Log action. var writeLogAction = clickTrigger.CreateAction( studio.ActiveProject.TriggerActionTypeLibrary.GetItemByName(ActionTypeNames.WriteLogAction)); // In the Write Log action set Log Text to "Image clicked". // This is the message that the Write Log action writes to the Log window. writeLogAction.Set(Properties.WriteLogActionLogText, "Image clicked"); return image; }
In the
Executefunction call the function that you created in the previous step.Add to the
Executefunction the code you want your plugin to run.public void Execute(PluginCommandParameter parameter) { // Get the RootPage node in the node tree. // This is the parent node of the Image node that this plugin creates. var rootNode = studio.ActiveProject.GetProjectItem("Screens/Screen/RootPage"); // Call the function that creates and configures the Image node and adds to the node // the Click Manipulator and the Click trigger with a Write Log action. The function // takes a parameter to set where the plugin creates the Image node. CreateClickableImage(rootNode); }
Build and run the plugin. See Building and running a Kanzi Studio plugin.
When you run the plugin, it creates and configures in the Screen > RootPage node an Image node and adds to that node:
Click Manipulator input manipulator component
Click trigger with a Write Log action
When you click the Image node in the Preview you set off the trigger, and the action that you created with the plugin writes the message to the Log window.
Opening a file
To open a file with a Kanzi Studio plugin:
In the Visual Studio solution of your plugin, in the Solution Explorer right-click the project name, select Add > Reference, and add the reference to the
PresentationFrameworkassembly.Kanzi Studio plugin uses this assembly to open the standard Windows dialog box that prompts you to open a file.
In Visual Studio open the class library file that implements the
PluginCommandinterface and create the function that opens the standard Windows dialog box. You use this dialog box to select which file on your computer you want your plugin to open.private static string GetFile() { // Configure the Open File dialog box to show files with the .xml extension var dialog = new Microsoft.Win32.OpenFileDialog(); dialog.DefaultExt = ".xml"; dialog.Filter = "XML files (*.xml)|*.xml"; // Open the Open File dialog box var result = dialog.ShowDialog(); var fileName = (result == true) ? dialog.FileName : null; return fileName; }
In the
Executefunction call the function that you created in the previous step.Add to the
Executefunction the code that you want your plugin to run.public void Execute(PluginCommandParameter parameter) { // Call the function that opens the standard Windows dialog box where you can // select a file that you want to open with your plugin. var fileName = GetFile(); // Add your code here to correctly load the file format of your file. // For example, C# includes XML libraries that you can use to load and parse XML files, // or you can create your own parser for the file format that you want to load. }
Build and run the plugin. See Building and running a Kanzi Studio plugin.
When you run the plugin, it opens the standard Windows dialog box where you can select which file on your computer you want to open with your plugin.