Creating keyframe animations
In Kanzi you can create keyframe animations that:
Animate the look and feel of a node by changing the values of properties that define the look and feel of that node. You can animate different property types:
Float property types. For example, you can animate light intensity or material color.
Boolean property types. For example, you can animate values such as visibility when you map a property to the timeline values 0 and 1.
Animate the position of a node by changing the values of properties that define the position of that node. For example, by animating the position you can make a menu appear from the side of your application, or a button bounce when the user clicks it.
You learn how to create this type of animation here.
You can create the animation data for keyframe animations in these ways:
Modify property values of a node in your project and drag them to an animation clip to create the animation data. This way you can visually inspect the animation in the Preview as you are creating it. See Creating keyframe animations for node properties
Create an animation, set a specific target property field that you want to animate, and add keyframes. This way is more suitable for data-driven animations. See Creating keyframe animations for target property fields.
To create keyframe animations using the Kanzi Engine API, see Creating animations and timelines using the Kanzi Engine API.
Creating keyframe animations for node properties
To create a keyframe animation for node properties:
In the Library > Animations > Animation Clips double-click the Animation Clip of your keyframe animation.
The Animation Clip Editor opens.
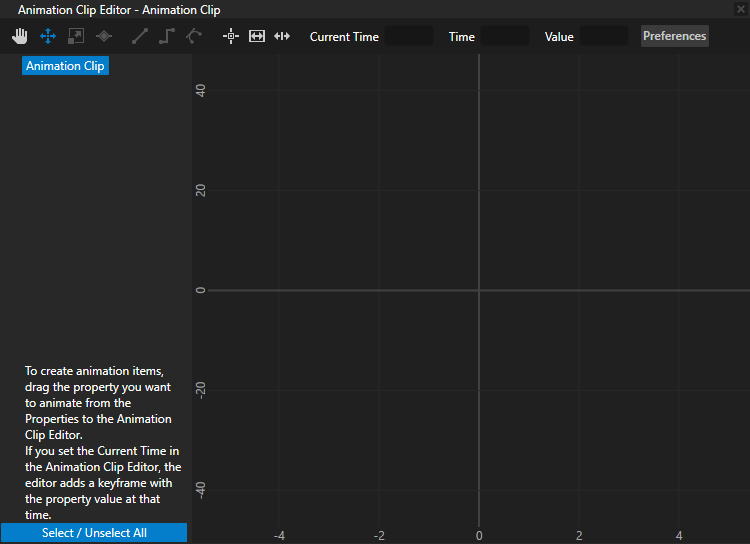
In the Animation Clip Editor enter in the Current Time the time at which you want your animation to start.
For example, enter 0 to start the animation when the trigger that starts the animation is triggered. See Editing animation clips.

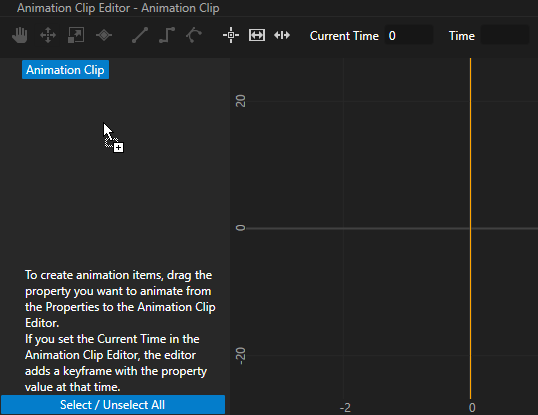
In the Node Tree select the node the property values of which you want to animate, and from the Properties drag the property you want to animate to the Animation Clip Editor.
Kanzi Studio creates Animation Data for each property and property field, and adds a keyframe for each property and property field at the time you selected in the Current Time.
For example, add Render Transformation property and drag it to the Animation Clip Editor to animate the position of the node.
In the Properties change the value of the property you are animating, in the Animation Clip Editor enter in the Current Time the time at which you want to Kanzi Studio to create a keyframe with that property value, and drag the property from the Properties.
For example, change the Translation property fields of the Render Transformation property.
Kanzi Studio adds the new property values to the Animation Data.

Repeat the previous three steps as many times as you want to add keyframes to your animation.
To play and control the playback of a keyframe animation, see Using keyframe animations.
Creating keyframe animations for target property fields
To create a keyframe animation for a target property field:
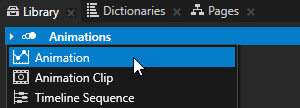
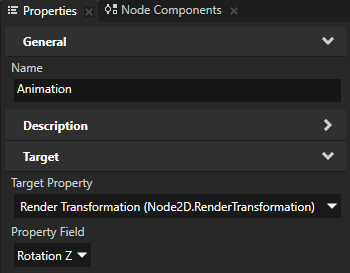
In the Library press Alt and right-click Animations and select Animation.
In the Properties set the Target of the animation.
For example, set:
Target Property to Node3D.RenderTransformation
Property Field to Rotation Z
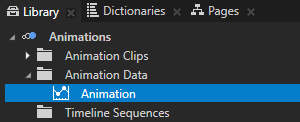
In the Library double-click the animation you created in the first step to open it in the Animation Clip Editor and in the Animation Clip Editor use the Move tool
 to select the animation in the canvas area.
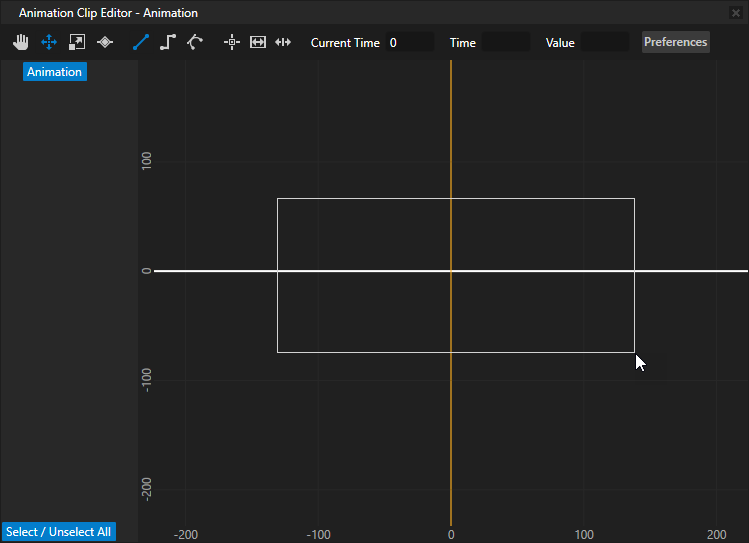
Select the Keyframe tool
 and click the animation to create keyframes.
For example, click the animation three times to create three keyframes.
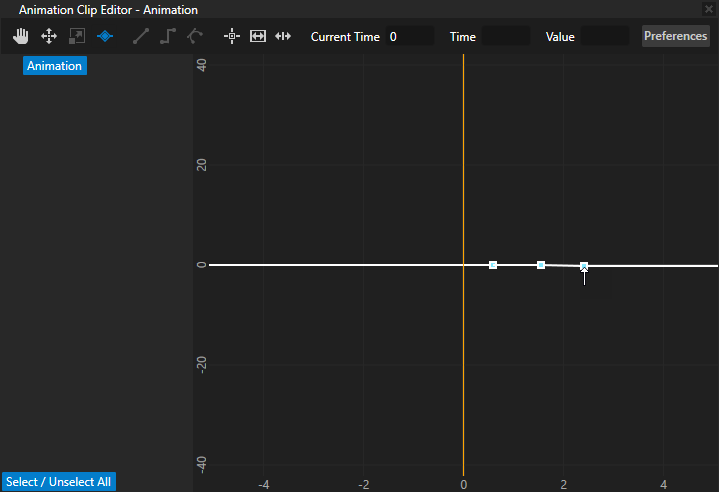
Select the Move tool
, select the first keyframe and set:Time to the number of seconds from the start of the animation when you want to place this keyframe.
Value to the value to which you want to set the Target Property Field you set in step 2.
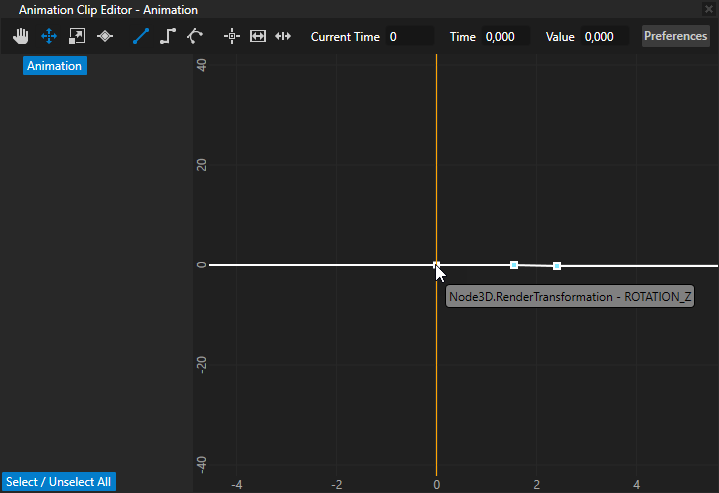
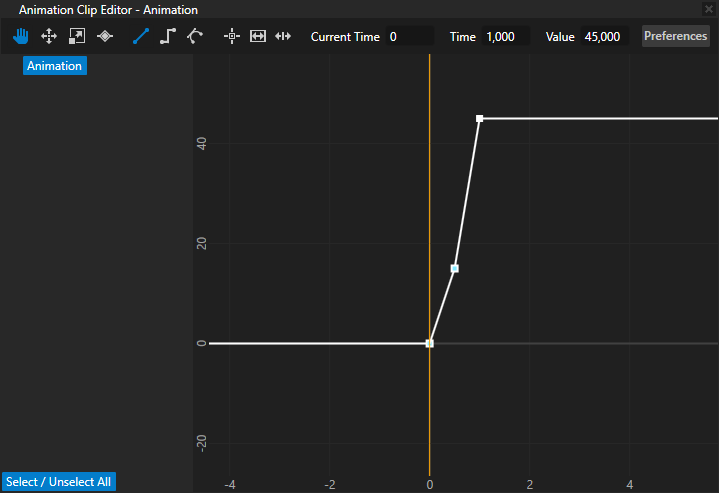
For example, set Time to 0 and Value to 0 to set the value of Node3D.RenderTransformationRotation Z to 0 degrees when the animation starts.
Repeat the previous step for each keyframe you created.
For example, set:
Second keyframe: Time to 0,5 and Value to 15 to set the value of Node3D.RenderTransformation Rotation Z to 15 degrees 0,5 seconds after the animation starts.
Third keyframe: Time to 1 and Value to 45 to set the value of Node3D.RenderTransformation Rotation Z to 45 degrees 1 second after the animation starts.
To play and control the playback of a keyframe animation, see Using keyframe animations.
Using keyframe animations in the API
To create a keyframe animation:
// Create a float keyframe animation.
FloatKeyframeAnimationSharedPtr keyframeAnimation = FloatKeyframeAnimation::create(domain);
// Create and add keyframes to the keyframe animation. This keyframe animation contains two linear keyframes.
// Create a linear keyframe at second 0 with the value 0.
keyframeAnimation->addLinearKeyframe(chrono::seconds::zero(), 0.0f);
// Create a linear keyframe at second 1 with the value 100.
keyframeAnimation->addLinearKeyframe(chrono::seconds(1), 100.0f);
To animate a property value in a node using a keyframe animation:
// Create a property timeline and apply the keyframeAnimation keyframe animation to the Layout Width property
// to animate the width of the current node.
PropertyAnimationTimelineSharedPtr propertyTimeline = PropertyAnimationTimeline::create(domain, ".", Node2D::WidthProperty, keyframeAnimation);
To animate a property field value in a node using a keyframe animation:
// Create a property field animation timeline and apply it to the Render Transformation property of the current node.
PropertyFieldAnimationTimelineSharedPtr propertyFieldTimeline = PropertyFieldAnimationTimeline::create(domain, ".", Node2D::RenderTransformationProperty);
// Rotate the current node by animating the Rotation Z property field of the Render Transformation property
// with the keyframeAnimation keyframe animation.
propertyFieldTimeline->addEntry(PropertyFieldRotationZ, keyframeAnimation);
To create a keyframe animation that uses Bezier keyframes to move an object on a sideways figure eight shaped path:
// Create two float keyframe animations: one to animate the object on the x axis,
// the other to animate the object on the y axis.
// Create float keyframe animation keyframeAnimationX that uses linear keyframes
// to animate the movement of the object on the x axis.
FloatKeyframeAnimationSharedPtr keyframeAnimationX = FloatKeyframeAnimation::create(domain);
// Create a linear keyframe at second 0 with the value 0.
keyframeAnimationX->addLinearKeyframe(chrono::seconds::zero(), 0.0f);
// Create a linear keyframe at second 4 with the value 4.
// At this keyframe the object reaches the furthest point on the x axis.
keyframeAnimationX->addLinearKeyframe(chrono::seconds(4), 4.0f);
// Create a linear keyframe at second 8 with the value 0.
// At this keyframe the object returns to the same position it had at the first keyframe.
keyframeAnimationX->addLinearKeyframe(chrono::seconds(8), 0.0f);

// Create float keyframe animation keyframeAnimationY that uses Bezier keyframes
// to animate the movement of the object on the y axis.
FloatKeyframeAnimationSharedPtr keyframeAnimationY = FloatKeyframeAnimation::create(domain);
// Create a linear keyframe at second 0 with the value 0. When you use Bezier keyframes,
// you can use any type of keyframe for the first keyframe, because you need this keyframe
// only to provide the information for the starting position.
keyframeAnimationY->addLinearKeyframe(chrono::seconds::zero(), 0.0f);
// Create a Bezier keyframe at second 4 with the value 0 and two control points.
// You use the control points to set the position of the keyframe.
keyframeAnimationY->addBezierKeyframe(chrono::seconds(4), 0.0f, Vector2(0.5f, 4.0f), Vector2(0.5f, -4.0f));
// Create a Bezier keyframe at second 8 with the value 0 and two control points.
// This keyframe uses the same control points, but because the keyframeAnimationX
// animation moves the object on the x axis back to its starting position, this keyframe
// is a mirror image of the previous keyframe.
keyframeAnimationY->addBezierKeyframe(chrono::seconds(8), 0.0f, Vector2(0.5f, 4.0f), Vector2(0.5f, -4.0f));

// Create a property field animation timeline and apply it to the Render Transformation property of the current node.
PropertyFieldAnimationTimelineSharedPtr timeline = PropertyFieldAnimationTimeline::create(domain, ".", Node3D::RenderTransformationProperty);
// Move the current node on the x axis by animating the Translation X property field of the Render Transformation property
// with the keyframeAnimationX keyframe animation.
timeline->addEntry(PropertyFieldTranslationX, keyframeAnimationX);
// Move the current node on the y axis by animating the Translation Y property field of the Render Transformation property
// with the keyframeAnimationY keyframe animation.
timeline->addEntry(PropertyFieldTranslationY, keyframeAnimationY);
To play an animation regardless of the timeline type:
// Create the playback context and the timeline playback for the node defined in the item2d.
SceneGraphTimelinePlaybackContext context(*item2d);
// Create the playback for the timeline defined in the propertyFieldTimeline.
TimelinePlaybackSharedPtr playback = propertyFieldTimeline->createPlayback(context);
// Start the animation.
domain->getRootTimelineClock()->addTimelinePlayback(playback);
For details, see the KeyframeAnimation class in the Kanzi Engine API reference.