Using materials
Material types define the property type of a material. By adjusting material property values defined by a material type, you set the appearance of a material. Each material type has a vertex shader and a fragment shader, which set the type of properties you can use in a material.
Use materials to set the appearance of nodes. See Adjusting the appearance of 3D nodes and Adjusting the appearance of 2D nodes with a material.
Creating a material
To create a material:
If you do not already have a material type for the material you want to create, add a material type to your project. See Adding a material type to your project.
Create the material and set its material type in one of these ways:
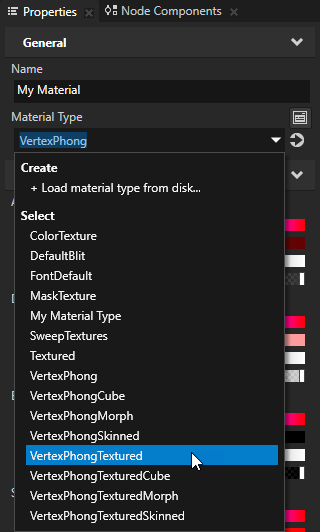
In the Library press Alt and right-click Materials and Textures, select Material, and in the Properties set the Material Type property to the material type you want to use for this material.
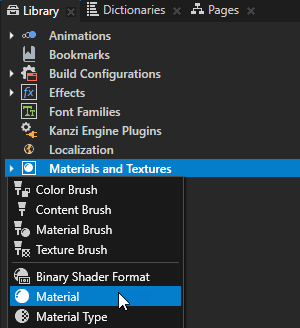
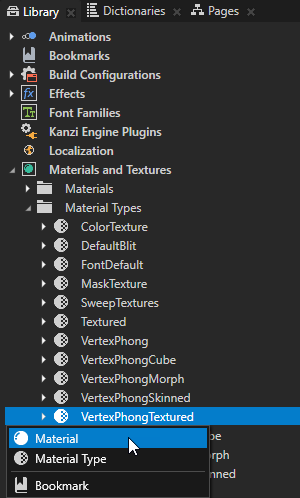
In the Library > Materials and Textures > Material Types press Alt and right-click the material type you want to use for the material you create, and select Material.
Assigning a material to a node
You can assign a material to a node in these ways:
Drag the material from the Assets and drop it on a node in the Preview or Node Tree.
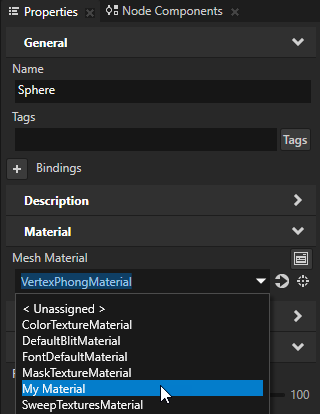
In the Node Tree select the node to which you want to assign a material and in the Properties set the Mesh Material or Material property to the material you want to use for the selected node. For primitive meshes use the Mesh Material property, for Model nodes use the Material property.
Adjusting the appearance of 3D nodes
Use materials to adjust the appearance of 3D nodes. After you set a node to use a material, add and set to the node the properties which you want to modify in the material. That way you can use the same material and modify the appearance of 3D nodes.
To adjust the appearance of 3D nodes:
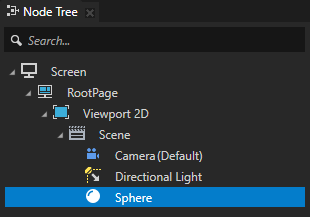
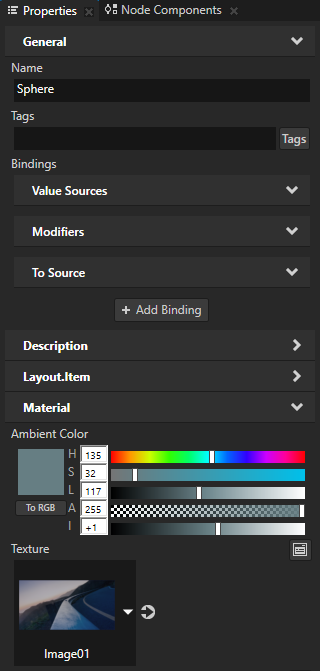
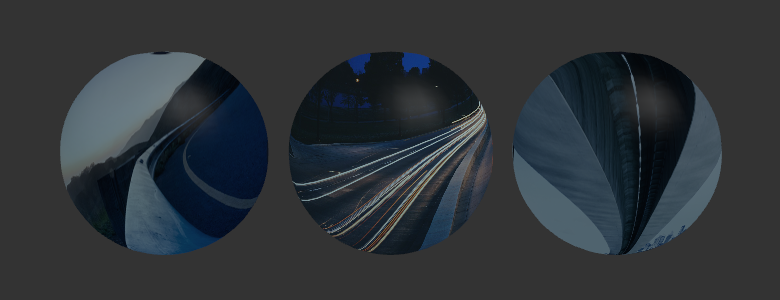
In the Node Tree create or select any 3D node the appearance of which you want to adjust. For example, press Alt and right-click the Scene node, create a Stack Layout 3D node and inside it create three Sphere nodes.
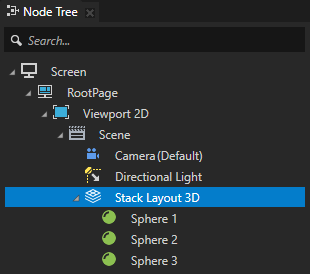
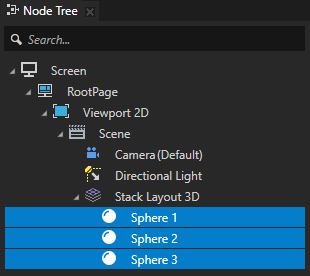
In the Node Tree select the 3D nodes the appearance of which you want to adjust, and in the Properties set the Mesh Material or Material property to the material that you want to use. For primitive meshes use the Mesh Material property, for Model nodes use the Material property. This way you apply the material to the nodes you selected in the Node Tree. For example, set the Mesh Material property of the Sphere nodes to the VertexPhongTexturedMaterial material.
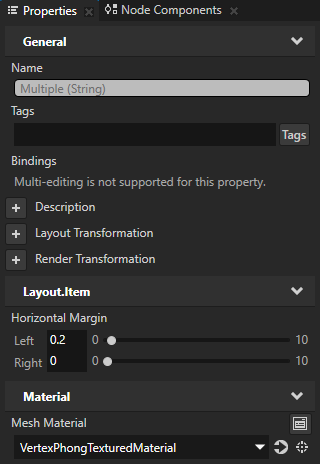
For each 3D node you selected in the previous step, in the Properties add and set the properties with which you want to change the appearance of the node. Use the properties from the Material category to adjust the materials. For example, to change the ambient color and texture of the material for the selected node, add and set the Ambient Color and Texture properties.
Adjusting the appearance of 2D nodes with a material
Use a Material Brush to fill a 2D node with a material.
To fill a 2D node with a material:
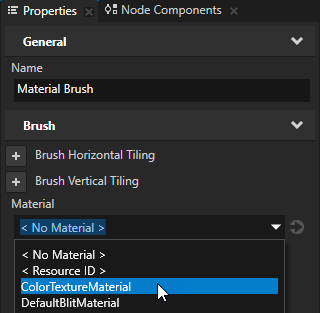
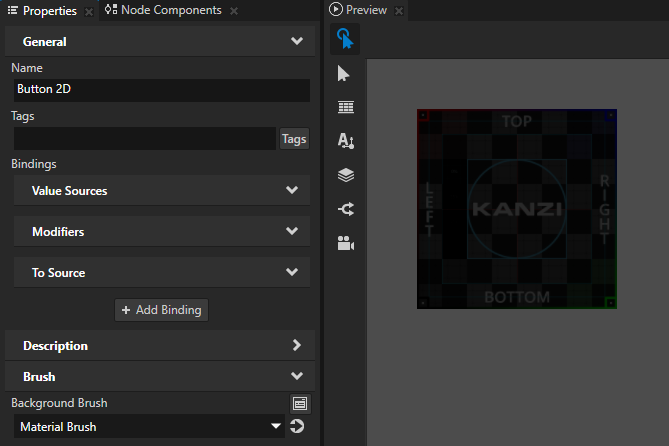
In the Library press Alt and right-click Materials and Textures, select Material Brush, and name the brush.

In the Properties set the Material property to the material you want to use to fill a 2D node.
If you do not have any materials in your project, create a material. See Creating a material.
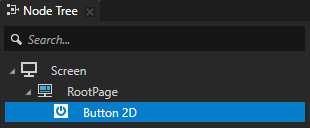
In the Node Tree select the 2D node that you want to fill with the brush you created, in the Properties add the Background Brush or the Foreground Brush property, and select the brush you created in the first step.
For example, create a Button 2D node, in the Properties add the Background Brush property, and set it to the brush you created in the first step.
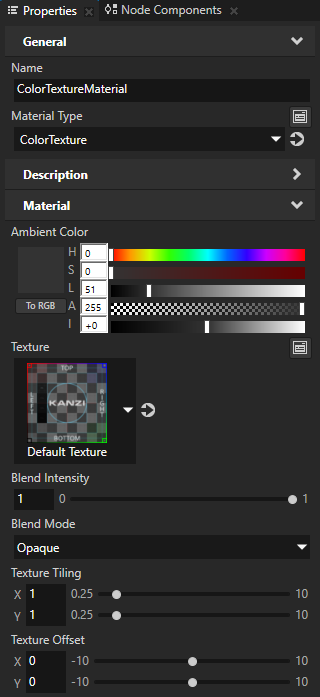
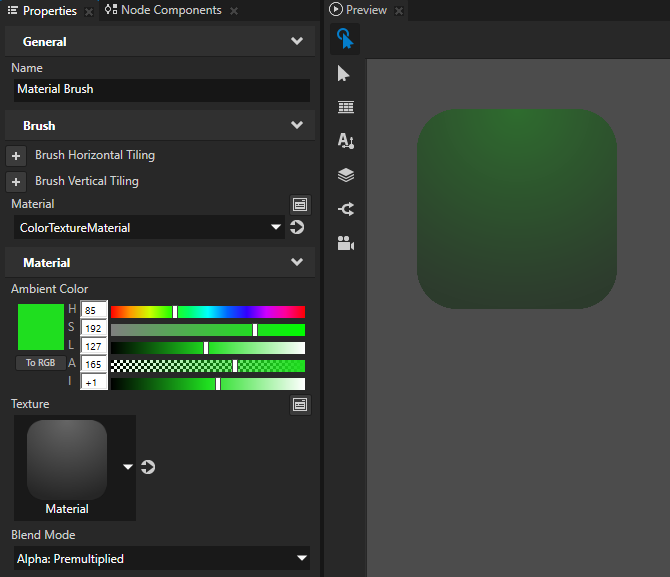
To adjust the appearance of the material, set the Material properties either in:
The Material Brush.
For example, to change the ambient color, texture, and blending of the material for the Material Brush, add and set the Ambient Color, Texture, and Blend Mode properties.
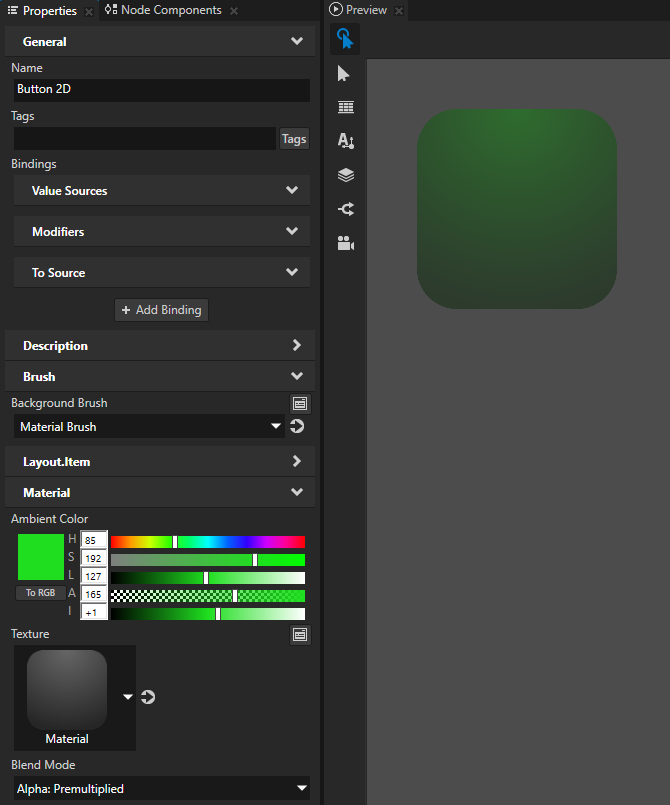
The node which uses the Material Brush.
For example, to change the ambient color, texture, and blending of the material for a node, add and set the Ambient Color, Texture, and Blend Mode properties in that node.
Using materials in the API
For details, see the Material class in the Kanzi Engine API reference.