Tutorial: Program Activities with C++ Code Behind
In this tutorial you learn how to program Activities with the Code Behind workflow. Code Behind is a workflow where you associate code with an instance of an Activity node instead of a type.
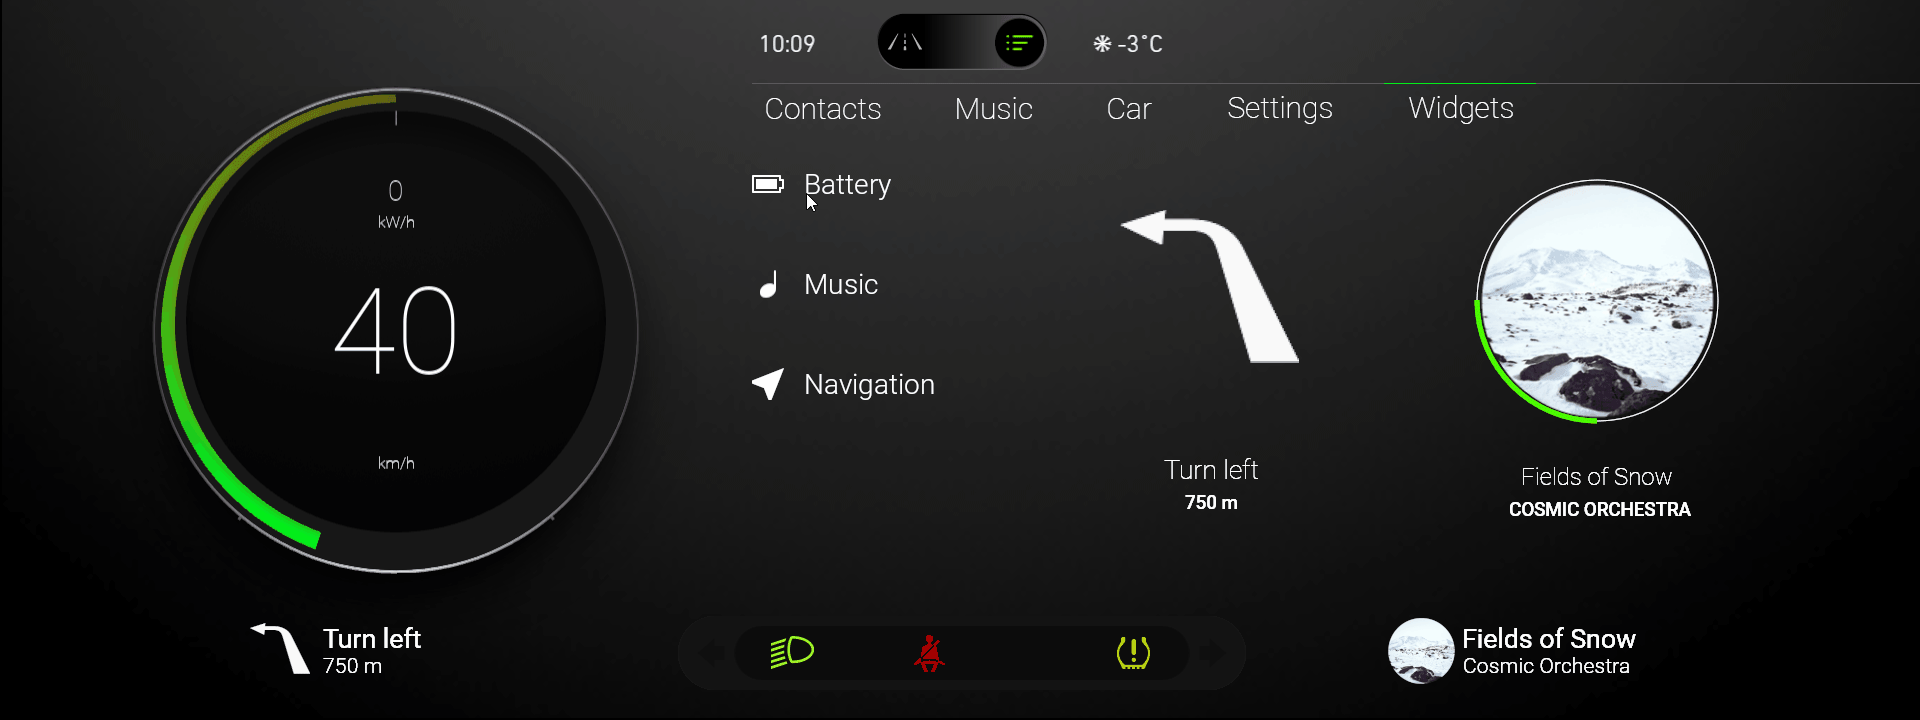
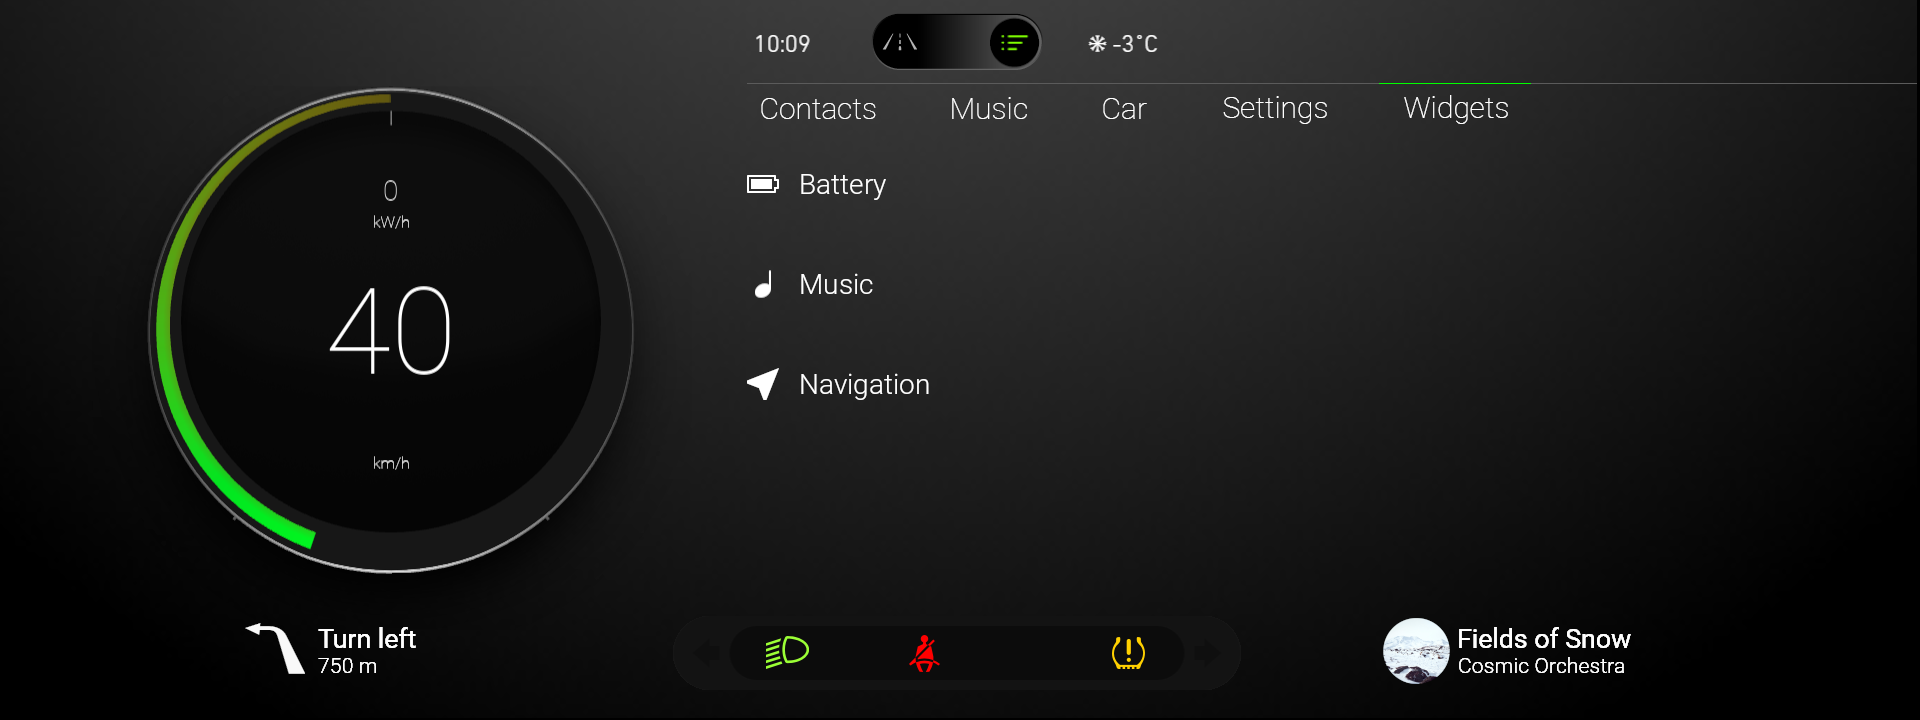
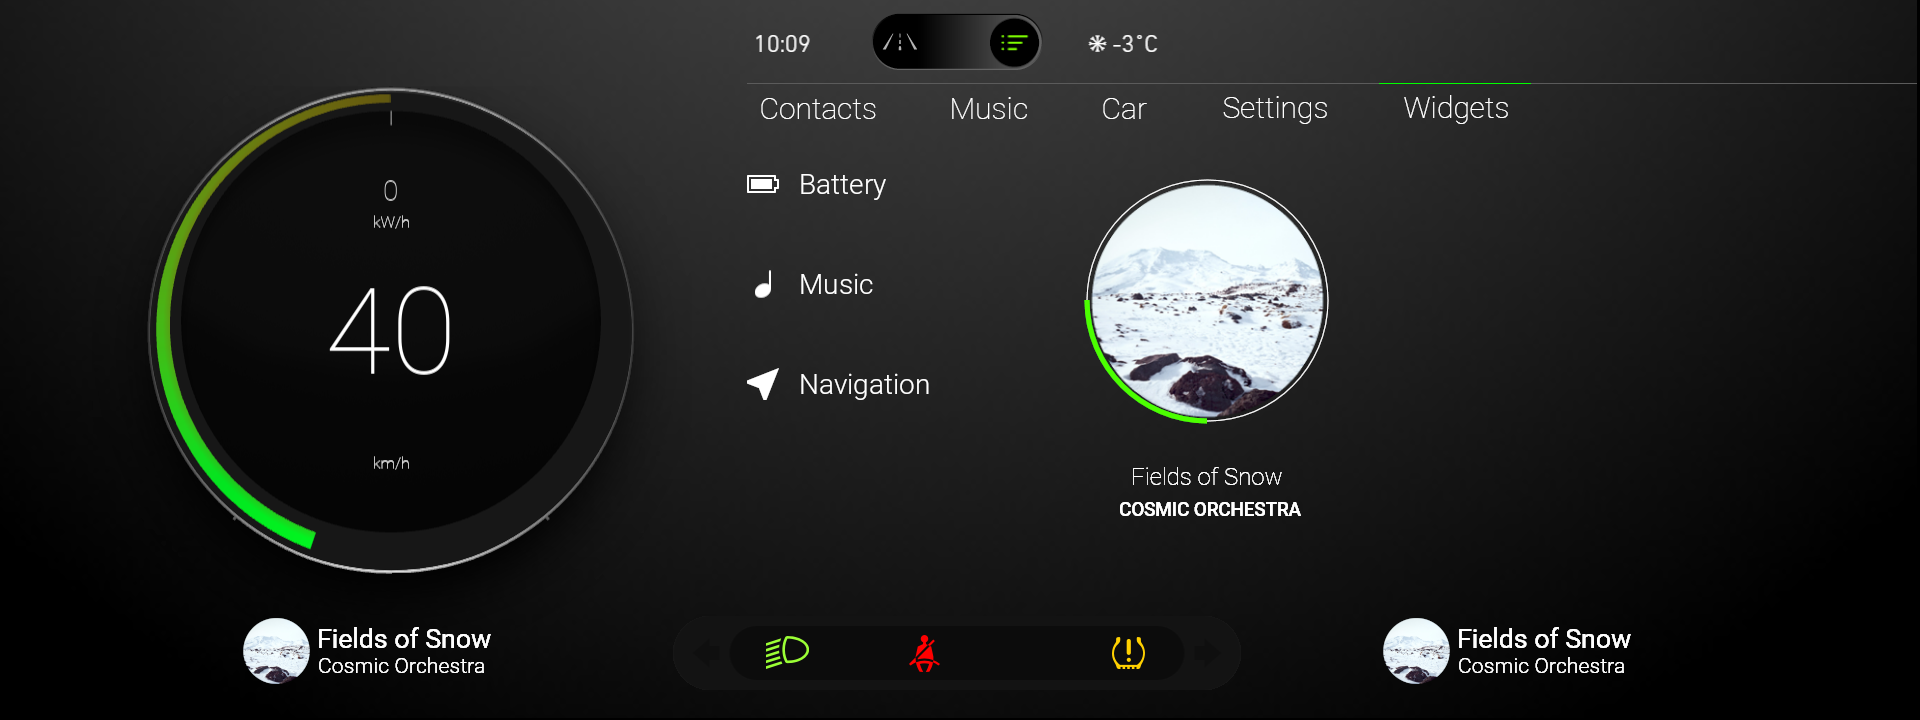
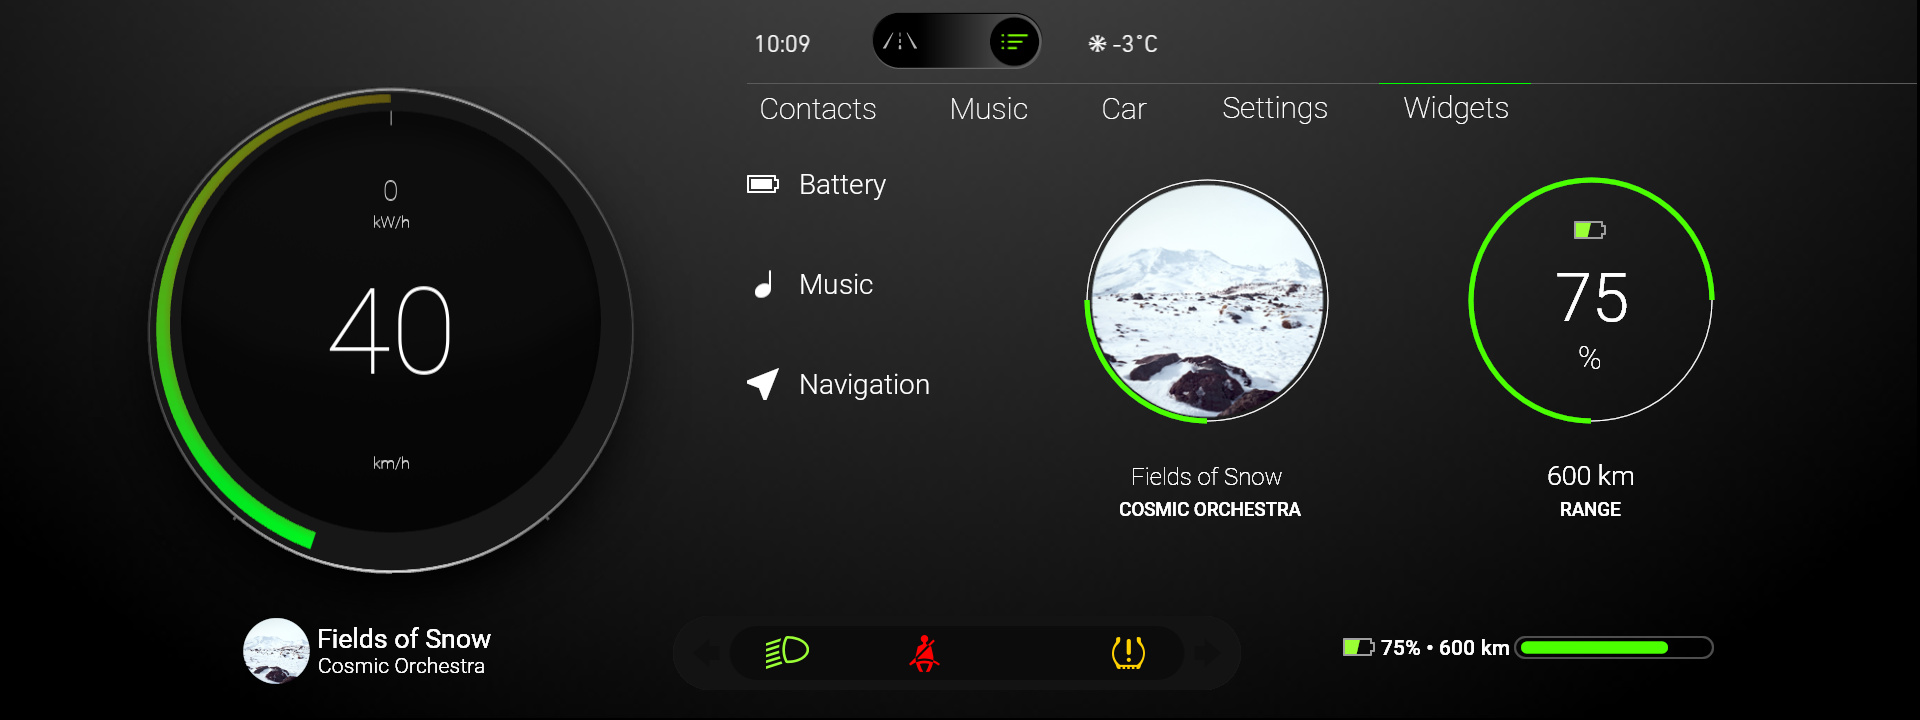
In this tutorial you use C++ Code Behind to enable the user to select the widgets that they want to use by dragging and dropping a widget from a list of widgets.
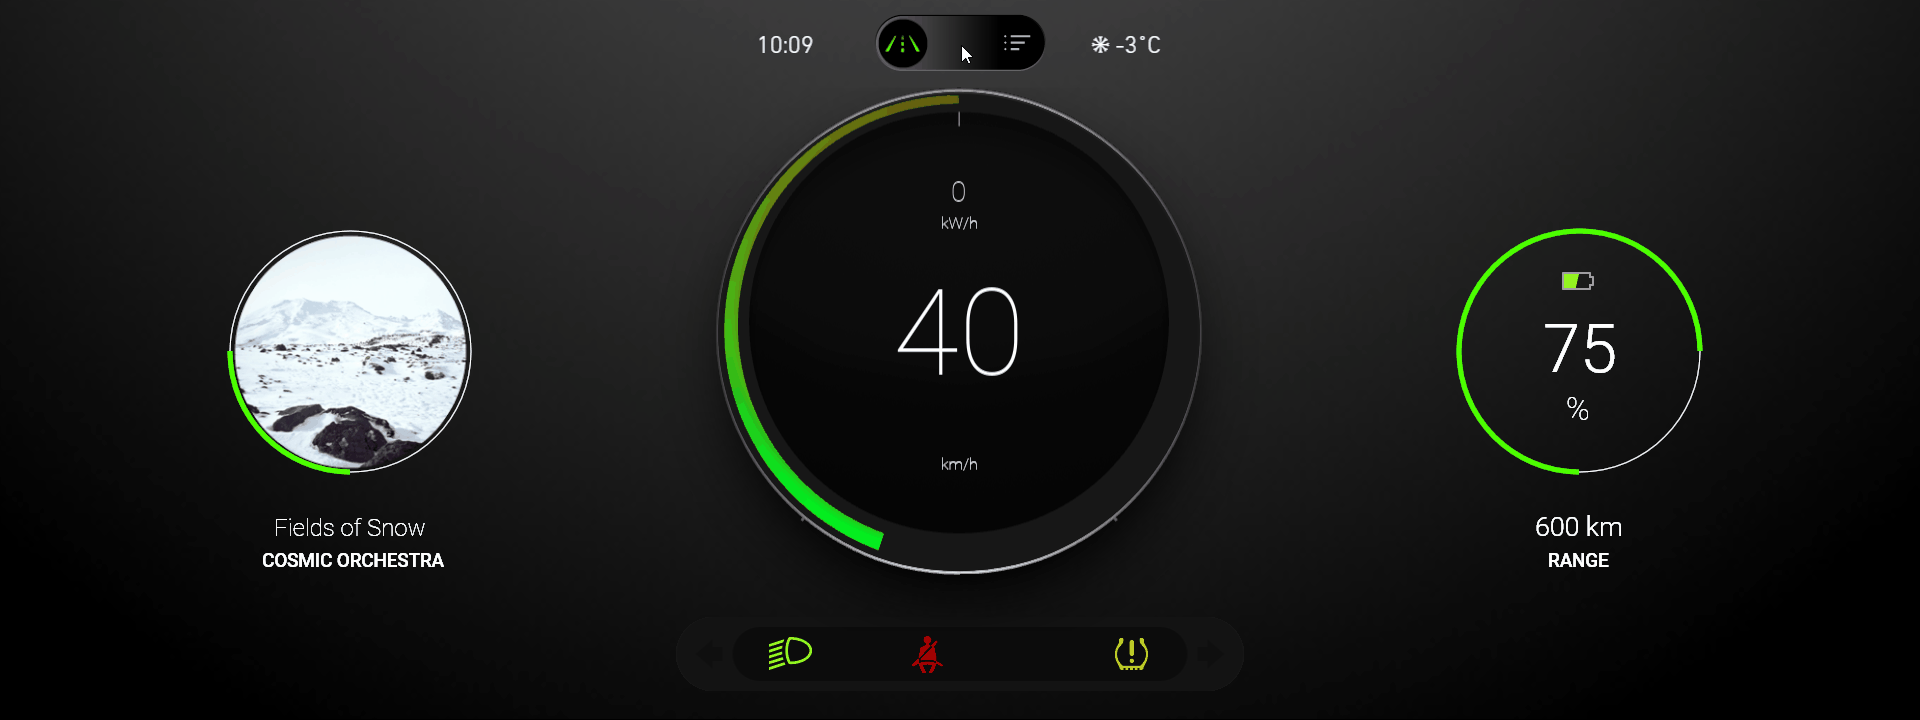
This video shows the result of the tutorial.
Before you start this tutorial, make sure that you have your Kanzi development environment set up. For developing application logic with Kanzi Engine API, you need:
CMake 3.15 or newer
Visual Studio 2019 or Visual Studio 2017 with the latest updates
This tutorial assumes that you understand the basics of working with the Kanzi Activity system. The best entry points for that are tutorials:
Assets for the tutorial
The starting point of this tutorial is the <KanziWorkspace>/Tutorials/Program Activities/Start/Tool_project/Program Activities.kzproj Kanzi Studio project. To learn about the content of this project and how to create such a project, see Tutorial: Control application UI.
You can find the completed tutorial in the <KanziWorkspace>/Tutorials/Program Activities/Completed directory.
The starting point project contains the assets that you need to complete this tutorial:
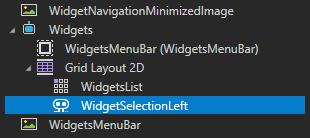
The Widgets Activity prefab contains the mockup for the Widgets panel in the application. In this Activity you create the drag-and-drop functionality with C++ Code Behind. The Activity uses a Grid Layout 2D to lay out the content.
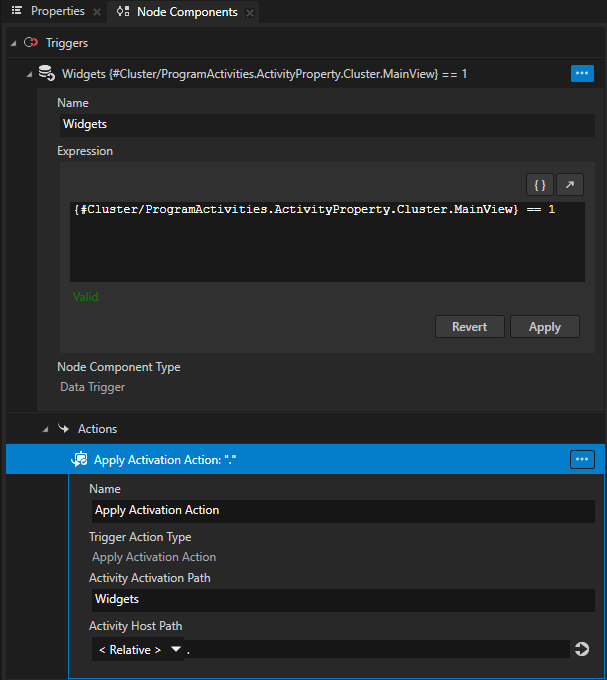
The GaugeView > GaugeViewActivityHost contains a Data Trigger with an Apply Activation Action that keeps the Widgets Activity active when the Cluster Activity Host is in the Browse mode.
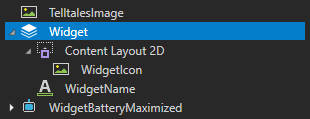
The Widget prefab that you use as a template for each widget in a list of widgets in the Widgets Activity. The widget image for the WidgetIcon and the widget name for the WidgetName are set in the Widgets data source.
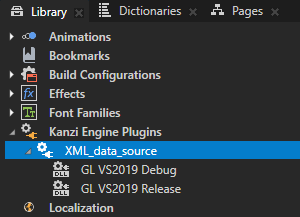
The XML_data_source is a Kanzi Engine plugin that provides limited support for using XML as a source of data for your Kanzi application.
You use this Kanzi Engine data source plugin to get data from an XML data source and use it to show a list of widgets.
To learn more about this plugin and how to define your own data source, see Tutorial: Get application data from a data source.
The Widgets data source uses the
Application/bin/Widgets.xmlto describe each widget.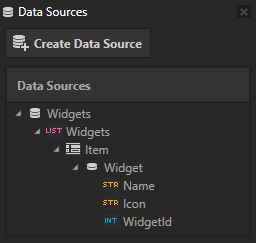
<Widgets type="list">
    <items>
        <Widget>
            <Name type="string">Battery</Name>
            <Icon type="string">file://./WidgetIconBattery.png</Icon>
            <WidgetId type="int">0</WidgetId>
        </Widget>
        <Widget>
            <Name type="string">Music</Name>
            <Icon type="string">file://./WidgetIconMusic.png</Icon>
            <WidgetId type="int">1</WidgetId>
        </Widget>
        <Widget>
            <Name type="string">Navigation</Name>
            <Icon type="string">file://./WidgetIconNavigation.png</Icon>
            <WidgetId type="int">2</WidgetId>
        </Widget>
    </items>
</Widgets>
The
Application/bin/WidgetIcon<WidgetName>.pngare icons that you use to represent each widget in a list in the Widgets Activity. These images are in theApplication/bindirectory so that you can access them from the application code. In theApplication/bin/Widgets.xmltheIconelement contains the path to these images so that the application can use them.
The resource dictionary of the Screen node contains the alias that points to the Cluster Parallel Activity Host. You use this alias to access that Activity Host from the C++ Code Behind application code.
The Header Activity contains a Toggle Button node that enables you to switch between the Drive and Browse application modes.
Create the content for the widget selection area
In this section you create the content and Activity system structure for the widget selection area in the application.
To create the content for the widget selection area:
In Kanzi Studio open the
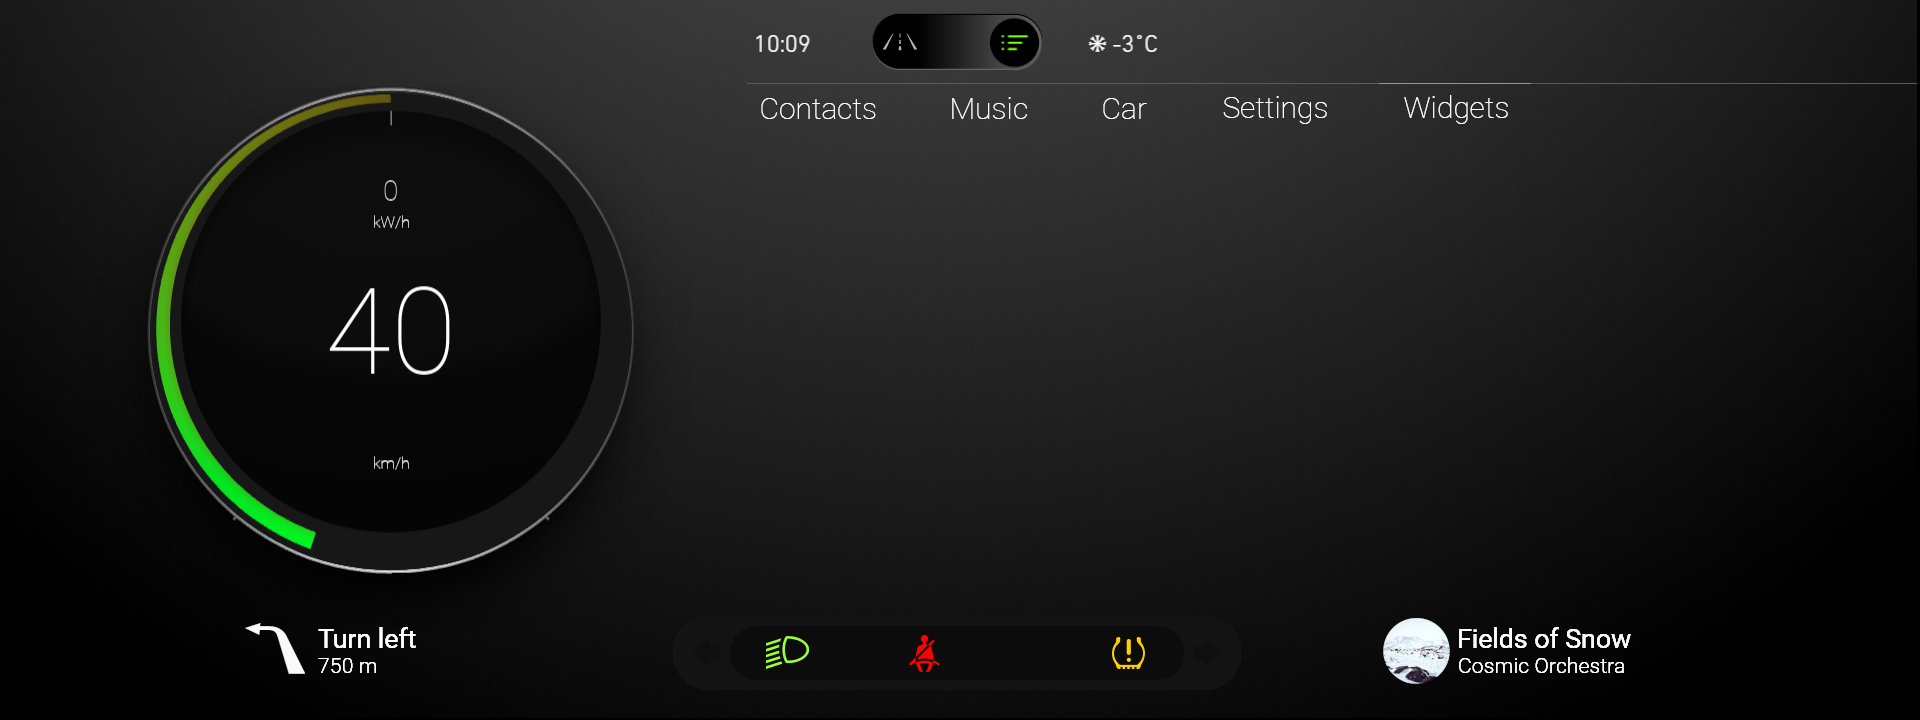
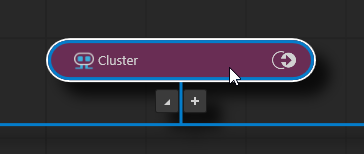
<KanziWorkspace>/Tutorials/Program Activities/Start/Tool_project/Program Activities.kzprojproject.In the Activity Browser select the Cluster and in the side panel set the MainView property to Browse.
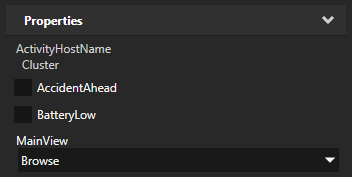
The GaugeView > GaugeViewActivityHost has a Data Trigger that activates its child Activity Widgets when the value of the MainView controller property is set to Browse.
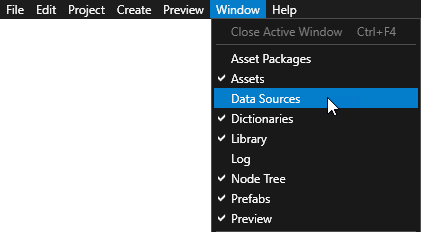
In the Window main menu select Data Sources.
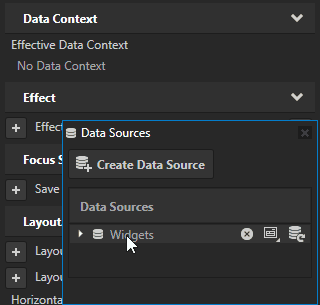
Use the Data Sources window to create, set, and delete the data sources in your project, and to connect data objects from a data source to nodes and resources in your project.
In the Prefabs select Widgets, from the Data Sources drag the Widgets data source to the Properties and drop it on the Effective Data Context property.
This way you set the data source that defines the content for widgets.
In the Prefabs in the Widgets > Grid Layout 2D create a Grid List Box 2D node, and name it WidgetsList.
You use this Grid List Box to show in the Widgets Activity a list of available widgets. The list of widgets comes from the Widgets data source defined in the
Widgets.xml. In the next section of the tutorial when you add the C++ Code Behind functionality to the Widgets Activity, you enable the user to drag a widget from this list and drop it to set either the left- or right-hand area widget.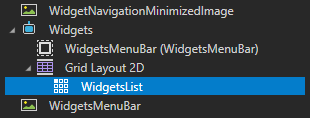
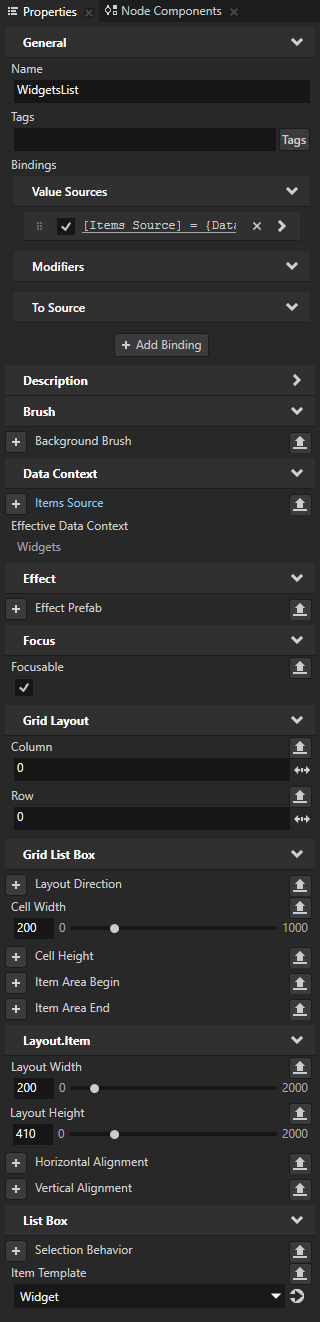
In the Prefabs select the WidgetsList node, and in the Properties add and set:
Grid Layout > Column to 0
Grid Layout > Row to 0
Cell Width to 200
Layout Width to 200
Layout Height to 410
Item Template to Widget
With the Item Template property you set which prefab template you want a Grid List Box node to use for the items in its list.
From the Data Sources drag the Widgets > Widgets list data object to the Items Source property.
This way you set the Grid List Box 2D to list the widgets that are defined in the
Application/bin/Widgets.xml.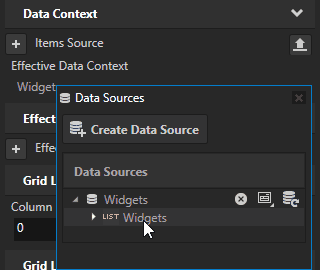
Create the structure for the selection of the left area widget:
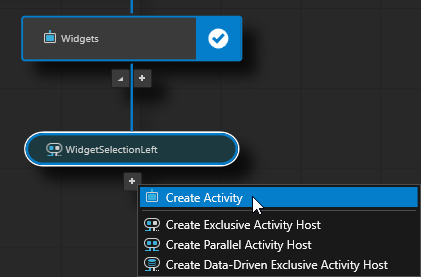
In the Prefabs press Alt and right-click Widgets > Grid Layout 2D, select Exclusive Activity Host 2D, name it WidgetSelectionLeft, and in the Properties add and set:
Grid Layout > Column to 1
Grid Layout > Row to 0
You use this Exclusive Activity Host to show the widget that the user selects for the left-hand area.

In the Activity Browser in the WidgetSelectionLeft click
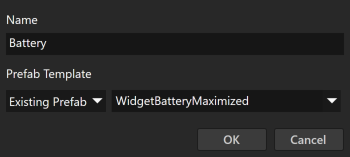
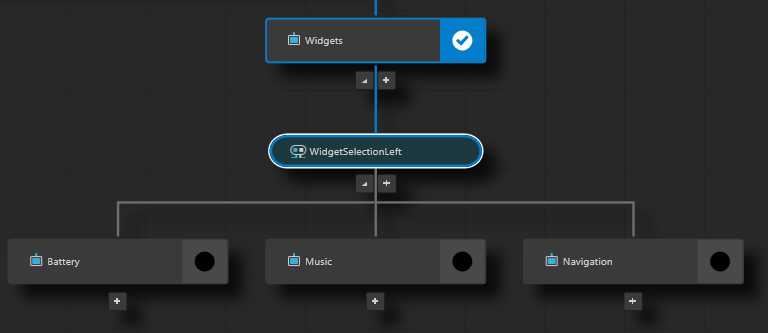
 , select Create Activity, and create an Activity for each widget. For each widget Activity use the prefab of that widget when it is maximized:
For the Battery Activity use the WidgetBatteryMaximized prefab.
For the Music Activity use the WidgetMusicMaximized prefab.
For the Navigation Activity use the WidgetNavigationMaximized prefab.
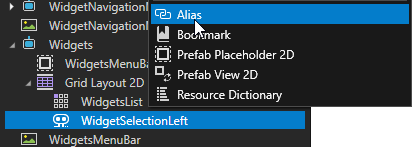
In the Prefabs press Alt and right-click Widgets > Grid Layout 2D > WidgetSelectionLeft and select Alias.
Kanzi Studio creates in the resource dictionary of the Widgets prefab an alias that points to the WidgetSelectionLeft Exclusive Activity Host. You use this alias to access this Exclusive Activity Host from C++ Code Behind.

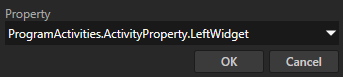
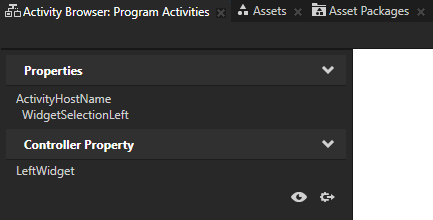
In the Activity Browser select the WidgetSelectionLeft Exclusive Activity Host, in the side panel in the Controller Property click
 , select Property, and set the Property to the ProgramActivities.ActivityProperty.LeftWidget property type.
You use this property type in the C++ Code Behind application code to activate in the WidgetSelectionLeft the Activity that the user drops there. Note that in the ProgramActivities.ActivityProperty.LeftWidget property in the Enumeration Options the Value for each widget must match that in the
WidgetIdelement in theApplication/bin/Widgets.xmldata source.The starting point project of this tutorial uses this property type to set the widgets in the left area of the cluster, both maximized and minimized. Here you use the same property type so that when the user drops a widget to the left widget area of the Widget Activity, the application applies the change to both maximized and minimized widgets in the application.
The Cluster Parallel Activity Host sets the value of the ProgramActivities.ActivityProperty.LeftWidget property.
Tip
To see in the Activity Browser which Activity Host sets the value of a controller property, select an Exclusive Activity Host and in the side panel click
 .
.
Create the structure for the selection of the right-hand area widget:
In the Prefabs right-click the WidgetSelectionLeft Activity Host and select Duplicate.
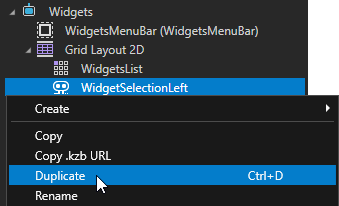

Select the duplicated Activity Host, press F2, and rename it to WidgetSelectionRight.
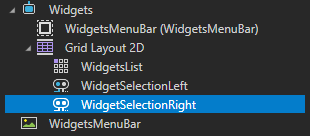
In the Properties set the Column property to 2.

In the Prefabs press Alt and right-click Widgets > Grid Layout 2D > WidgetSelectionRight and select Alias.
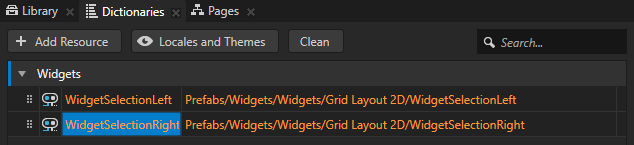
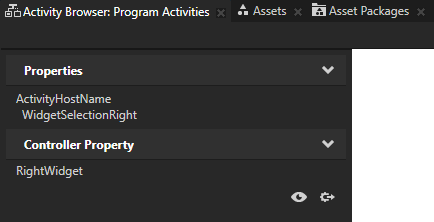
In the Activity Browser select the WidgetSelectionRight Activity Host, in the side panel in the Controller Property click
, select Property, and set the Property to the ProgramActivities.ActivityProperty.RightWidget property type.
Add C++ Code Behind and create the functionality
In this section you add C++ Code Behind to the Widgets Activity and using the Kanzi Engine API create the drag-and-drop functionality that enables the user to select the widget that they want to show in the left- and right-hand areas of the cluster by dragging a widget in the Widgets Activity.
To add C++ Code Behind and create the functionality:
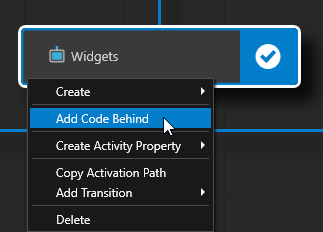
In the Activity Browser right-click the Widgets Activity, select Add Code Behind, and wait for Kanzi Studio to create and add a C++ Code Behind project to the Widgets Activity.
When you add C++ Code Behind to an Activity node, Kanzi Studio:
Copies the C++ Code Behind template from the
<KanziWorkspace>/Templates/Code_behind_template.In the
<ProjectName>/Tool_project/CodeBehinddirectory creates a Visual Studio solution and project for the Activity to which you added C++ Code Behind.Compiles the project.
Imports to the Kanzi Studio project the dll file that contains the functionality defined in the C++ Code Behind Visual Studio project as a Kanzi Engine plugin.
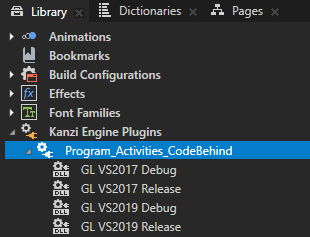
Restarts the Preview.
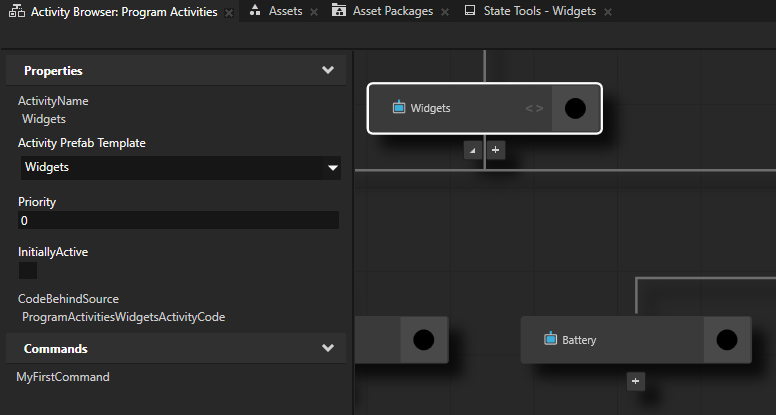
When the Preview starts, in the Activity Browser the Activities with C++ Code Behind contain the
 icon and the side panel shows the commands that are defined in the C++ Code Behind.
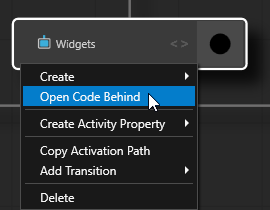
In the Activity Browser right-click the Widgets Activity and select Open Code Behind.
Kanzi Studio opens the C++ Code Behind project in Visual Studio.
In Visual Studio in the Program_Activities_CodeBehind > Header Files in the
program_activities_widgets_activity_code.hppadd:The Kanzi header files that you need to implement the functionality for this tutorial:
#include <kanzi/core.ui/data/data_context.hpp>
#include <kanzi/core.ui/input/drag_and_drop_manipulator.hpp>
#include <kanzi/core.ui/node/node2d.hpp>
In the
protectedsection add the attach and detach override functions, and callback functions for thekanzi::DragAndDropManipulator:protected: ... /// NodeComponent::attachOverride implementation. void attachOverride() override; /// NodeComponent::detachOverride implementation. void detachOverride() override; /// Message handler for the DragAndDropManipulator::StartedMessage. /// \param args The DragAndDropManipulator::StartedMessage arguments. void onDragStarted(kanzi::DragAndDropManipulator::StartedMessageArguments& args); /// Message handler for the DragAndDropManipulator::MovedMessage. /// \param args The DragAndDropManipulator::MovedMessage arguments. void onDragMoved(kanzi::DragAndDropManipulator::MovedMessageArguments& args); /// Message handler for the DragAndDropManipulator::FinishedMessage. /// \param args The DragAndDropManipulator::FinishedMessage arguments. void onDragFinished(kanzi::DragAndDropManipulator::FinishedMessageArguments& args); /// Updates the position of the dragged widget. /// \param dragPosition The new position of the dragged widget. /// \param dragWorldTransform The world transform matrix of the dragged widget. void updateDragAndDrop(kanzi::Vector2 dragPosition, kanzi::Matrix3x3 dragWorldTransform);
Create the
privatesection and add these members:private: /// The dragged widget node. kanzi::Node2DSharedPtr m_draggedWidget = nullptr; /// The point from which the user started dragging the node, /// relative to the origin (by default the top-left corner) of the node. kanzi::Vector2 m_dragGrabOffset; /// The data context object of the dragged widget that the user starts to drag. kanzi::DataObjectSharedPtr m_draggedDataContext = nullptr; /// Token for the DragAndDropManipulator::StartedMessage. kanzi::Node::MessageSubscriptionToken m_started; /// Token for the DragAndDropManipulator::MovedMessage. kanzi::Node::MessageSubscriptionToken m_moved; /// Token for the DragAndDropManipulator::FinishedMessage. kanzi::Node::MessageSubscriptionToken m_finished;
In Visual Studio in the Program_Activities_CodeBehind > Source Files in the
program_activities_widgets_activity_code.cppadd:The Kanzi header files that you need to implement the drag-and-drop functionality for this tutorial:
#include <kanzi/core.ui/data/data_context.hpp>
#include <kanzi/core.ui/data/data_object.hpp>
#include <kanzi/core.ui/input/drag_and_drop_manipulator.hpp>

#include <kanzi/ui/node/concept/list_box/default_list_box_item_container_generator.hpp>
#include <kanzi/ui/node/concept/list_box/list_box_item_container_generator.hpp>
#include <kanzi/ui/node/grid_list_box2d.hpp>
Create a custom list box item generator that adds a
kanzi::DragAndDropManipulatorto every generated item of a list box.namespace { ... // The custom item generator that adds a DragAndDropManipulator to every generated item of a list box. class CustomItemContainerGenerator : public DefaultListBoxItemContainerGenerator<ListBoxItemContainerGenerator2D> { using BaseClass = DefaultListBoxItemContainerGenerator<ListBoxItemContainerGenerator2D>; public: explicit CustomItemContainerGenerator(Domain* domain) : BaseClass(domain) { } ListBoxItemContainerGenerator2D::ItemContainerSharedPtr acquireItemContainer(string_view name) override { auto manipulator = DragAndDropManipulator::create(getDomain()); manipulator->setPressDuration(chrono::milliseconds(100u)); auto itemContainer = BaseClass::acquireItemContainer(name); itemContainer->addInputManipulator(manipulator); return itemContainer; } }; }
To take into use the custom list box generator for the
WidgetsListGrid List Box that you created in the previous step, replace the existingProgramActivitiesWidgetsActivityCode::registerStatusChangeOverride()function with// When the Widgets Activity is activated, use the custom item generator CustomItemContainerGenerator to // add a DragAndDropManipulator to every generated item of the WidgetsList Grid List Box. void ProgramActivitiesWidgetsActivityCode::registerStatusChangeOverride() { registerStatusChange(ActivityConcept::Status::Active, [this](ActivityConcept::StatusChangedMessageArguments&) { auto listbox = getNode()->lookupNode<GridListBox2D>("Grid Layout 2D/WidgetsList"); if (!listbox) { kzLogWarning(KZ_LOG_CATEGORY_GENERIC, ("Widgets CodeBehind: Could not find the WidgetsList list box.")); } else { auto generator = make_shared<CustomItemContainerGenerator>(getDomain()); listbox->setItemContainerGenerator(generator); } }); registerStatusChange(ActivityConcept::Status::Inactive, [](ActivityConcept::StatusChangedMessageArguments&) { kzLogInfo(KZ_LOG_CATEGORY_GENERIC, ("Activity status changed: Inactive")); }); registerStatusChange(ActivityConcept::Status::Activating, [](ActivityConcept::StatusChangedMessageArguments&) { kzLogInfo(KZ_LOG_CATEGORY_GENERIC, ("Activity status changed: Activating")); }); registerStatusChange(ActivityConcept::Status::Deactivating, [](ActivityConcept::StatusChangedMessageArguments&) { kzLogInfo(KZ_LOG_CATEGORY_GENERIC, ("Activity status changed: Deactivating")); }); }
To initialize the dragged widget, replace the existing
ProgramActivitiesWidgetsActivityCode::initialize()function with// To show the dragged widget from drag start till drag end, instantiate the Widget prefab. // The visibility of dragged widget is handled in the DragAndDropManipulator message handlers. void ProgramActivitiesWidgetsActivityCode::initialize() { // Get the reference to the dragged widget prefab. auto dragItemPrefab = getDomain()->getResourceManager()->acquireResource<PrefabTemplate>("kzb://program_activities/Prefabs/Widget"); kzAssert(dragItemPrefab); // Instantiate the dragged widget prefab. m_draggedWidget = dragItemPrefab->instantiate<Node2D>("Dragged widget"); }
Add the handlers for the drag messages, using the
ProgramActivitiesWidgetsActivityCode::attachOverride()and theProgramActivitiesWidgetsActivityCode::detachOverride()functions.// After the Widget Activity is attached to the Node Tree, // add the DragAndDropManipulator message handlers. void ProgramActivitiesWidgetsActivityCode::attachOverride() { ActivityCodeBehind::attachOverride(); m_started = getNode()->addMessageFilter(DragAndDropManipulator::StartedMessage, this, &ProgramActivitiesWidgetsActivityCode::onDragStarted); m_moved = getNode()->addMessageFilter(DragAndDropManipulator::MovedMessage, this, &ProgramActivitiesWidgetsActivityCode::onDragMoved); m_finished = getNode()->addMessageFilter(DragAndDropManipulator::FinishedMessage, this, &ProgramActivitiesWidgetsActivityCode::onDragFinished); } // Remove the DragAndDropManipulator message handlers // before detaching the Widget Activity from the the Node Tree. void ProgramActivitiesWidgetsActivityCode::detachOverride() { if (m_started.isValid()) { getNode()->removeMessageHandler(m_started); } if (m_moved.isValid()) { getNode()->removeMessageHandler(m_moved); } if (m_finished.isValid()) { getNode()->removeMessageHandler(m_finished); } ActivityCodeBehind::detachOverride(); }
Create the handlers for the drag messages.
// When the drag has started, render the instantiated Widget prefab.
void ProgramActivitiesWidgetsActivityCode::onDragStarted(DragAndDropManipulator::StartedMessageArguments& messageArguments)
{
    auto rootHost = getNode()->lookupNode<Node2D>("#Cluster");
    kzAssert(rootHost);

    rootHost->addChild(m_draggedWidget);

    // Get the dragged widget from the message arguments.
    auto dragSourceItem = dynamic_pointer_cast<ListBoxItemContainer2D>(messageArguments.getSource());
    kzAssert(dragSourceItem);

    // Set the size of the dragged widget to be the same as the size of the widget that the user starts to drag.
    auto dragSourceItemSize = dragSourceItem->getActualSize();
    m_draggedWidget->setSize(dragSourceItemSize.getX(), dragSourceItemSize.getY());

    // Set the dragged widget to have the same Data Context as the widget that the user starts to drag.
    auto item = dragSourceItem->getItem();
    kzAssert(item);
    m_draggedDataContext = dynamic_pointer_cast<DataObject>(item->getProperty(DataContext::DataContextProperty));
    kzAssert(m_draggedDataContext);
    m_draggedWidget->setProperty(DataContext::DataContextProperty, m_draggedDataContext);

    // Save the point from which the user started dragging the node,
    // relative to the origin (by default the top-left corner) of the node.
    m_dragGrabOffset = messageArguments.getPoint();

    // Move the dragged widget to the correct position.
    updateDragAndDrop(messageArguments.getPoint(), dragSourceItem->getWorldTransform());

    // Make the dragged widget visible.
    m_draggedWidget->setVisible(true);
}

// Update the position of the rendered Widget, with respect to the cursor position.
void ProgramActivitiesWidgetsActivityCode::onDragMoved(DragAndDropManipulator::MovedMessageArguments& messageArguments)
{
    // Get the dragged widget from the message arguments.
    auto dragSourceItem = dynamic_pointer_cast<Node2D>(messageArguments.getSource());
    kzAssert(dragSourceItem);

    // Move the dragged widget to the correct position.
    updateDragAndDrop(messageArguments.getPoint(), dragSourceItem->getWorldTransform());
}

// When the drag is finished, hide the rendered Widget,
// and if the drop point was over the children of either the WidgetSelectionLeft or WidgetSelectionRight Activity Host,
// update the controller property of the respective Activity Host to show the dropped widget.
void ProgramActivitiesWidgetsActivityCode::onDragFinished(DragAndDropManipulator::FinishedMessageArguments& messageArguments)
{
    auto rootHost = getNode()->lookupNode<Node2D>("#Cluster");
    if (!rootHost)
    {
        kzLogWarning(KZ_LOG_CATEGORY_GENERIC, ("Widgets CodeBehind: Could not find the Cluster Activity Host node."));
    }

    rootHost->removeChild(*m_draggedWidget);

    // Hide the dragged widget.
    m_draggedWidget->setVisible(false);

    // Clear the pointer to the data context object.
    m_draggedDataContext.reset();

    // Calculate the local drag anchor that is the top-left corner of the dragged widget that the user is dragging.
    const auto dragPosition = messageArguments.getPoint();
    const auto localDragAnchor = dragPosition - m_dragGrabOffset;

    // Calculate the global drag anchor.
    auto dragSourceItem = dynamic_pointer_cast<Node2D>(messageArguments.getSource());
    kzAssert(dragSourceItem);

    const auto dragWorldTransform = dragSourceItem->getWorldTransform();
    const auto globalDragAnchor = dragWorldTransform * localDragAnchor;

    // Get the drop point node.
    auto hitTestNode = rootHost->hitTest(globalDragAnchor);
    if (!hitTestNode)
    {
        return;
    }

    // From the dragged widget, get the widget ID from the data source.
    // Use this widget ID to set the controller property of the WidgetSelectionLeft or WidgetSelectionRight Activity Host.
    auto draggedData = dynamic_pointer_cast<DataContext>(m_draggedWidget->getProperty(DataContext::DataContextProperty));
    kzAssert(draggedData);
    auto nameData = dynamic_pointer_cast<DataObject>(draggedData->lookupDataContext("Widget.WidgetId"));
    kzAssert(nameData);

    const auto nameIndex = get<int>(nameData->readVariant());

    auto leftArea = dragSourceItem->lookupNode<Node>("#WidgetSelectionLeft");
    auto rightArea = dragSourceItem->lookupNode<Node>("#WidgetSelectionRight");

    // Check whether the drop point node is a child of WidgetSelectionLeft or WidgetSelectionRight Activity Host.
    if (leftArea && isAncestorOf(*hitTestNode, *leftArea))
    {
        kzLogDebug(("Widgets CodeBehind: Dropped the dragged widget to the left widget Activity."));

        // Set the controller property of the WidgetSelectionLeft Activity Host to show the dropped widget.
        // Note that controller property of the WidgetSelectionLeft Activity Host is set on the Cluster root Activity Host.
        DynamicPropertyType<int> leftWidgetPropertyType("ProgramActivities.ActivityProperty.LeftWidget");
        rootHost->setProperty(leftWidgetPropertyType, nameIndex);
    }
    else if (rightArea && isAncestorOf(*hitTestNode, *rightArea))
    {
        kzLogDebug(("Widgets CodeBehind: Dropped the dragged widget to the right widget Activity."));

        // Set the controller property of the WidgetSelectionRight Activity Host to show the dropped widget.
        // Note that controller property of the WidgetSelectionLeft Activity Host is set on the Cluster root Activity Host.
        DynamicPropertyType<int> rightWidgetPropertyType("ProgramActivities.ActivityProperty.RightWidget");
        rootHost->setProperty(rightWidgetPropertyType, nameIndex);
    }
}

// Helper method to update the render position of the dragged Widgets prefab.
void ProgramActivitiesWidgetsActivityCode::updateDragAndDrop(Vector2 dragPosition, Matrix3x3 dragWorldTransform)
{
    // Calculate the local drag anchor that is the top-left corner of the dragged widget that the user is dragging.
    const auto localDragAnchor = dragPosition - m_dragGrabOffset;

    // Calculate the global drag anchor.
    const auto globalDragAnchor = dragWorldTransform * localDragAnchor;

    // The structure that you use to describe the Render Transformation property of the dragged widget.
    SRTValue2D transform;
    // Set the Render Transformation property Translation property field to the global drag anchor.
    transform.setTranslation(globalDragAnchor);

    // Move the dragged widget for the amount of the dragged distance.
    m_draggedWidget->setRenderTransformation(transform);
}
In Kanzi Studio restart the Preview.
When you restart the Preview, Kanzi Studio rebuilds the C++ Code Behind code to take the updated code into use.
In the Activity Browser when you set in the Cluster the MainView property to Browse, you can drag a widget from the list and drop it on the left or right widget to set the widget that you want to use in the cluster.
What's next?
In this tutorial you learned how to program Activities with the Code Behind workflow. You used C++ Code Behind to enable the user to select widgets by dragging and dropping a widget from a list of widgets.
Now you can:
Learn how to define a data source. See Tutorial: Get application data from a data source.
Learn how to use a List Box. See Tutorial: Create a contacts list with a Grid List Box.
See also
To learn more about the Code Behind worklow, see Programming Activities with Code Behind.
To learn more about the Activity system, see Activities.
To learn more about the Data Sources, see Data sources.
To learn more about the Grid List Box nodes, see Using the Grid List Box nodes.
To learn more about using bindings, see Using bindings and Bindings expressions reference.