Scroll view example
This example shows how to use the Scroll View node as a controller for moving a map plane in a scene. In the example the Kanzi Studio project contains a Scroll View node which translates the scroll position coordinates to the translation fields of a node. The example implements more advanced features in the C++ application using the Kanzi Engine API.
A key aspect in using the Scroll View node is the controlling of input sensitivity based on the distance of the scroll view plane from the camera. This example uses a one-to-one mapping with the background plane by positioning them at the same distance and orientation from the camera. Scroll view and the background plane, however, are not tied together under the same translation because that way the input coordinate space would move along with the background plane during the user's panning gesture. By positioning the scroll view plane further from the camera, the sensitivity of scroll view gestures increases.
This example demonstrates the use of a raw InterpolatedValue instance in the C++ application for afflicting a z-offset (zoom) based on the velocity of the movement.
The scroll view as well as the trajectory list box components manipulate input to output coordinates through a value interpolator, effectively allowing for smoother gesture mappings that are often most suitable for touchscreen based interactions.
You can find the example in the <KanziWorkspace>/Examples/Scroll_view directory.
Running the example
To run the example:
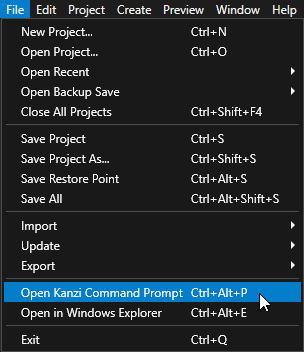
In Kanzi Studio, select File > Open Kanzi Command Prompt.
The Kanzi Command Prompt opens the Windows Command Prompt with the Kanzi environment variables set for the version of Kanzi for which you open a Kanzi Command Prompt.
Use the Kanzi Command Prompt to access Kanzi utilities and build tools, such as Gradle, SCons, and CMake, without using absolute paths or setting environment variables.
Tip
You can find the Kanzi Command Prompt in the Windows Start Menu in the Rightware directory.
When you have more than one version of Kanzi installed, make sure that you launch a Kanzi Command Prompt for the version of Kanzi with which you want to work in that command prompt.
In the Kanzi Command Prompt in the
<KanziWorkspace>/Examples/Scroll_view/Applicationdirectory run the script that generates a Visual Studio solution for the example application.For example, if you use Visual Studio 2019, run
generate_cmake_vs2019_solution.bat
This script generates a Visual Studio solution for the application in the directory
<KanziWorkspace>/Examples/Scroll_view/Application/build_vs2019.In Visual Studio open the
<KanziWorkspace>/Examples/Scroll_view/Application/build_vs<Version>/Scroll_view.slnVisual Studio solution.In Visual Studio in the Solution Explorer right-click the
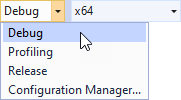
Scroll_viewproject and select Set as StartUp Project.Select the solution configuration that you want to use and run your application.
During development, select the Debug configuration. When you are ready to create a version for production, select the Release configuration.