Step 3 - Fine-tune the bloom effect
In this step you first convert the render passes, which you created in the previous step for the bloom effect, to a render pass prefab that you can reuse and apply multiple times. You then create multiple passes of the bloom effect. To make the effect spread to a wider area and look more realistic, you adjust the settings of the blur and the intensity of the bloom in each pass.
Reuse the render passes that apply the bloom effect
In this section you convert the render passes, which create the first pass of the bloom effect, into a render pass prefab that you instantiate using the Render Pass View.
To reuse the render passes that apply the bloom effect:
Create and instantiate the render pass prefab that applies one pass of the bloom effect:
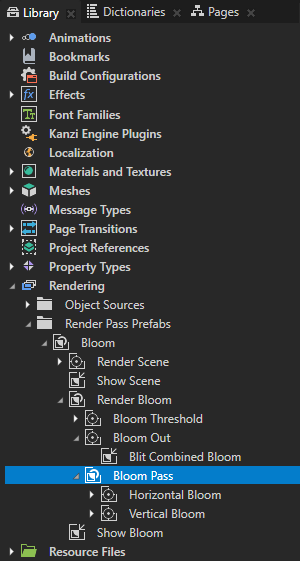
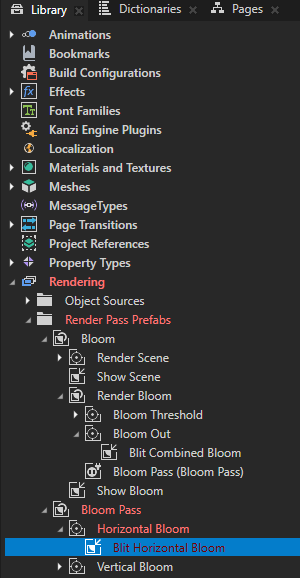
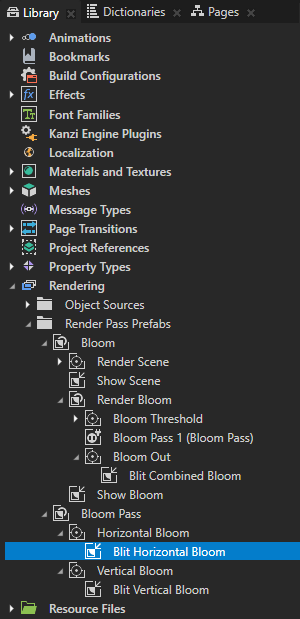
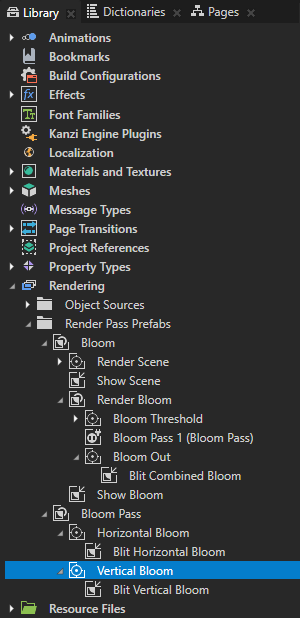
In the Library > Rendering > Render Pass Prefabs > Bloom > Render Bloom create a Group Render Pass, name it Bloom Pass, and drag the Horizontal Bloom and Vertical Bloom render passes to the Bloom Pass render pass.
You use the Bloom Pass render pass to group the render passes that apply one pass of the bloom effect.
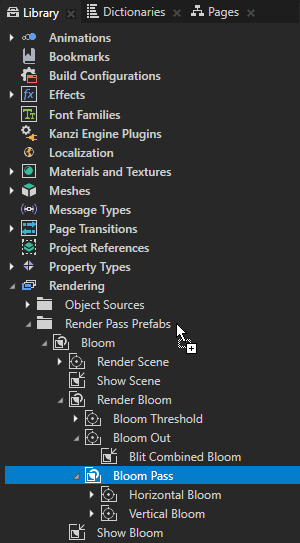
In the Library drag the Bloom Pass render pass to the Render Pass Prefabs folder.
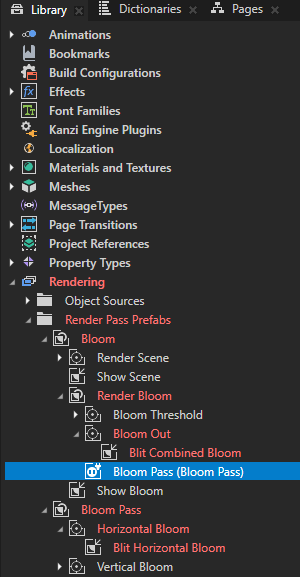
This way you convert the Bloom Pass render pass into a render pass prefab. Kanzi Studio creates in the Render Bloom render pass a Render Pass View named Bloom Pass, which instantiates the Bloom Pass render pass prefab.
In the Library > Rendering > Render Pass Prefabs all top-level items are render pass prefabs that you can instantiate using the Render Pass View.
Kanzi Studio marks as invalid those render passes that contain invalid bindings. The bindings are invalid because they bind properties of render passes that are no longer in the same render pass prefab.
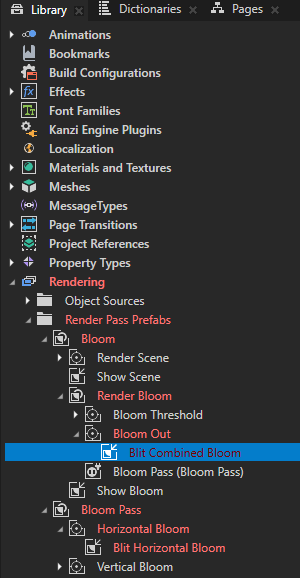
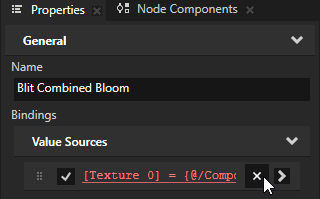
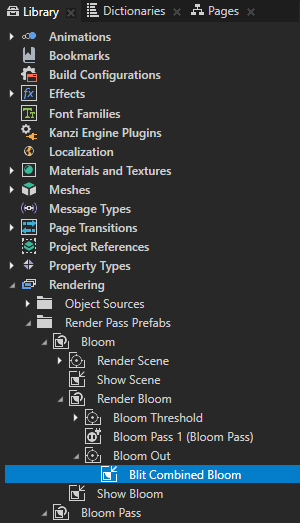
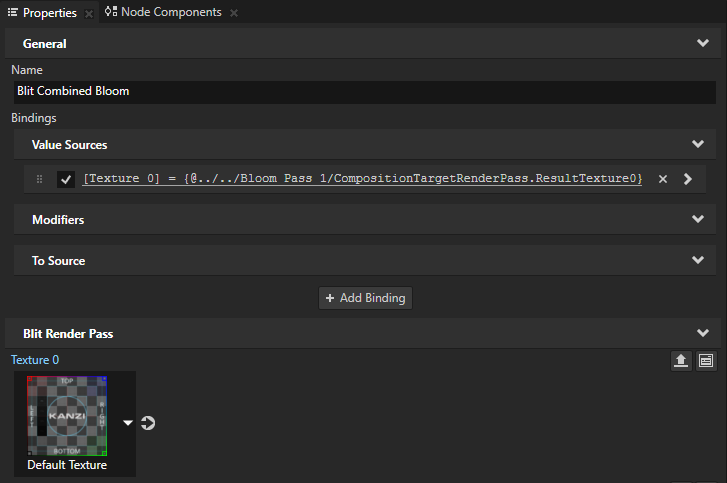
In the Library in the Bloom render pass prefab select the Blit Combined Bloom render pass and in the Properties next to the invalid binding click
 to remove that binding.
You cannot bind the Texture 0 property of the Blit Combined Bloom render pass to the result texture of the Vertical Bloom render pass, which is in a different render pass prefab.
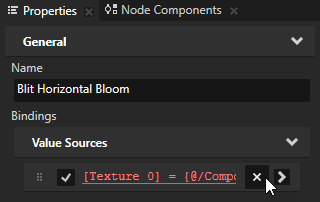
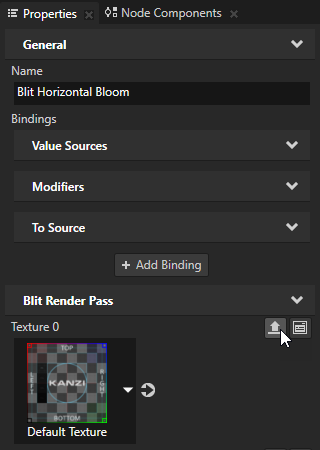
In the Library in the Bloom Pass render pass prefab select the Blit Horizontal Bloom render pass and in the Properties next to the invalid binding click
to remove that binding.You cannot bind the Texture 0 property of the Blit Horizontal Bloom render pass to the result texture of the Bloom Threshold render pass, which is in a different render pass prefab.
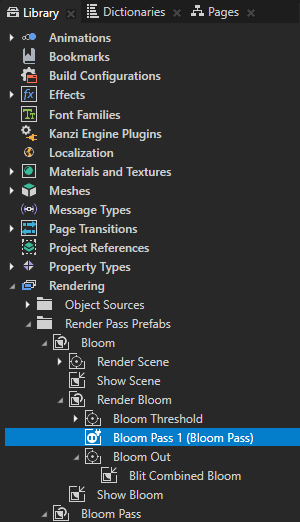
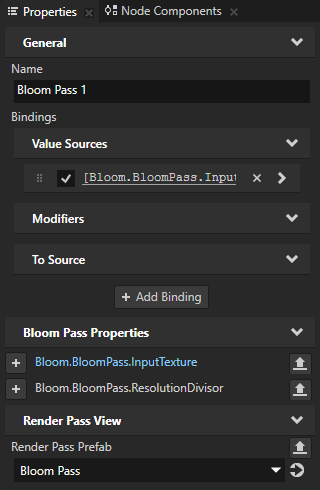
In the Library in the Bloom render pass prefab rename the Bloom Pass Render Pass View to Bloom Pass 1, and drag it above the Bloom Out render pass.


Set the textures that Bloom Pass 1 takes as input and outputs:
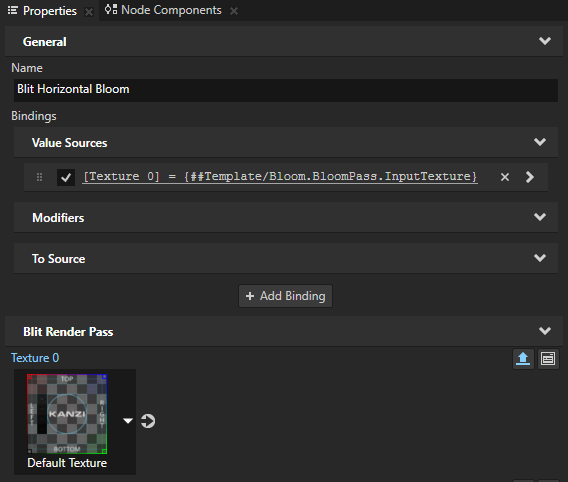
In the Library in the Bloom Pass render pass prefab select the Blit Horizontal Bloom render pass, in the Properties next to the Texture 0 property click
 , in the Publish Property dialog name the property type Bloom.BloomPass.InputTexture, and click OK.
Kanzi Studio:
Creates from the Texture 0 property a custom property named Bloom.BloomPass.InputTexture.
Adds the Bloom.BloomPass.InputTexture property to the root of the Bloom Pass render pass prefab, and creates in the Blit Horizontal Bloom render pass a
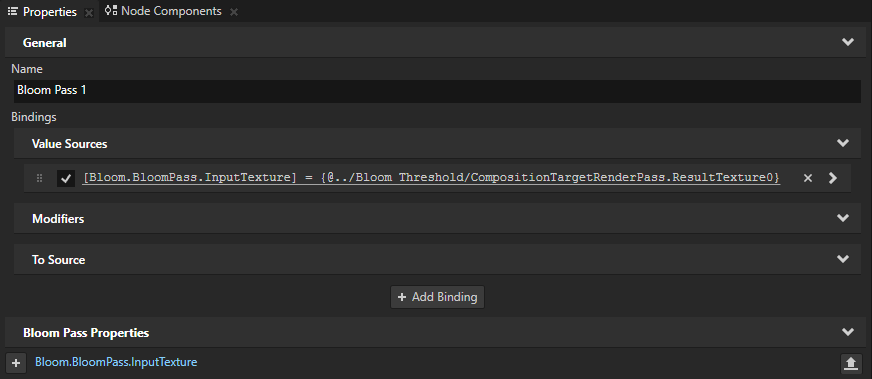
#Templatebinding to the property in the render pass prefab root.Shows the Bloom.BloomPass.InputTexture property as a frequently used property in the Bloom Pass 1 render pass view, which instantiated the Bloom Pass render pass prefab.
You can now use the Bloom.BloomPass.InputTexture property type to set the Texture 0 property of the Blit Horizontal Bloom render pass to a different value in each Render Pass View that instantiates the Bloom Pass render pass prefab.
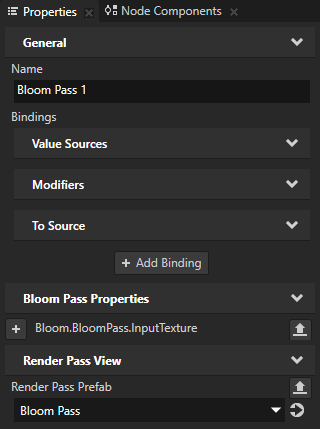
In the Library in the Bloom render pass prefab select the Bloom Pass 1 Render Pass View, from the Library drag the Bloom Threshold render pass to the Properties window, and drop it on the Bloom.BloomPass.InputTexture property of the Bloom Pass 1.
You set the Bloom Pass 1 Render Pass View to take as its input the result texture of the Bloom Threshold render pass.
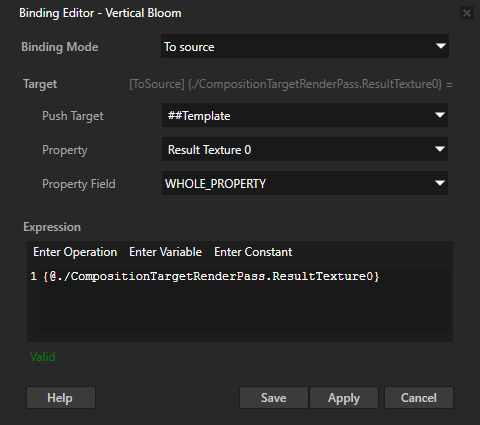
In the Library in the Bloom Pass render pass prefab select the Vertical Bloom render pass, in the Properties click + Add Binding, and in the Binding Editor set:
Binding Mode to To source
Kanzi Studio automatically sets the Push Target property to ##Template. This pushes the property value, which this binding sets, to the render pass prefab root.
Property to [Existing Properties] > Result Texture 0
Expression to
{@./CompositionTargetRenderPass.ResultTexture0}
Click Save.
This binding pushes the value of the Result Texture 0 property of the Vertical Bloom render pass to the root of the Bloom Pass render pass prefab. The Result Texture 0 property of the Vertical Bloom render pass is now available in each Render Pass View that instantiates the Bloom Pass render pass prefab.
In the Library in the Bloom render pass prefab select the Blit Combined Bloom render pass, from the Library drag the Bloom Pass 1 Render Pass View to the Properties window, and drop it on the Texture 0 property of the Blit Combined Bloom render pass.
You set the Blit Combined Bloom render pass to draw on the screen the result texture of the Bloom Pass 1 Render Pass View. This is the result texture of the Bloom Pass > Vertical Bloom render pass, which you in the previous step made available in the Bloom Pass 1 Render Pass View.
Make the resolution of the composition target customizable in each Render Pass View that instantiates the Bloom Pass render pass prefab:
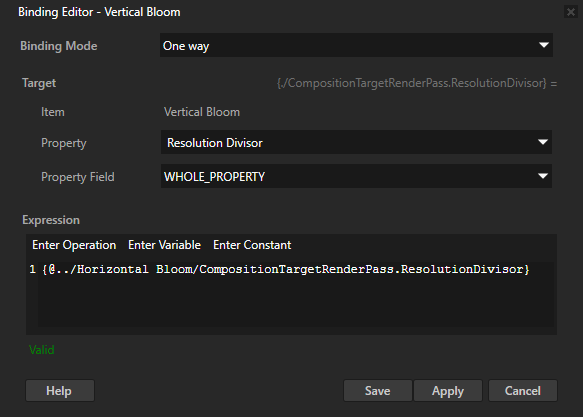
In the Library in the Bloom Pass render pass prefab select the Vertical Bloom render pass, in the Properties click + Add Binding, and in the Binding Editor set:
Property to [Existing Properties] > Resolution Divisor
Expression to
{@../Horizontal Bloom/CompositionTargetRenderPass.ResolutionDivisor}
Click Save.
You bind the Resolution Divisor property of the Vertical Bloom render pass to the Resolution Divisor property of the Horizontal Bloom render pass. With this binding you make sure that the value of the Resolution Divisor property is always the same in the Horizontal Bloom and Vertical Bloom render passes.
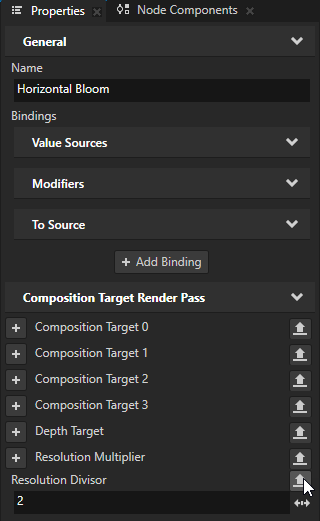
In the Library select the Horizontal Bloom render pass, in the Properties next to the Resolution Divisor property click
, and in the Publish Property dialog click OK.You can now use the Bloom.BloomPass.ResolutionDivisor property type to set the Resolution Divisor property of the Blit Horizontal Bloom render pass to a different value in each Render Pass View that instantiates the Bloom Pass render pass prefab.

In the Library select the Blit Vertical Bloom render pass, in the Properties next to the Blur Direction property click
, in the Publish Property dialog name the property type Bloom.BloomPass.VerticalBlurDirection, and click OK.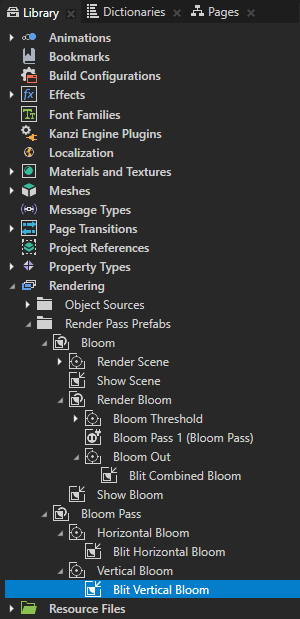
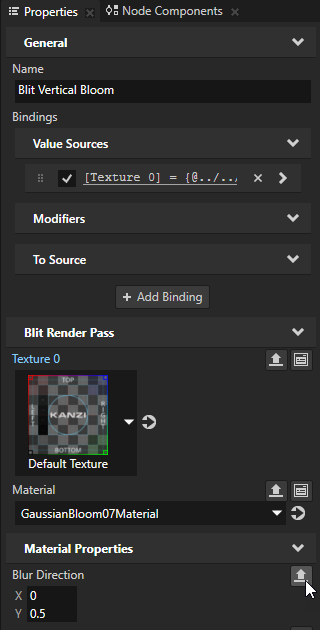
Make the material, which the Blit Horizontal Bloom and Blit Vertical Bloom render passes use to draw textures, customizable in each Render Pass View that instantiates the Bloom Pass render pass prefab:
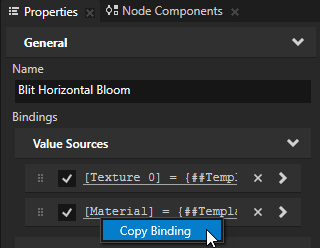
In the Library select the Blit Horizontal Bloom render pass, in the Properties next to the Material property click
, and in the Publish Property dialog click OK.
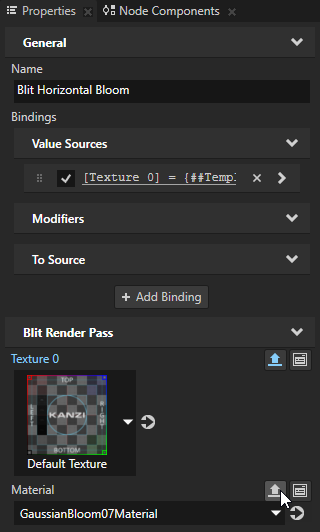
In the Properties right-click the binding that binds the Material property and select Copy Binding.
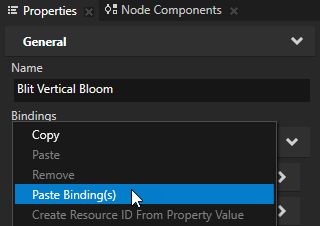
In the Library select the Blit Vertical Bloom render pass, in the Properties right-click Bindings, and select Paste Binding(s).
Repeat the previous step twice to make these properties customizable in each Render Pass View that instantiates the Bloom Pass render pass prefab:
Blur Radius
Intensity
Kanzi Studio now shows the properties, which you made customizable, as frequently used properties in the Bloom Pass 1 Render Pass View which instantiates the Bloom Pass render pass prefab.
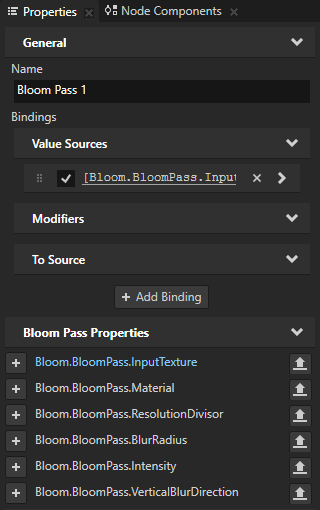
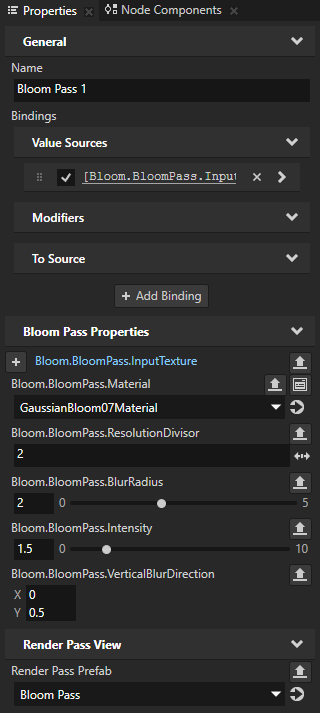
In the Library select the Bloom Pass 1 Render Pass View, and in the Properties add and set:
Bloom.BloomPass.Material to GaussianBloom07Material
Bloom.BloomPass.ResolutionDivisor to 2
Bloom.BloomPass.BlurRadius to 2
Bloom.BloomPass.Intensity to 1.5
Bloom.BloomPass.VerticalBlurDirection property Y property field to 0.5
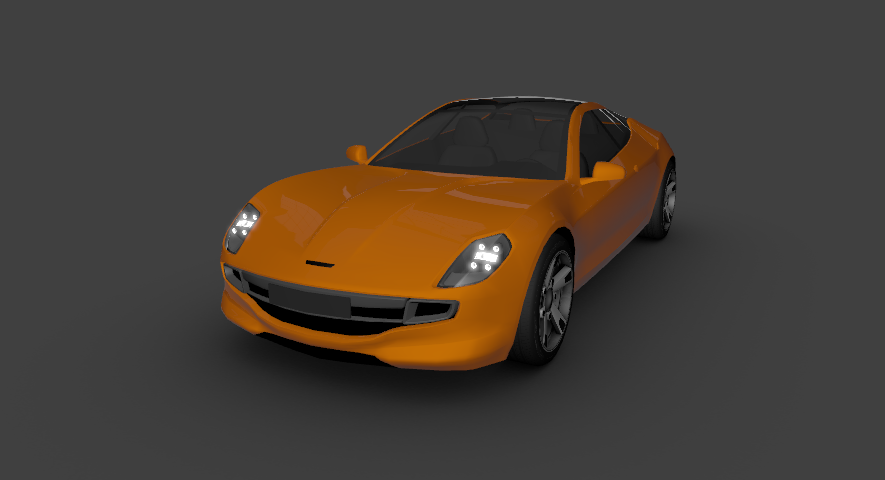
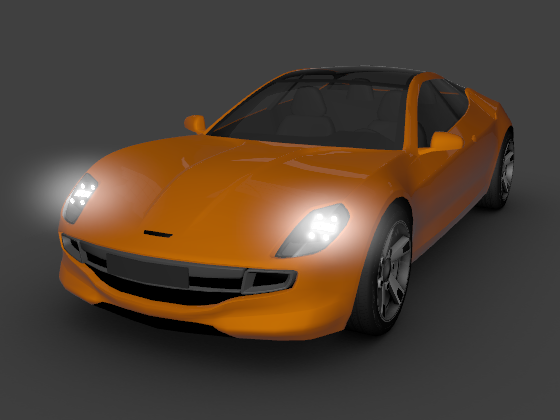
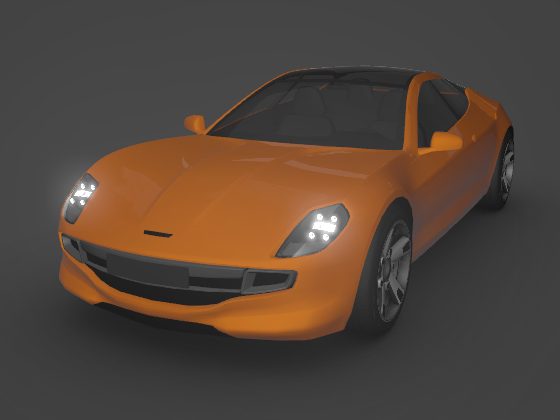
The Preview now shows the first pass of the bloom effect.
Adjust the spread and intensity of the bloom effect
In this section you create multiple passes of the bloom effect. You use the Render Pass View to instantiate the Bloom Pass render pass prefab multiple times, customizing each instance to adjust the spread and intensity of the bloom effect.
To adjust the spread and intensity of the bloom effect:
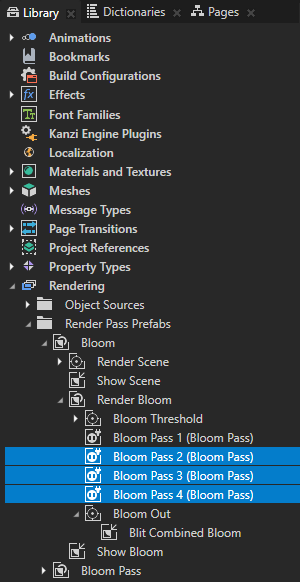
In the Library duplicate the Bloom Pass 1 Render Pass View three times, name the duplicates Bloom Pass 2, Bloom Pass 3, and Bloom Pass 4, and drag them above the Bloom Out render pass.
Set the Blit Combined Bloom render pass to draw the combined result of all four passes of the bloom effect:
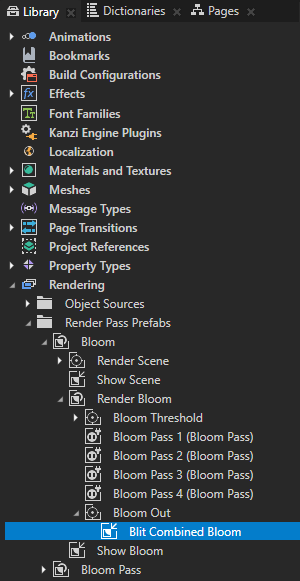
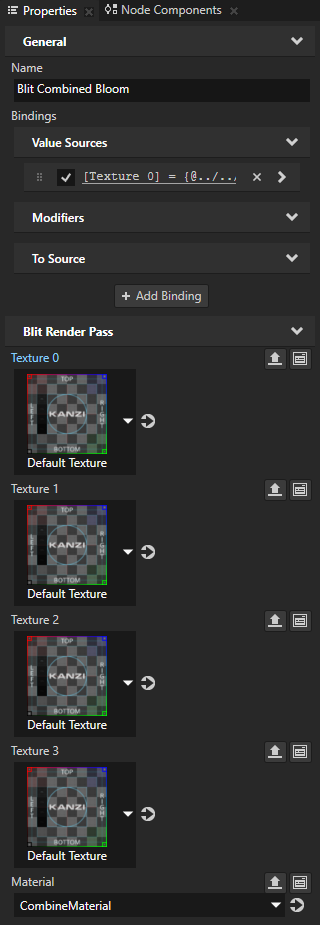
In the Library select the Bloom Out > Blit Combined Bloom render pass and in the Properties add the Blit Render Pass > Texture 1, Texture 2, and Texture 3 properties.
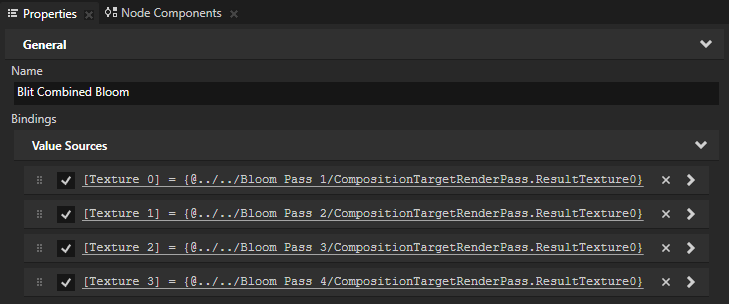
From the Library drag to the Properties window and drop:
Bloom Pass 2 on the Texture 1 property
Bloom Pass 3 on the Texture 2 property
Bloom Pass 4 on the Texture 3 property
This way you set the Blit Combined Bloom render pass to draw the result textures of Bloom Pass 1, Bloom Pass 2, Bloom Pass 3, and Bloom Pass 4 using the CombineMaterial material.
For each pass of the bloom effect, set as the input texture the result texture of the previous pass:
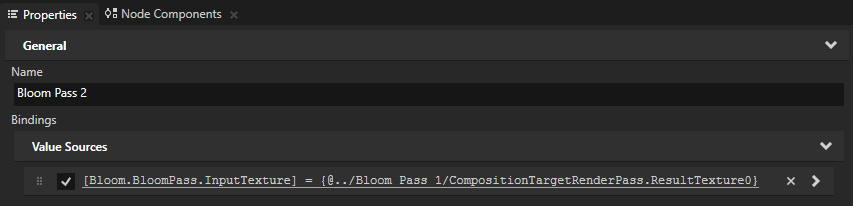
In the Library select the Bloom Pass 2 render pass view, from the Library drag the Bloom Pass 1 render pass view to the Properties window, and drop it on the Bloom.BloomPass.InputTexture property of the Bloom Pass 2 render pass view.
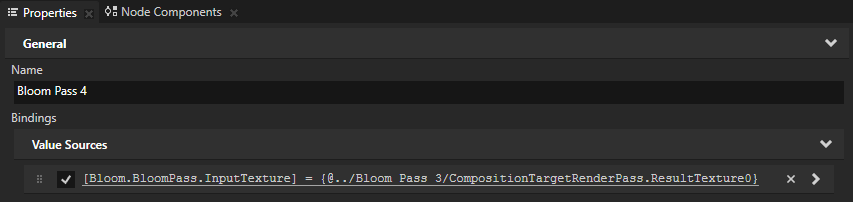
Repeat the previous step twice:
For the Bloom Pass 3 use the result texture of Bloom Pass 2.

For the Bloom Pass 4 use the result texture of Bloom Pass 3.
Load these material types from
<KanziWorkspace>/Tutorials/Bloom/Assets:GaussianBloom09.kzmatGaussianBloom13.kzmatGaussianBloom15.kzmat
The GaussianBloom09Material, GaussianBloom13Material, and GaussianBloom15Material materials provide a directional Gaussian blur effect using kernel sizes of 9, 13, and 15 pixels. To optimize performance you use smaller kernel sizes when possible.

To adjust the spread and intensity of the bloom effect, customize each Render Pass View that instantiates the Bloom Pass:
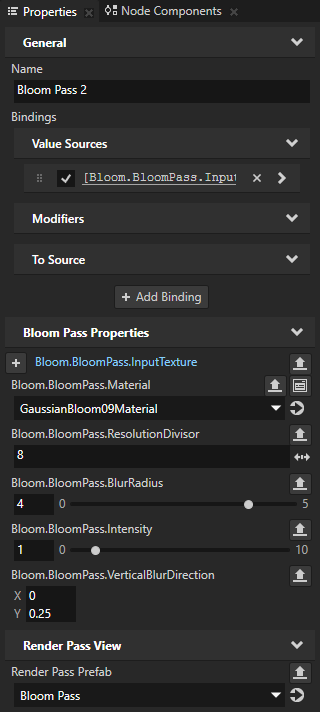
In the Library select the Bloom Pass 2 Render Pass View and in the Properties set:
Bloom.BloomPass.Material to GaussianBloom09Material
Bloom.BloomPass.ResolutionDivisor to 8
You reduce the resolution of the composition target at every pass of the bloom effect, making the effect spread to a wider area.
Bloom.BloomPass.BlurRadius to 4
Bloom.BloomPass.Intensity to 1
Bloom.BloomPass.VerticalBlurDirection property Y property field to 0.25
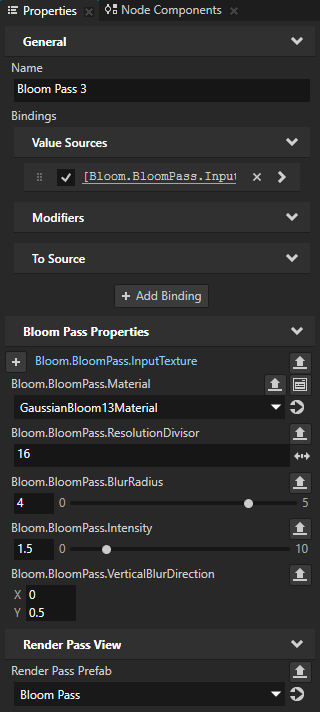
In the Library select the Bloom Pass 3 Render Pass View and in the Properties set:
Bloom.BloomPass.Material to GaussianBloom13Material
Bloom.BloomPass.ResolutionDivisor to 16
Bloom.BloomPass.BlurRadius to 4
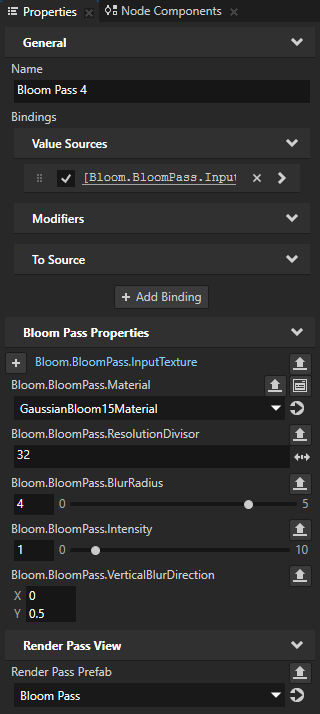
In the Library select the Bloom Pass 4 render pass view and in the Properties set:
Bloom.BloomPass.Material to GaussianBloom15Material
Bloom.BloomPass.ResolutionDivisor to 32
Bloom.BloomPass.BlurRadius to 4
Bloom.BloomPass.Intensity to 1
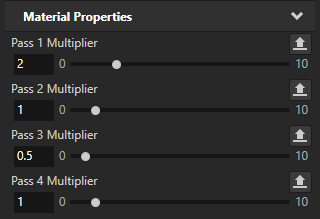
In the Library select the Bloom Out > Blit Combined Bloom render pass, and in the Properties add and set these Material Properties:
Pass 1 Multiplier to 2
Pass 2 Multiplier to 1
Pass 3 Multiplier to 0.5
Pass 4 Multiplier to 1
You use these properties to set weights for the Bloom Pass 1, Bloom Pass 2, Bloom Pass 3, and Bloom Pass 4, whose result textures the Blit Combined Bloom renders. You can experiment with different multiplier values to see how each pass of the bloom effect affects the final outcome.
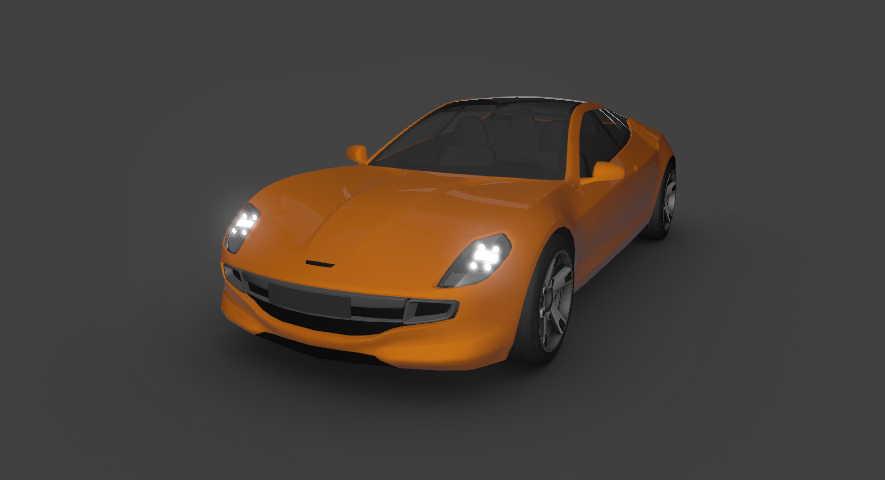
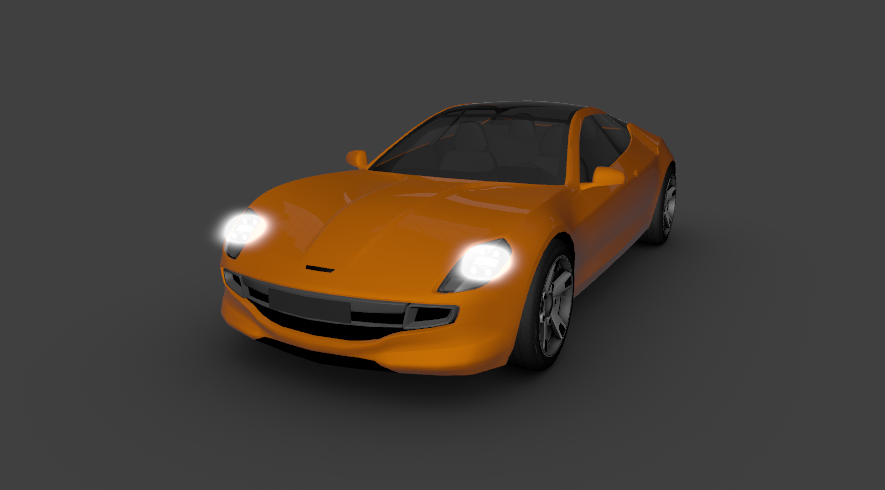
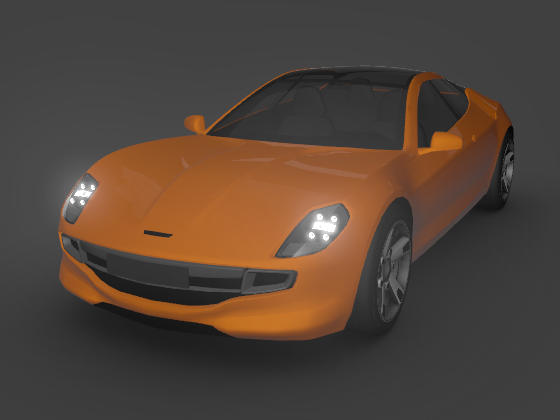
In the Preview click and drag the car to see how the bloom effect looks when the car rotates.
What's next?
In this tutorial you learned how to use render passes and shaders to apply a bloom effect on 3D content.
Now you can:
Learn how to apply a stencil to 3D content so that Kanzi renders only a selected area of the content. See Tutorial: Apply a stencil to 3D content.
Learn how to rotate with a swiping gesture a 3D model in your Kanzi application. See Tutorial: Rotate a 3D model.
Learn how to use the Blur Effect 2D effect to apply a Gaussian blur effect to the content of a 2D node. See Tutorial: Create a Gaussian blur effect.