Applying a stencil to 3D content
Use render passes and the stencil buffer to apply a stencil to 3D content so that Kanzi renders only a selected area of the content.
The stencil buffer is an image in the current framebuffer which you can use to control which pixels Kanzi renders. You use render passes to discard or render specific pixels in your content depending on the values of the stencil buffer. This way you can limit the area of rendering to the shape of a node you use as a stencil. The shape of the node works as the gap in the stencil, determining which parts of your content are visible.
To apply a stencil to 3D content and render only the area defined by the stencil:
Create the node you want to use as the stencil. For example:
Import a mesh the shape of which you want to use as the stencil. See Using meshes.
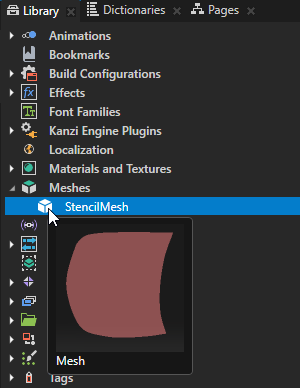
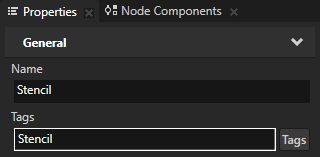
Create a Model node, name it Stencil, and in the Properties set the Mesh property to the mesh you imported.
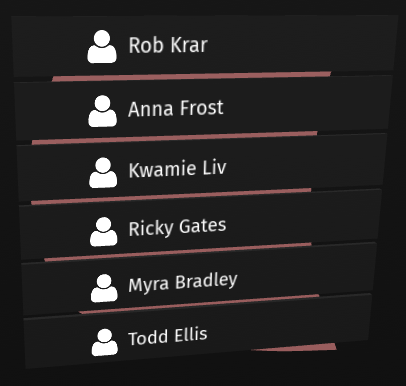
Create the 3D node to which you want to apply the stencil.
For example, create a Grid List Box 3D node which shows a list of contacts.
Scale and position the nodes that you created so that the node you want to use as the stencil outlines the area you want to show of the node to which you want to apply the stencil.
Tag the node you want to use as the stencil. See Tagging a node.
For example, tag the Stencil node with the tag Stencil.
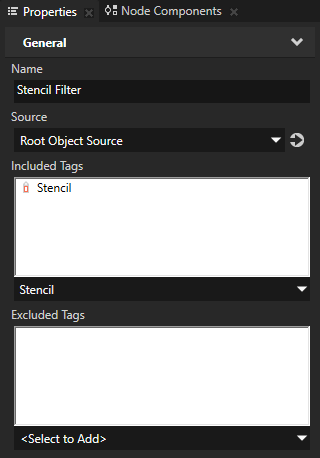
Create a Tag Filter resource which picks the Stencil node, and another Tag Filter resource which picks all nodes except the Stencil node. See Using the Tag Filter.
For example, create these Tag Filter resources:
Stencil Filter and in the Properties add to Included Tags the Stencil tag
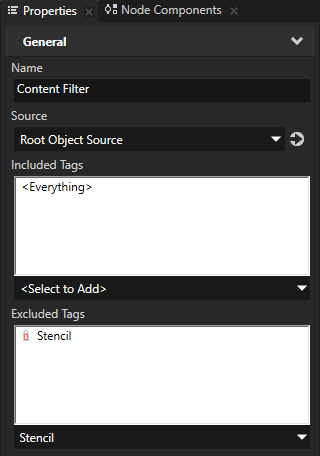
Content Filter and in the Properties add to Excluded Tags the Stencil tag
Apply the stencil:
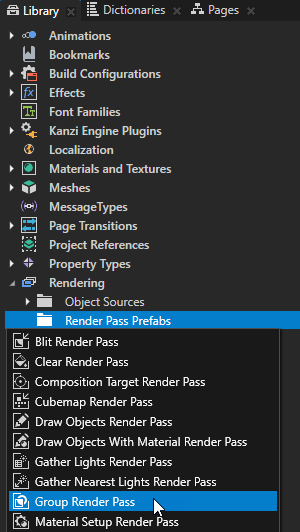
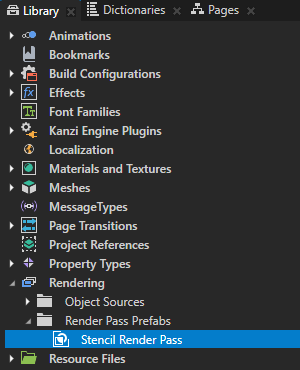
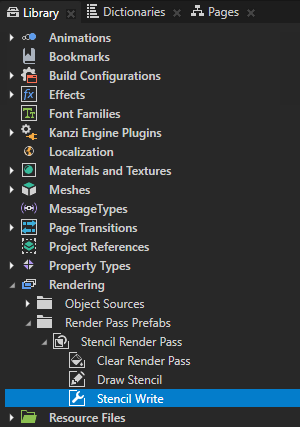
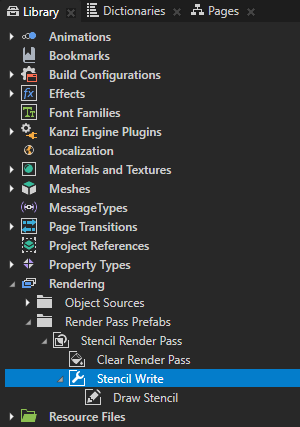
In the Library > Rendering press Alt and right-click Render Pass Prefabs, select Group Render Pass, and name it Stencil Render Pass.
You use a Group Render Pass to collect the render passes which apply a stencil on the content.
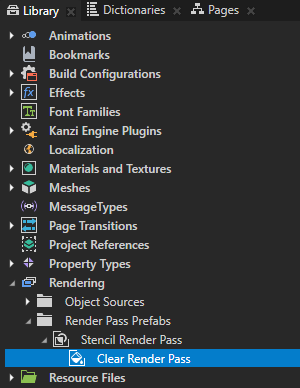
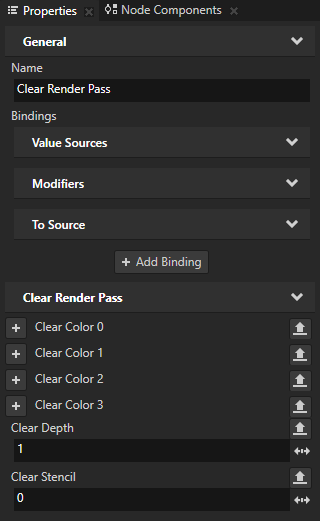
In the Library > Rendering > Render Pass Prefabs > Stencil Render Pass create a Clear Render Pass, in the Properties add the Clear Stencil property, and set it to 0. This way you clear the stencil buffer by writing the value 0 to all pixels in the stencil buffer. You use the stencil buffer later in this procedure to limit the area of rendering to the shape of the Stencil node.
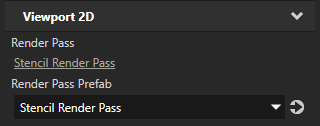
In the Node Tree select the Viewport 2D node which contains the Stencil node and the node to which you want to apply the stencil, and in the Properties set the Render Pass Prefab property to the Stencil Render Pass.
This way you set Kanzi to render the Viewport 2D node using the Stencil Render Pass.
The Stencil Render Pass does not draw anything on the screen yet.
Write to the stencil buffer the shape of the Stencil node:
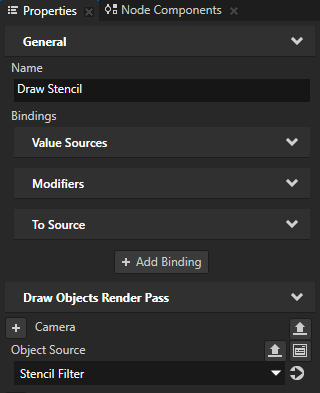
In the Library > Rendering > Render Pass Prefabs > Stencil Render Pass create a Draw Objects Render Pass, name it Draw Stencil, in the Properties add the Object Source property, and set it to the Stencil Filter Tag Filter.
You use the Object Source property to pass to a Draw Objects Render Pass only the nodes you want it to render.
Here you set the Stencil Render Pass to render only the Stencil node.
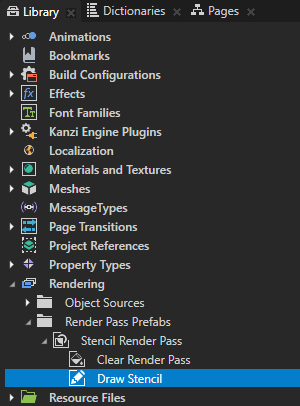
In the Library > Rendering > Render Pass Prefabs > Stencil Render Pass create a Pipeline State Render Pass, name it Stencil Write, and drag the Draw Stencil render pass to the Stencil Write render pass.
You use this render pass to write to the stencil buffer.
In the Library > Rendering > Render Pass Prefabs > Stencil Render Pass select Stencil Write, and in the Properties add and set:
Color Write Mode to None
This way you make the Stencil node invisible.
Stencil Test Function to Always
You use this property to control how the stencil test compares the stencil reference value to the value in the stencil buffer. You set the property to Always to always pass the test.
This way you make the Draw Stencil render pass write to the stencil buffer the Stencil node.
Stencil Function Reference Value to 1
By setting Stencil Function Reference Value to 1 you make the Draw Stencil render pass write to the stencil buffer with the value 1.
Stencil Pass Depth Pass Operation to Replace
You replace the current value in the stencil buffer with the value of the Stencil Function Reference Value property.
See Stencil operations.
Stencil Write Enabled to enabled
You write to the stencil buffer the shape of the Stencil node with the value 1, and leave the value 0 everywhere else.

Render the node to which you want to apply the stencil.
For example:
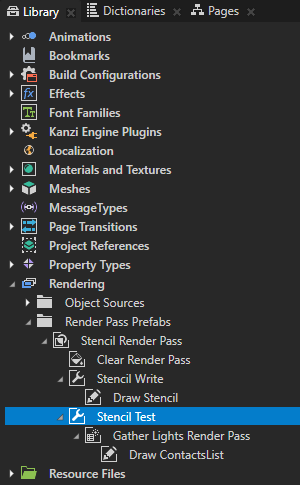
In the Library > Rendering > Render Pass Prefabs > Stencil Render Pass create a Gather Lights Render Pass.
You use this render pass to collect in the Viewport 2D node, which uses the Stencil Render Pass render pass prefab, the Light nodes that light the list of contacts.
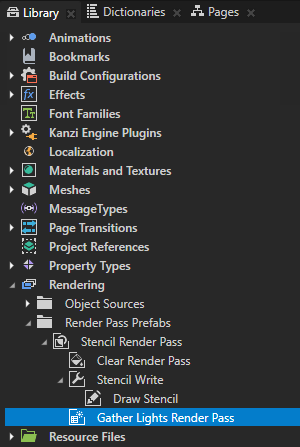
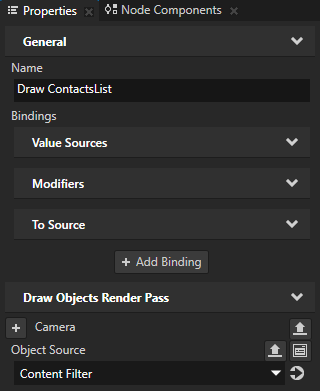
In the Library > Rendering > Render Pass Prefabs > Stencil Render Pass > Gather Lights Render Pass create a Draw Objects Render Pass, name it Draw ContactsList, in the Properties add the Object Source property, and set it to the Content FilterTag Filter.
Kanzi now renders all nodes in the Viewport 2D except for the Stencil node. Kanzi does not render the Stencil node because the Content Filter excludes the nodes with the Stencil tag.
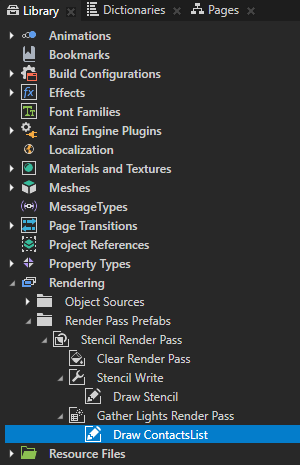

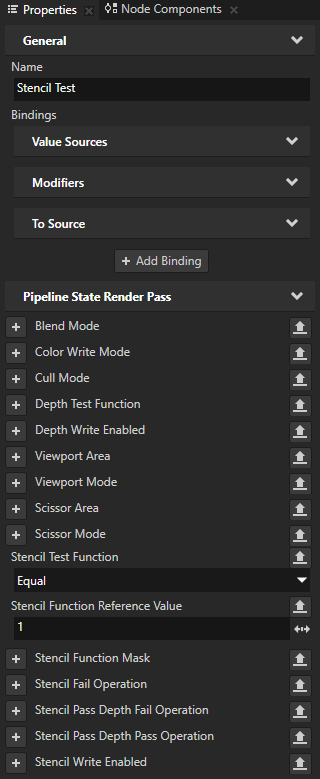
In the Library > Rendering > Render Pass Prefabs > Stencil Render Pass create a Pipeline State Render Pass, name it Stencil Test, and drag the Gather Lights Render Pass render pass to the Stencil Test render pass.
In the next step you use the Stencil Test render pass to limit the rendering of the Draw ContactsList render pass to the area you wrote to the stencil buffer earlier in this procedure.

In the Library > Rendering > Render Pass Prefabs > Stencil Render Pass select Stencil Test, and in the Properties add and set:
Stencil Test Function to Equal
Stencil Function Reference Value to 1
This way you limit the area of rendering of the ContactsList node to those pixels which have the stencil value 1, so that the render pass draws only the part of the ContactsList node which overlaps the Stencil node.
Stencil test functions
Use the Stencil Test Function property to compare the Stencil Function Reference Value to the value in the stencil buffer.
You can use these operations:
Stencil Test Function |
Description |
|---|---|
Always |
Pass always |
Equal |
Pass if the values are equal |
Greater |
Pass if Stencil Function Reference Value is greater than the value in the stencil buffer |
Greater or Equal |
Pass if Stencil Function Reference Value is greater than or equal to the value in the stencil buffer |
Less |
Pass if Stencil Function Reference Value is less than the value in the stencil buffer |
Less or Equal |
Pass if Stencil Function Reference Value is less than or equal to the value in the stencil buffer |
Never |
Fail always |
Not equal |
Pass if Stencil Function Reference Value is different from the value in the stencil buffer |
You can use the Stencil Function Mask property to perform a bitwise AND operation on the Stencil Function Reference Value and the value in the stencil buffer before comparing them with the Stencil Test Function. This way you can modify only certain bits in the stencil buffer. By default, and when Stencil Function Mask is set to 255, all Stencil Test Function operations both read and write all bits in the buffers.
For example, if you set Stencil Function Mask to 2, Kanzi Studio preserves only the second bit of the stencil reference value and the stencil buffer value. This way you can use different bits of the stencil buffer to mask different elements on the screen.
Stencil operations
Use the Stencil Fail Operation, Stencil Pass Depth Fail Operation and Stencil Pass Depth Pass Operation properties to set the values in the stencil buffer depending on the results of stencil and depth test. By default Kanzi Studio keeps the current value.
You can use these operations:
Operation |
Description |
|---|---|
Decrease |
If the stencil value if larger than 0, decrease it by 1. |
Decrease wrap |
Otherwise the same as Decrease, but if the current value is 0, set the value to the maximum possible value for the stencil buffer, usually 255. |
Increase |
If the stencil value is lower than the maximum value, increase it by 1. |
Increase wrap |
Otherwise the same as Increase, but if the maximum value is exceeded, set the value to 0. |
Invert |
Apply a bitwise invert to the value. |
Keep |
Keep the current value. |
Replace |
Replace the stencil value with the value of the Stencil Function Reference Value property. |
Zero |
Set the stencil value to 0. |