Tutorial: Create a Gaussian blur effect
In this tutorial you learn how to apply a Gaussian blur effect and how to apply that effect when a condition is met.
This video shows the result of the tutorial.
This tutorial assumes that you understand the basics of working with Kanzi Studio. The best entry points for getting familiar with Kanzi Studio are:
Assets for the tutorial
The starting point of this tutorial is the <KanziWorkspace>/Tutorials/Blur/Start/Blur.kzproj Kanzi Studio project.
You can find the completed tutorial in the <KanziWorkspace>/Tutorials/Blur/Completed directory.
Create the blur effect
In this section you create the blur effect.
To create the blur effect:
In Kanzi Studio open the
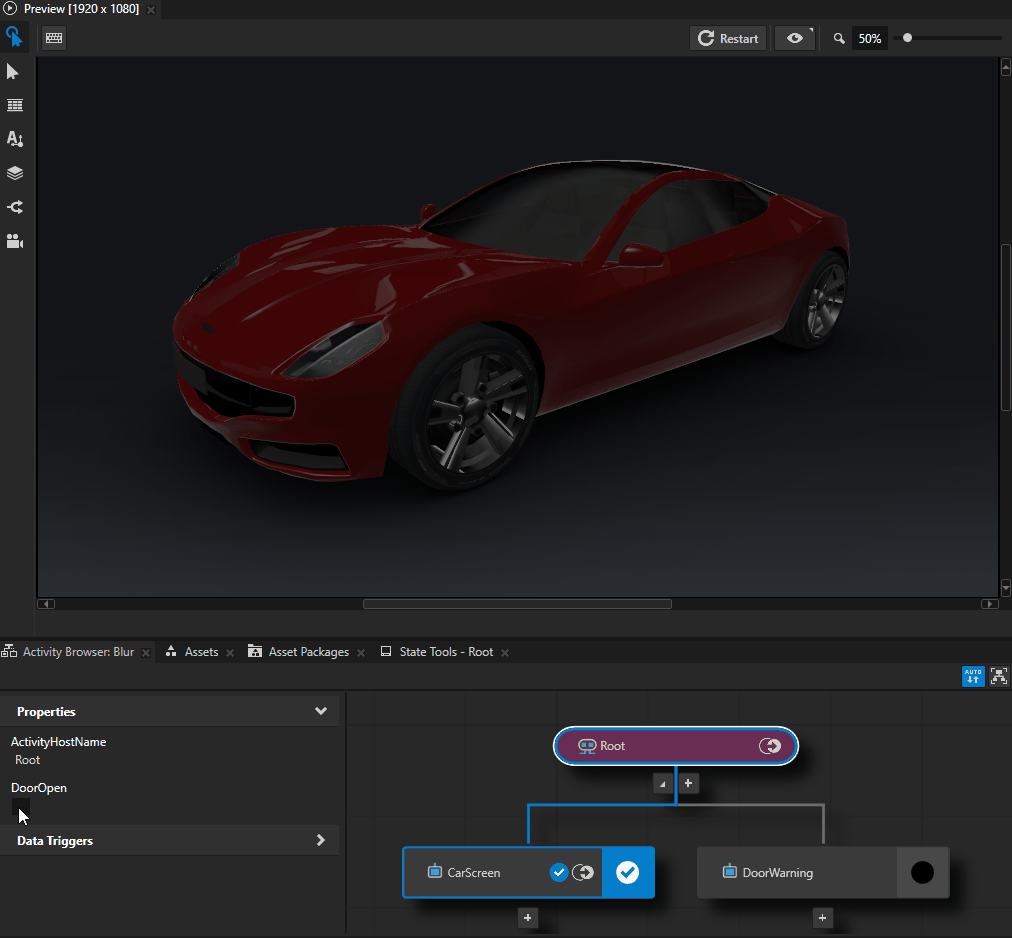
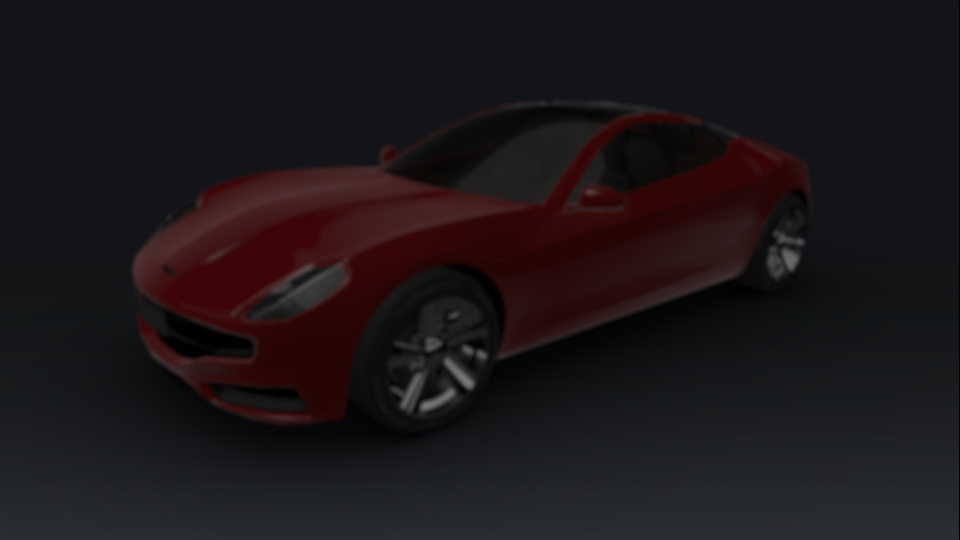
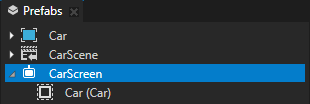
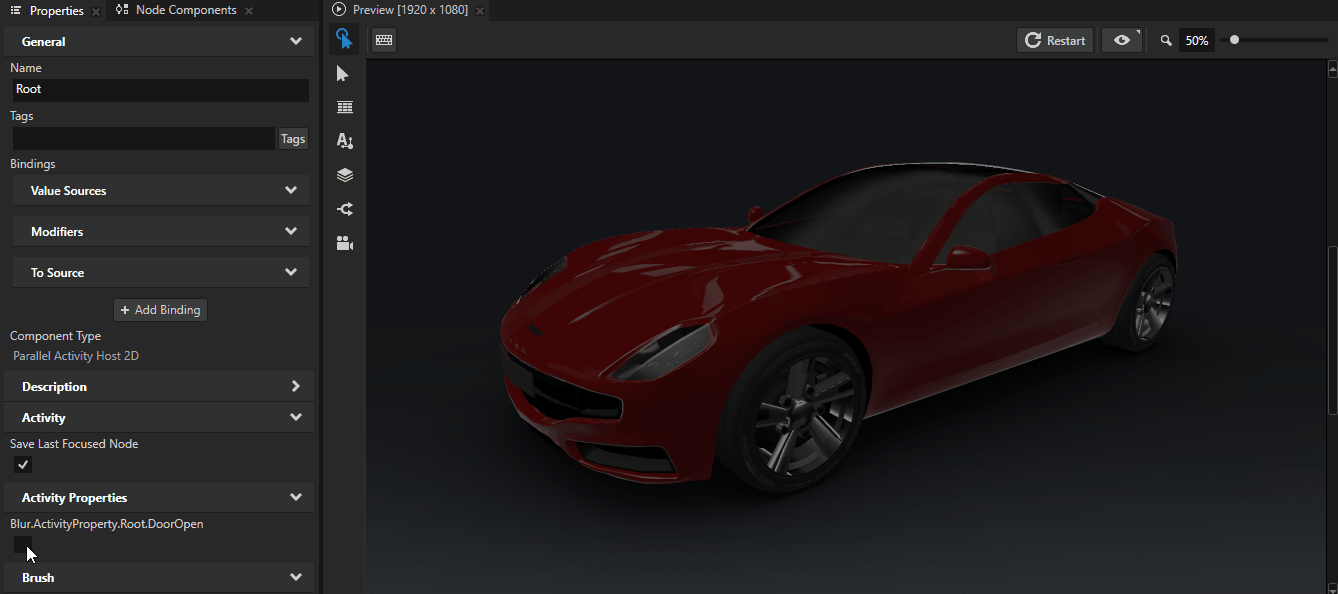
<KanziWorkspace>/Tutorials/Blur/Start/Blur.kzprojproject.The Root Parallel Activity Host contains the CarScreen Activity that shows a 3D car model.
Tip
If you cannot see the entire car in the Preview, you can adjust the Preview zoom level in the upper right corner of the Preview.

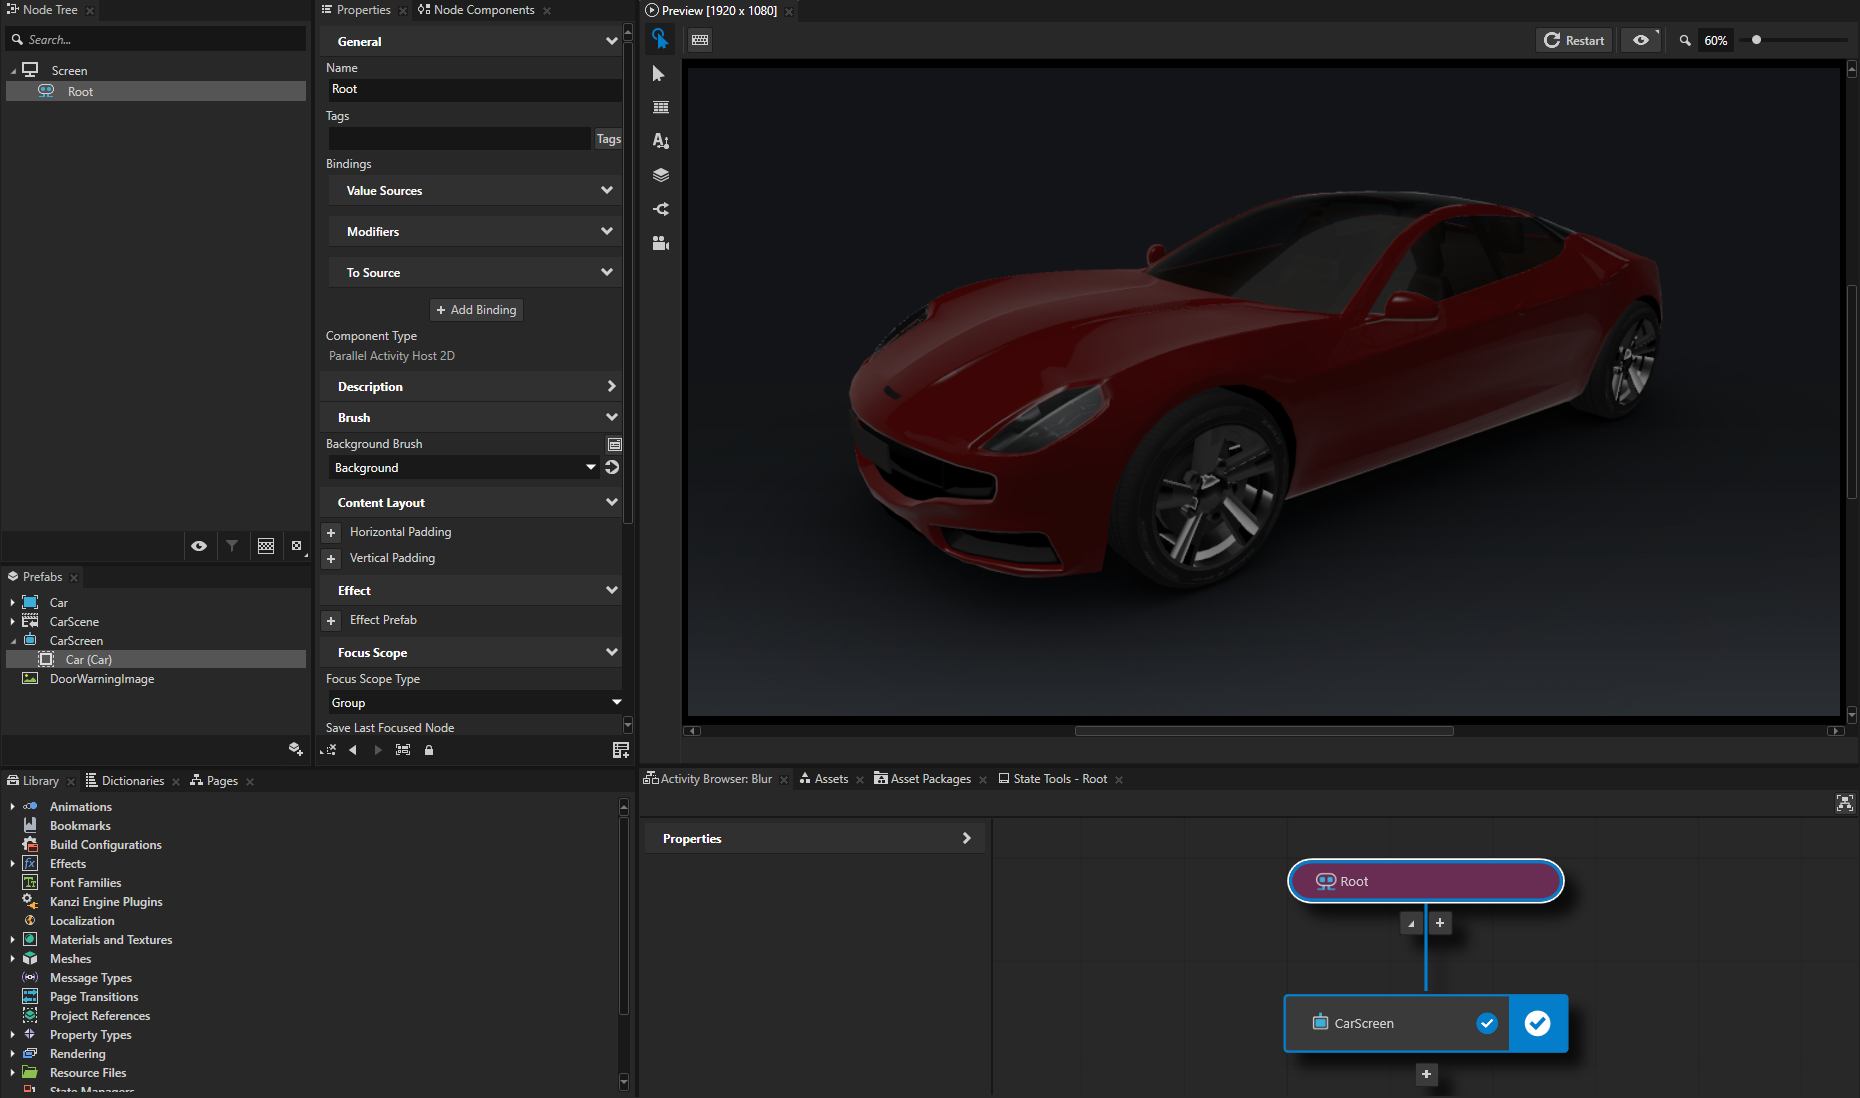
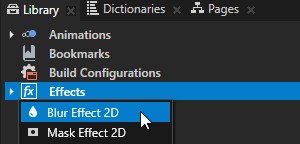
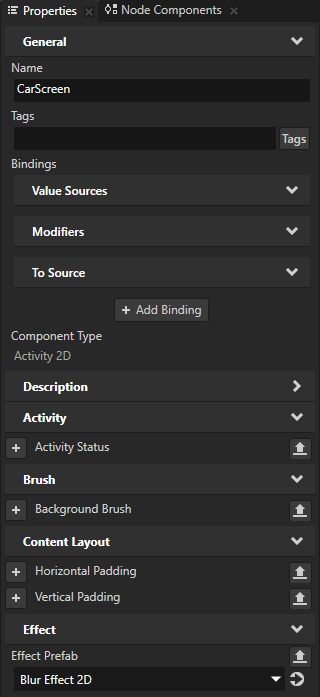
In the Library press Alt and right-click Effects and select Blur Effect 2D.
The Blur Effect 2D effect applies a Gaussian blur to the content of a 2D node.
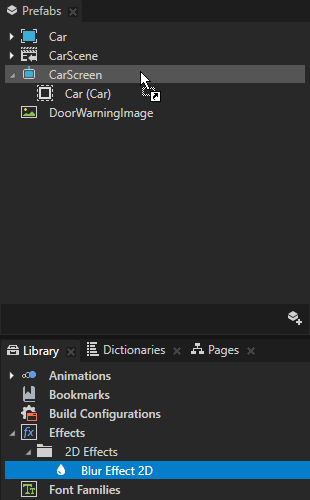
From the Library drag the Blur Effect 2D effect to the Prefabs and drop it on the CarScreen prefab.
This way you set the Effect Prefab property to the Blur Effect 2D.
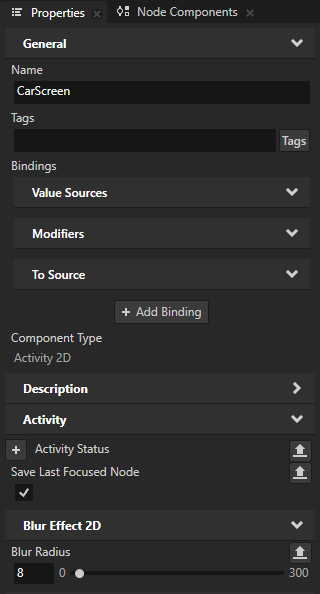
The Blur Effect 2D effect by default applies to a 2D node a blur where the radius of the circular area of pixels that blend to each other is 8 pixels.
Control the amount of blur:
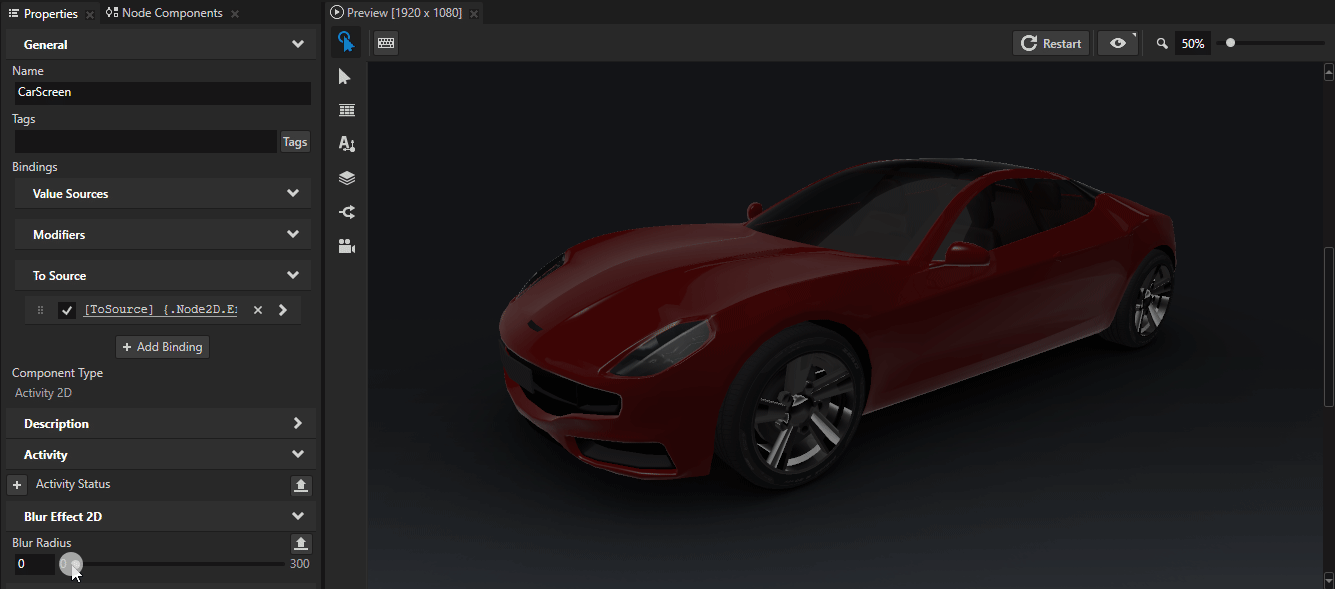
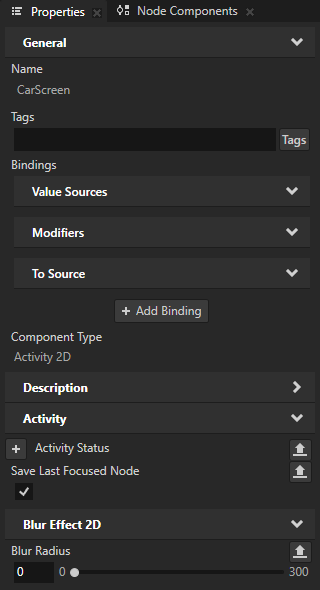
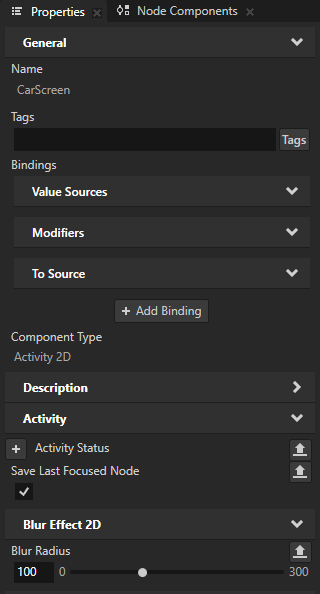
In the Prefabs select the CarScreen prefab and in the Properties add the Blur Effect 2D > Blur Radius property.
You use the Blur Radius property to set the amount of blur in the instance of the Blur Effect 2D effect in the CarScreen prefab.
The value of the property does not yet affect the amount of blur in the CarScreen prefab because the property is not connected to the instance of the Blur Effect 2D effect in that prefab.
Click + Add Binding and in the Binding Editor set:
Binding Mode to To source
Push Target to .Node2D.Effect
This way you target the instance of the Blur Effect 2D effect in the CarScreen prefab.
Property to Blur Radius
From the Properties drag the Blur Radius property to the Expression
Click Save.
You can now control the amount of blur in the CarScreen prefab by adjusting the value of the Blur Radius property in that prefab.

Control the blur effect with a state manager
In this section you create a state manager that you use to control the blur effect in the CarScreen prefab. You use the state manager to animate the transitions between the normally rendered and blurred states. In the next sections you create a popup warning and use the state manager to blur the content of the CarScreen prefab when that warning is shown.
To control the blur effect with a state manager:
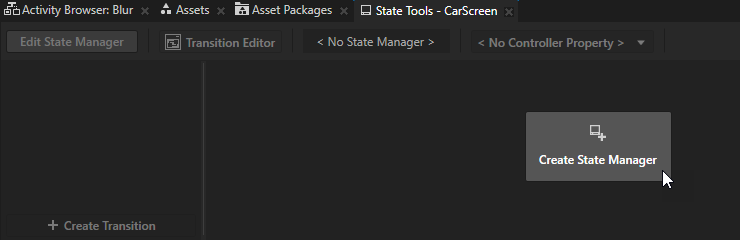
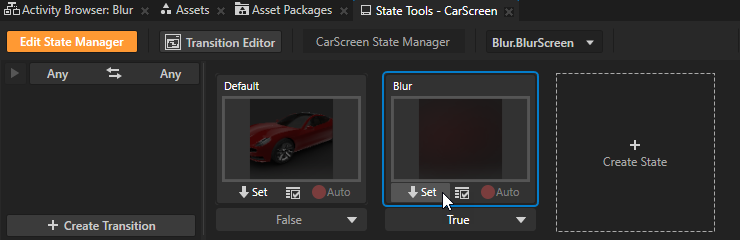
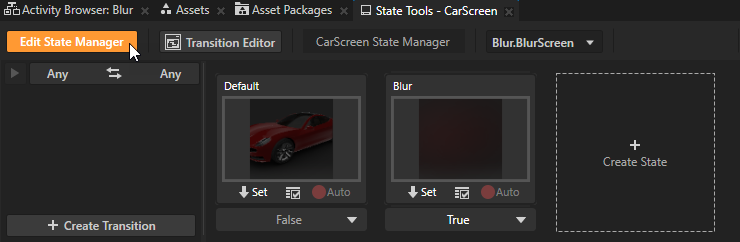
In the Prefabs select the CarScreen prefab and in the State Tools click Create State Manager.
Kanzi Studio creates a state manager and assigns it to the CarScreen prefab.
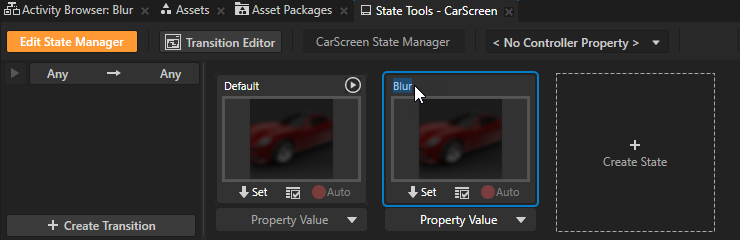
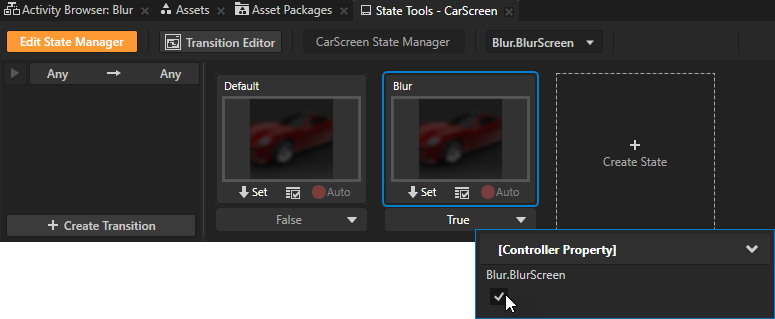
Click Create State twice to create two states and name them Default and Blur.
You use the Default state to define the state of your application when the CarScreen prefab is rendered without applying blur, the Blur state when the prefab is blurred.
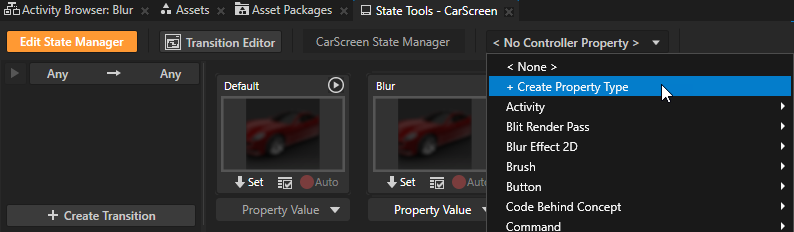
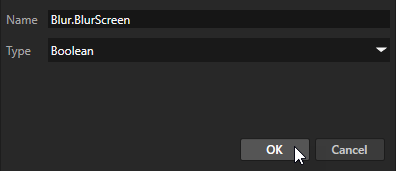
Click <No Controller Property>, select + Create Property Type and set:
Name to Blur.BlurScreen
Type to Boolean
In a state manager the value of the property that you select as the Controller Property defines the conditions when each state in a state group is active.
In the Blur state set the value of the BlurScreen controller property to True.
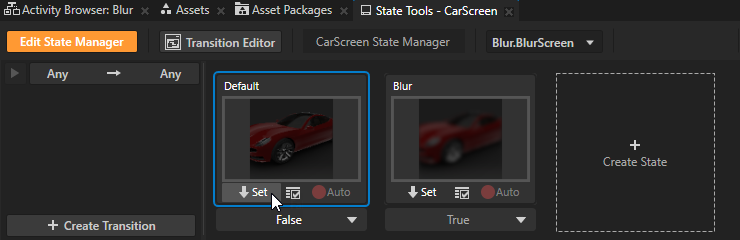
In the State Tools select the Default state, in the Properties set the Blur Radius property to 0, and in the State Tools in the Default state click Set to save the value of the Blur Radius property to that state.
This way you set the Default state to render the CarScreen without applying the blur.
In the Properties set the Blur Radius property to 100 and in the State Tools in the Blur state click Set.
This way you set the Blur state to apply the blur to the CarScreen.
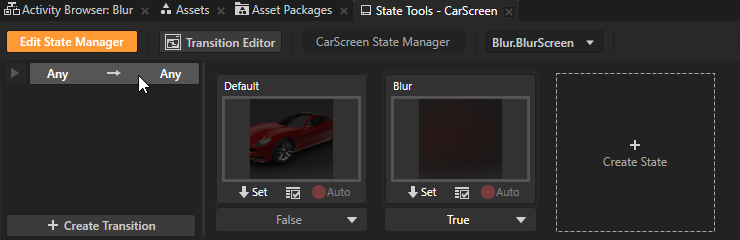
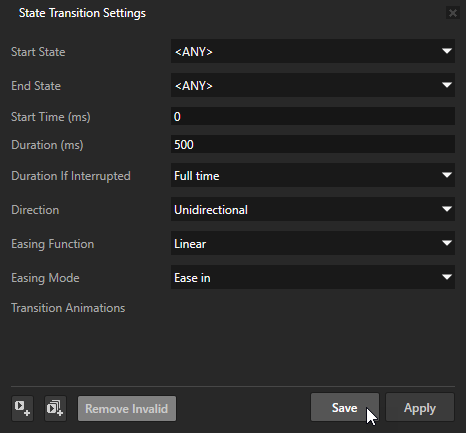
In the State Tools click Any -> Any, in the State Transition Settings set Duration to 500, and click Save.
This way you set the length of the transition between the Default and Blur states to 500 milliseconds.
Click Edit State Manager to deactivate the state tools.
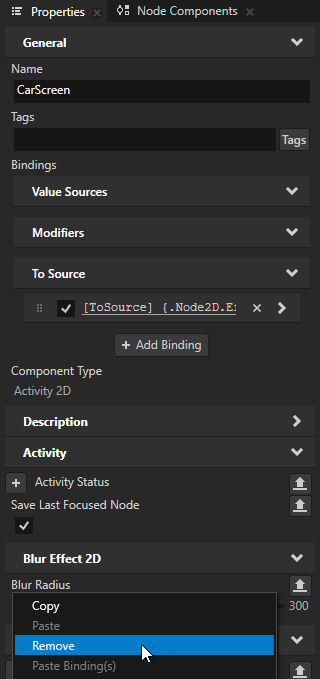
In the Prefabs select the CarScreen prefab and in the Properties remove the Blur Radius property.
You remove this property because you use a state manager to control the value of this property.
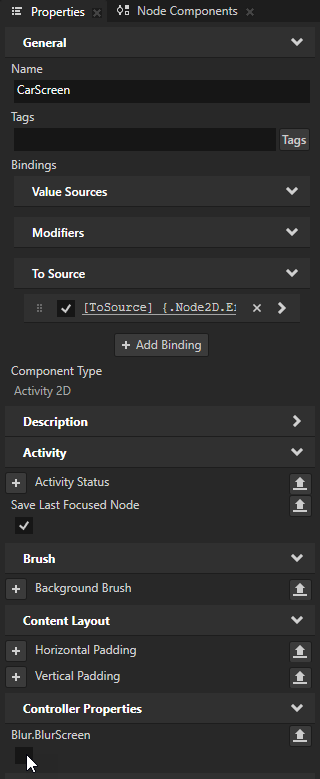
In the Properties add and disable the Controller Properties > Blur.BlurScreen property.
This way you set Kanzi to render the CarScreen prefab without applying the blur. In the next sections you create a popup warning and use the Blur.BlurScreen property to blur the CarScreen when that warning is shown.
Create a popup warning
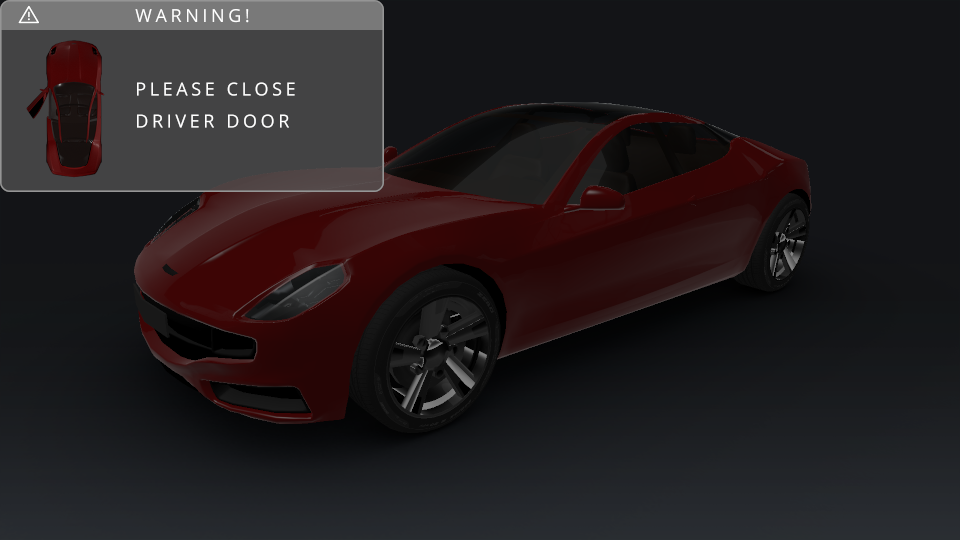
In this section you create a popup warning that you show on top of the CarScreen.
To create a popup warning:
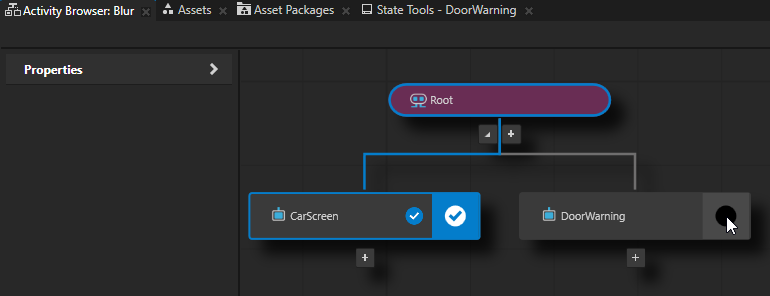
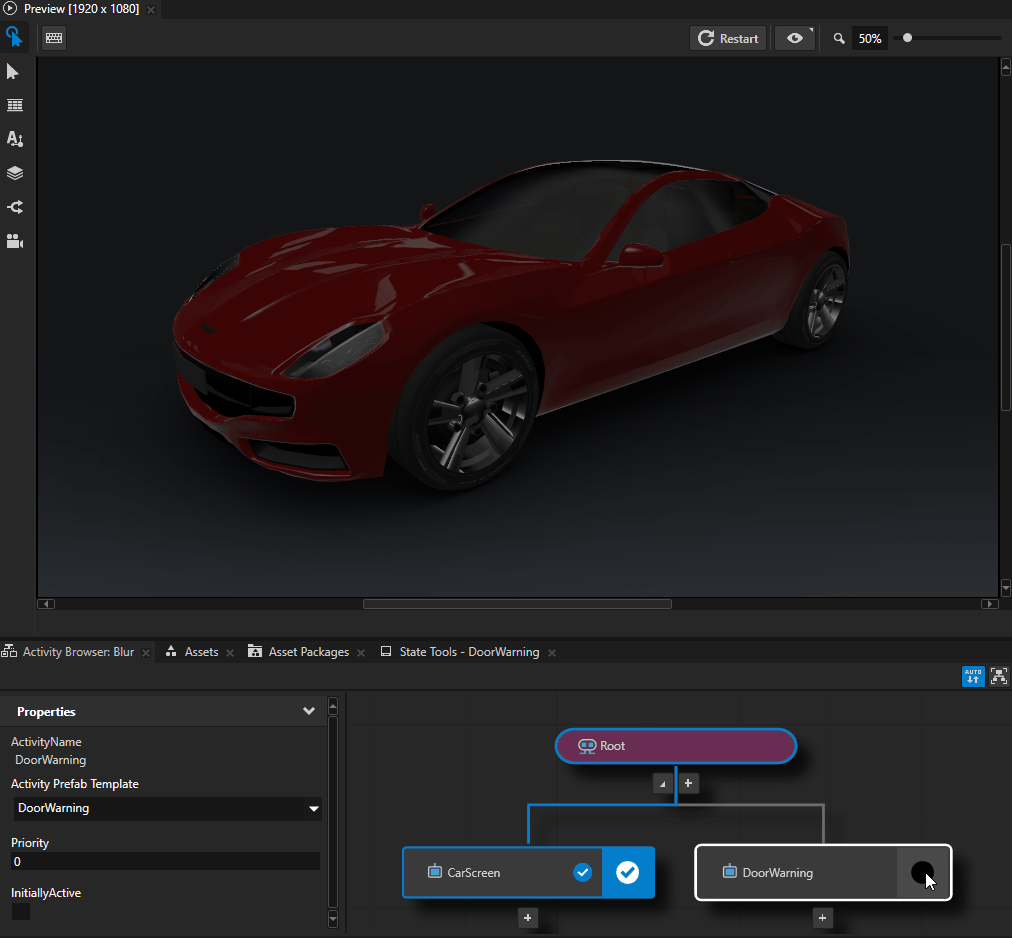
In the Activity Browser below the Root Activity Host click
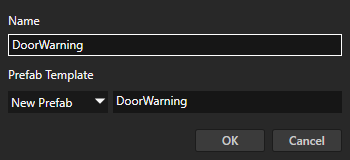
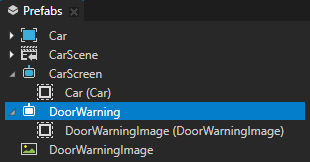
 , select Create Activity, and name the Activity and its prefab DoorWarning.
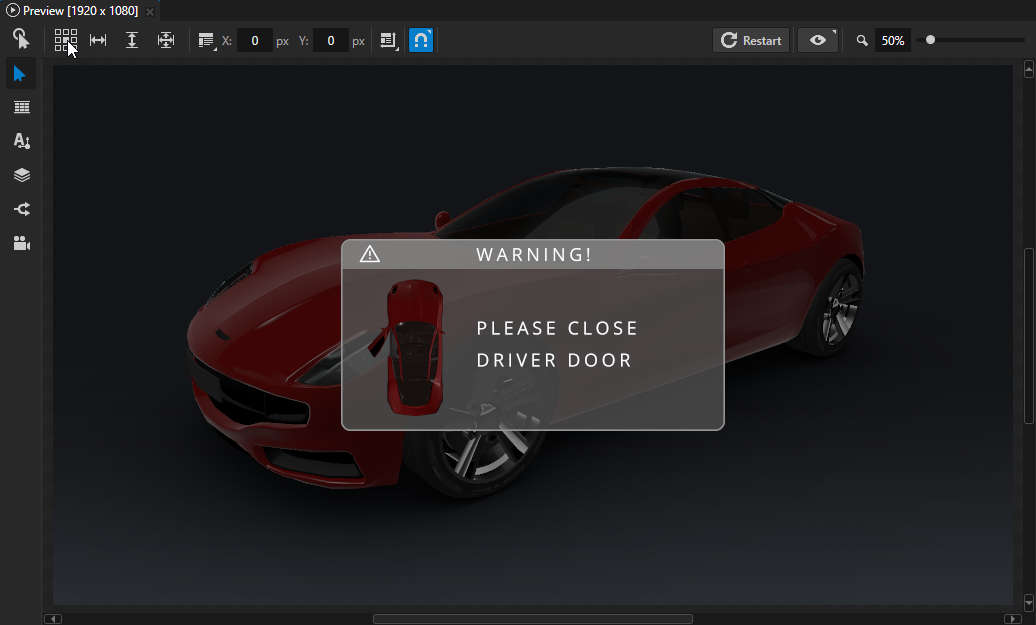
You use this Activity to show a door-open warning on top of the CarScreen Activity.
In the Activity Browser in the DoorWarning Activity click
 .
.This way you simulate the activation of the DoorWarning Activity so that you can see its content in the Preview.
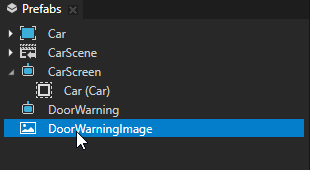
In the Prefabs drag the DoorWarningImage prefab to the DoorWarning prefab.
In the Prefabs select the DoorWarning prefab, in the Preview select the Node tool
 , and in the align tool
  click the center square.
This way you align the DoorWarning Activity to the center of the Root Activity Host.
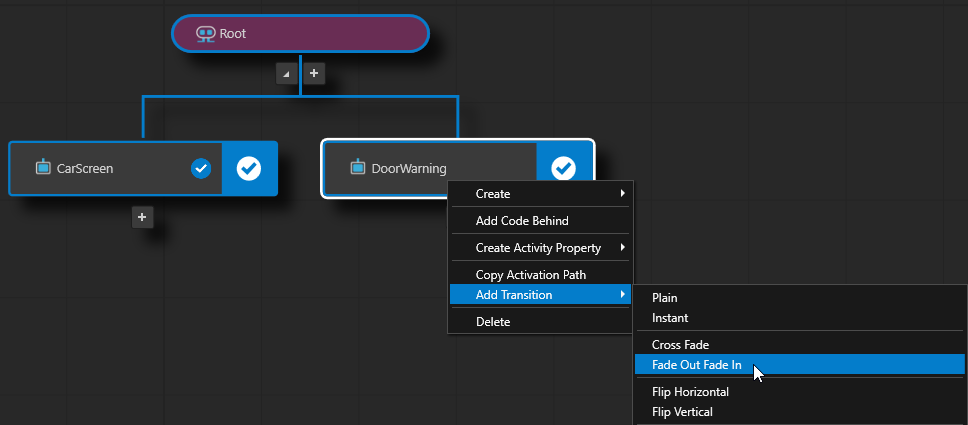
In the Activity Browser right-click the DoorWarning Activity and select Add Transition > Fade Out Fade In.
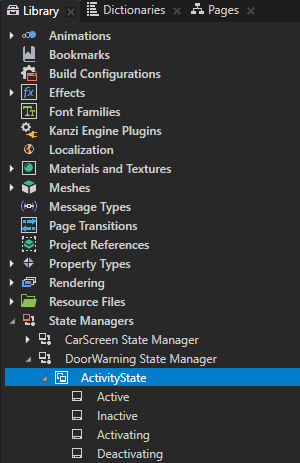
Kanzi Studio creates in the Library > State Managers a state manager, which defines the fade-out and fade-in transitions, and sets the DoorWarning Activity to use it.
The state DoorWarning State Manager > ActivityState state group contains the states that map to the different statuses of Activity nodes. In the Active state the DoorWarning is opaque and in all other states it is fully transparent.
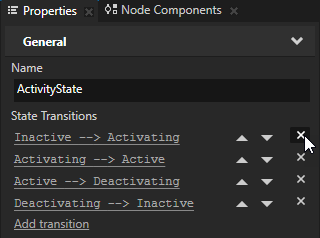
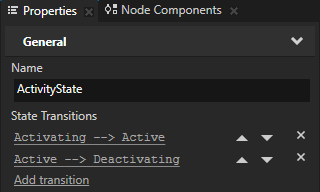
In the Library > State Managers select the DoorWarning State Manager > ActivityState state group and in the Properties remove these state transitions:
Inactive --> Activating
Deactivating --> Inactive
You keep the state transitions that define the transitions to and from the Active state, where the DoorWarning Activity is opaque.
Now when you simulate the activation and deactivation of the DoorWarning Activity, the door-open warning takes 500 milliseconds to fade in and fade out.
Control the blur effect and the popup warning
In this section you set the blur effect and the popup warning so that when the warning is shown, the content of the CarScreen behind the warning is blurred.
To control the blur effect and the popup warning:
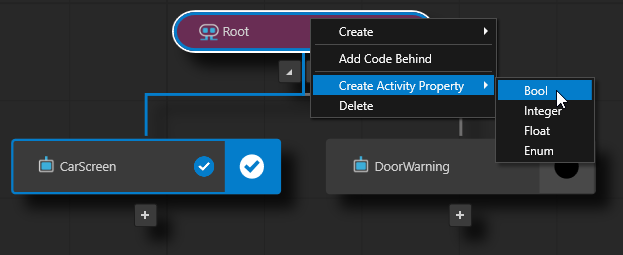
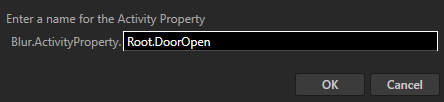
In the Activity Browser, right-click Root, select Create Activity Property > Bool, and name the property Root.DoorOpen.
Kanzi Studio creates an Activity Property property type and adds it to the Root node.
You use this property type to control the activation state of the DoorWarning Activity.

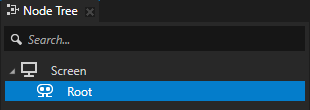
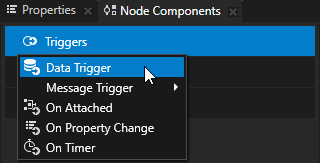
In the Node Tree select the Root node, in the Node Components press Alt and right-click Triggers, select Data Trigger, and name it Door Warning.
A Data Trigger keeps the actions in that Data Trigger applied for as long as the condition expression in that Data Trigger is met.
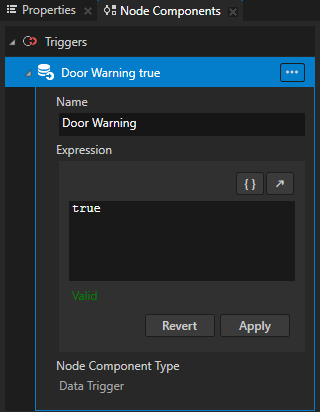
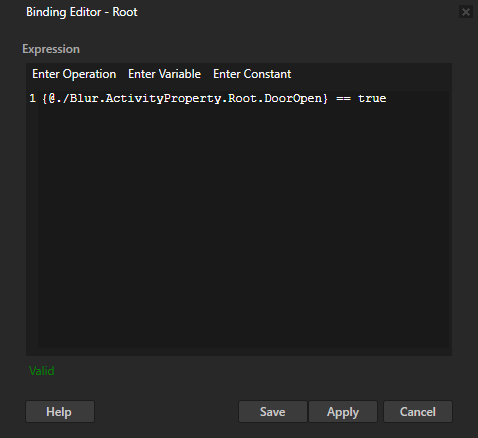
In the Door Warning Data Trigger in the Expression click
 , select the Properties window, drag the Blur.ActivityProperty.Root.DoorOpen property to the Expression field, and edit the expression to
{@./Blur.ActivityProperty.Root.DoorOpen} == trueA condition expression in a Data Trigger must evaluate to either
TrueorFalse.Click Save.
This way you set the Data Trigger to keep an Action that you add to that Data Trigger applied only when the Blur.ActivityProperty.Root.DoorOpen is enabled (Boolean value
True). In the next step you add an Apply Activation Action that activates and deactivates the DoorWarning Activity.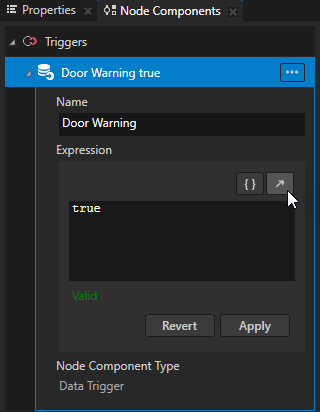
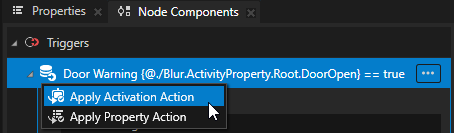
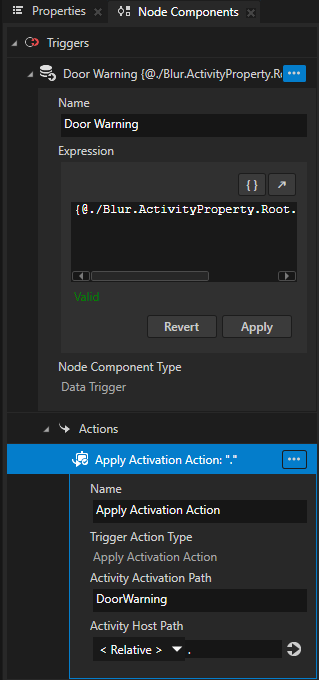
In the Node Components press Alt and right-click the Door Warning Data Trigger, select Apply Activation Action, and in the Apply Activation Action set the Activity Activation Path to DoorWarning.
The path to the Activity that you set in the Activity Activation Path property is relative to the Activity Host node that you set in the Activity Host Path property.
The Data Trigger and Apply Activation Action keep this Activity active for as long as the condition in the Data Trigger is met.
In the Preview click
 to restart the Preview.
You can now use the Blur.ActivityProperty.Root.DoorOpen property in the Root Activity Host to activate and deactivate the DoorWarning Activity.
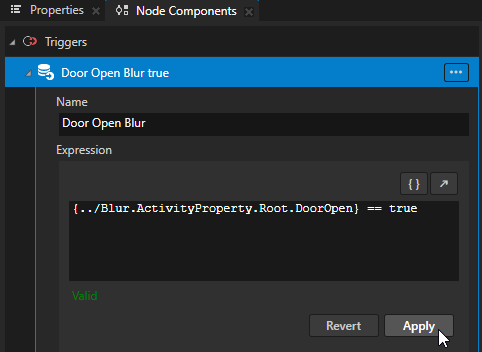
In the Prefabs select the CarScreen Activity, in the Node Components create a Data Trigger, name it Door Open Blur, and set the Expression to
{../Blur.ActivityProperty.Root.DoorOpen} == trueClick Apply.
This way you set the Data Trigger to keep an Action in that Data Trigger applied only when the Blur.ActivityProperty.Root.DoorOpen in the Root Activity Host is enabled.
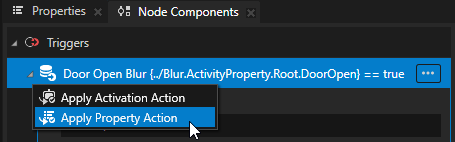
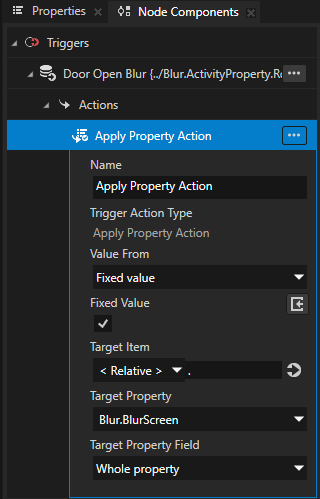
In the Node Components press Alt and right-click the Door Open Blur Data Trigger, select Apply Property Action, and in the Apply Property Action set:
Target Property to Controller Properties > Blur.BlurScreen
Fixed Value to enabled
This way you set the Door Open Blur Data Trigger to keep the Blur.BlurScreen property in the CarScreen Activity enabled when the Blur.ActivityProperty.Root.DoorOpen in the Root Activity Host is enabled.
Now when you in the Root Activity Host:
Disable the Blur.ActivityProperty.Root.DoorOpen property, Kanzi renders the CarScreen Activity without applying the blur and deactivates the DoorWarning Activity.
Enable the Blur.ActivityProperty.Root.DoorOpen property, Kanzi applies blur to the CarScreen Activity and activates the DoorWarning Activity.
To simulate this using the Activity Browser, select the Root Activity Host and in the side panel toggle the DoorOpen property.
What's next?
In this tutorial you learned how to use the Blur Effect 2D effect and how to apply that effect when a condition is met. Now you can:
Learn how to use render passes to apply a bloom effect on 3D content. See Tutorial: Create a bloom effect.
Learn more about using conditions to control the activation state of Activities. See Tutorial: Control application UI.
See also
To learn more about 2D effects, see Effects for 2D nodes.
To learn more about the Activity system, see Activities.
To learn more about using bindings, see Using bindings and Bindings expressions reference.
To learn more about the Kanzi state manager, see State manager.
To learn more about how to apply anti-aliasing, see Applying anti-aliasing.