Using the Flow Layout nodes
Use the Flow Layout nodes to arrange nodes along a line. When a line runs out of space, the Flow Layout node places its child nodes in a new line.
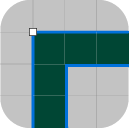
You can use a Flow Layout node to arrange content in the same way you would arrange it on a page.

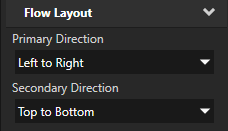
Flow Layout node iterates through its child nodes in the order you add them and first arranges items along the line set in the Primary Direction property. When a Flow Layout node runs out of available space in the direction set by the Primary Direction property, it creates a new line along the direction you set in the Secondary Direction property. See Setting the direction of a Flow Layout node.
You can set the direction and the starting point for arranging Flow Layout 3D child nodes on x, y, and z axes, and Flow Layout 2D child nodes on x and y axes.
Creating a Flow Layout node
To create a Flow Layout node:
In the Node Tree press Alt and right-click the node where you want to create a Flow Layout node and select either Flow Layout 3D, or Flow Layout 2D.
You can create a 3D node only in a 3D node, such as the Scene node, and a 2D node only in a 2D node.
Tip
In the Preview select the Flow Layout 2D tool
 to create a Flow Layout 2D node by clicking and dragging in the Preview.
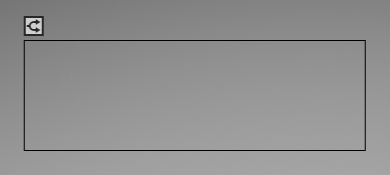
When you create a layout whose width is greater than its height, the direction of the layout is Left to Right.
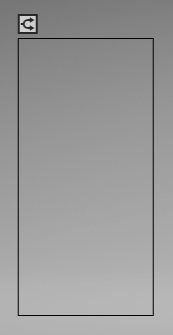
When you create a layout whose height is greater than its width, the direction of the layout is Top to Bottom.
In the Node Tree, add child nodes to the layout that you created in the previous step.
For example, if you created a Flow Layout 3D node, add several Sphere nodes, if you created a Flow Layout 2D node, add several Image nodes.
As you add child nodes, the Flow Layout node positions them along the axes defined by the Primary Direction and Secondary Direction properties.
(Optional) To clear the area around child nodes in a layout, in the Node Tree select child nodes in the layout, in the Properties click
 , and add and set the margin properties:
Depth Margin to clear the area in the back and the front of a child node.
Horizontal Margin to clear the area on the left and the right sides of a child node.
Vertical Margin to clear the area on the bottom and the top of a child node.
Setting the direction of a Flow Layout node
For a Flow Layout node you can set both the starting point and the direction in which the Flow Layout node arranges its child nodes.
To set the direction of a Flow Layout node:
Create a Flow Layout node and add child nodes to it. See Creating a Flow Layout node.
In the Properties set the Flow Layout node direction properties:
Primary Direction. This is the direction along which the child nodes are arrange until they reach the limit of the Flow Layout node.
For example, for a Flow Layout node with a Primary Direction set to Left to Right, the limit is set by the Layout Width property. However, if the Primary Direction is set to Near to Far, the limit is set by the Layout Depth property.
Secondary Direction. This is the direction along which the child nodes are laid out when the child nodes exceed the limit set by the Primary Direction property.
For example, to set a Flow Layout node where child nodes are first added from the left to right and then from top to bottom, set the Primary Direction property to Left to Right and the Secondary Direction property to Top to Bottom.
Note that in order to make the Flow Layout node go in the direction defined by the Secondary Direction property, you must set the limit for the Primary Direction property.
For example, to arrange items in a flow layout according to the rules used in:
Left-to-right languages, set properties:
Primary Direction to Left to Right
Secondary Direction to Top to Bottom
Right-to-left languages, set properties:
Primary Direction to Right to Left
Secondary Direction to Top to Bottom
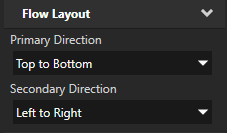
Traditional Chinese writing layout, set properties:
Primary Direction to Top to Bottom
Secondary Direction to Right to Left
Setting the appearance of a Flow Layout 2D node
To set the appearance of 2D nodes:
You can fill 2D nodes with a solid color, a texture, or a material. See Adjusting the appearance of 2D nodes.


You can apply a post-processing effect to a 2D node. See Effects for 2D nodes.


You can rotate a 2D node around all three axes to create a 3D perspective effect. See Creating a 3D perspective effect for 2D nodes.

You can apply custom rendering to 2D nodes to create post-processing effects. See Applying custom rendering to 2D nodes.

You can render a 2D node as pixel-perfect. See Rendering pixel-perfect 2D nodes.
Using the Flow Layout 3D node in the API
To create a Flow Layout 3D node:
// Create a Flow Layout 3D node named Flow. The default primary direction is
// left-to-right and the secondary direction top-to-bottom.
FlowLayout3DSharedPtr flow = FlowLayout3D::create(domain, "Flow");
To set the width of a Flow Layout 3D node:
// Set the width of the Flow Layout 3D node to 6 device-independent pixels to
// limit its size in its primary direction. By limiting the size in
// the primary direction you force the node to create a new line in
// the secondary direction, when it cannot fit an item in the primary direction.
flow->setWidth(6.0f);
To add items to a Flow Layout 3D node:
// Flow Layout 3D node arranges its items in the order that you add them.
// Create a 3D node ...
Model3DSharedPtr item1 = Model3D::createBox(domain, "item1", Vector3(2.0f, 1.0f, 1.0f), ThemeRed);
// ... and add it to the Flow Layout 3D node.
flow->addChild(item1);
// The second item still fits in the first line.
Model3DSharedPtr item2 = Model3D::createBox(domain, "item2", Vector3(3.0f, 1.0f, 1.0f), ThemeGreen);
flow->addChild(item2);
// There is still space in the first line, but the third item is
// too large to fit, so the Flow Layout 3D node creates a new line.
Model3DSharedPtr item3 = Model3D::createBox(domain, "item3", Vector3(5.0f, 1.0f, 1.0f), ThemeBlue);
flow->addChild(item3);
// The fourth item fits in the second line by leaving no empty space.
Model3DSharedPtr item4 = Model3D::createBox(domain, "item4", Vector3(1.0f, 1.0f, 1.0f), ThemeOrange);
flow->addChild(item4);
// The Flow Layout 3D node places the last item in a new line.
Model3DSharedPtr item5 = Model3D::createBox(domain, "item5", Vector3(3.0f, 1.0f, 1.0f), ThemeGreen);
flow->addChild(item5);
For details, see the FlowLayout3D class in the Kanzi Engine API reference.
Using the Flow Layout 2D node in the API
To create a Flow Layout 2D node:
// Create a Flow Layout 2D node named Flow. The default primary direction is
// left-to-right and secondary direction top-to-bottom.
FlowLayout2DSharedPtr flow = FlowLayout2D::create(domain, "Flow");
To set the width of a Flow Layout 2D node:
// Set the width of the Flow Layout 2D node to 600 pixels to limit its size in its
// primary direction. By limiting the size in the primary direction you force
// the node to create a new line in the secondary direction, when it cannot fit
// an item in the primary direction.
flow->setWidth(600.0f);
To add items to a Flow Layout 2D node:
// Flow Layout 2D node arranges its items in the order that you add them.
// Create a 2D node ...
EmptyNode2DSharedPtr item1 = EmptyNode2D::create(domain, "item1", 200.0f, 200.0f, ThemeRed);
// ... and add it to the Flow Layout 2D node.
flow->addChild(item1);
// The second item still fits in the first line.
EmptyNode2DSharedPtr item2 = EmptyNode2D::create(domain, "item2", 250.0f, 250.0f, ThemeBlue);
flow->addChild(item2);
// There is still space in the first line, but the third item is
// too large to fit, so the Flow Layout 2D node creates a new line.
EmptyNode2DSharedPtr item3 = EmptyNode2D::create(domain, "item3", 200.0f, 200.0f, ThemeGreen);
flow->addChild(item3);
// The fourth item fits in the second line by leaving no empty space.
EmptyNode2DSharedPtr item4 = EmptyNode2D::create(domain, "item4", 400.0f, 400.0f, ThemeOrange);
flow->addChild(item4);
// The Flow Layout 2D node places the last item in a new line.
EmptyNode2DSharedPtr item5 = EmptyNode2D::create(domain, "item5", 150.0f, 150.0f, ThemeRed);
flow->addChild(item5);
For details, see the FlowLayout2D class in the Kanzi Engine API reference.
Flow Layout property types and messages
For lists of the available property types and messages for the Flow Layout nodes, see Flow Layout 2D and Flow Layout 3D.