Using material types
Material types define the property type of a material. By adjusting material property values defined by a material type, you set the appearance of a material. Each material type has a vertex shader and a fragment shader, which set the type of properties you can use in a material.
Kanzi Studio provides template projects that contain a default set of material types and shaders from the Kanzi Studio Asset Library located in the <KanziInstallation>/Studio/Asset Library directory. When you create a new Kanzi Studio project you can select from different project templates based on the material types they provide:
To start with a template that does not contain any predefined material types, select Import material types manually. You can add material types from the Kanzi Studio material library to the project when you need them, or create your own material types. See Adding a material type to your project.
High performance vertex shaders template is intended for low precision and high performance OpenGL ES2 applications. It contains vertex-based shaders optimized for use with OpenGL ES2. Most of the GPU specific computation, including applying lights using the Phong reflection model, is done in the vertex shader. This is a good starting point for most devices.
High quality fragment shaders template is intended for high precision OpenGL ES2 applications. It contains pixel-shader based materials for use with OpenGL ES2. Most of the GPU specific computation, including applying lights using the Phong reflection model, is done in the fragment shader. This offers better image quality often at the cost of performance.
Physically based rendering template is intended for OpenGL ES3 applications. It contains materials based on shaders that implement physically-based rendering (PBR) principles. The properties of these materials represent physical properties, such as metalness, and are therefore intuitive to control. Most of the GPU specific computation, including applying lights using a physically-based lighting model, is done in the fragment shader. This offers a more realistic rendering result in many lighting conditions.
In a material type vertex and fragment shaders define the uniforms and property types that you can use in that material. When rendering 3D nodes with a specific material type, uniform bindings allow Kanzi to write values to the render state and use those values for uniforms and property types.
Uniform bindings enable you to modify the values of shader uniforms used by a material type without making changes to the shader code.
See Uniform bindings.
You can:
Modify the Kanzi default material types. See Modifying the default material types.
Add properties to material types. See Adding a property to a material type.
Reuse material types. See Reusing material types.
Adding a material type to your project
You can add material types to your project in these ways:
Create a Kanzi default material type.
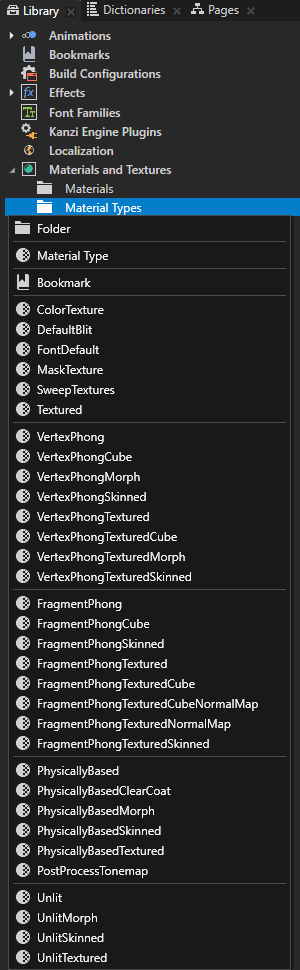
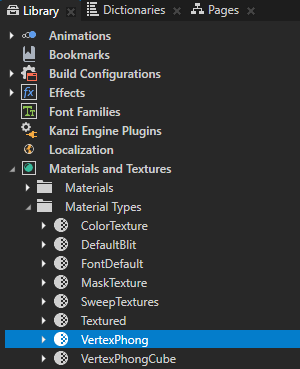
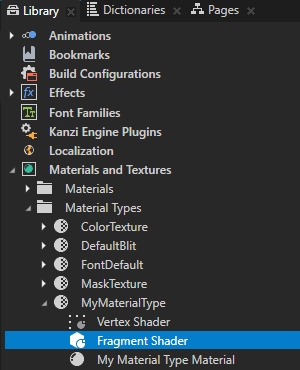
Kanzi comes with a set of default material types for different purposes. To create a Kanzi default material type that is not already in your project, in the Library > Materials and Textures press Alt and right-click Material Types, and select the material type that you want to add.
If you created your project with a template that does not contain any predefined material types, all Kanzi default material types are available for you to add:
ColorTexture, DefaultBlit, FontDefault, MaskTexture, SweepTextures, and Textured are material types with general purpose shaders. Because these shaders are more concerned with functionality and quality than performance, these material types are suitable for development purposes. See General-purpose shaders.
VertexPhong material types are high performance material types with vertex-based Phong shaders. See Vertex-based Phong shaders.
FragmentPhong material types are slower-performing material types with pixel-based Phong shaders. See Pixel-based Phong shaders.
PhysicallyBased material types use shaders that implement physically based rendering (PBR) principles. See Physically-based shaders.
Unlit material types use shaders that do not use lights. See Unlit shaders.
Kanzi Studio adds the material type and creates a material using that material type. You can create additional materials from the same material type. See Using materials.
Create a new material type.
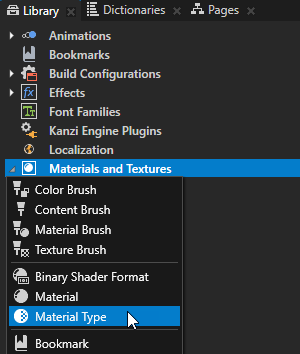
To create a new material type, in the Library press Alt and right-click Materials and Textures, and select Material Type.
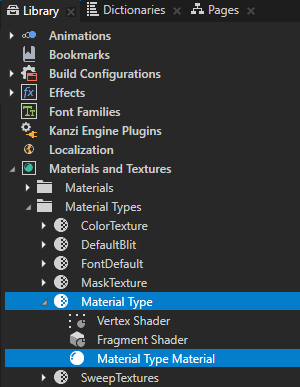
Kanzi Studio creates a material type and a material that uses the material type.
To edit the Vertex Shader and Fragment Shader in the Material Type that you created, double-click them. See Editing shaders.
Add any material type from your computer.
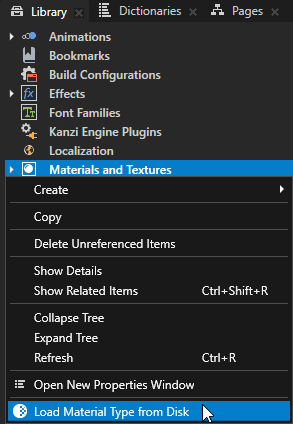
To add to your project any material type from your computer, in the Library right-click Materials and Textures, select Load Material Type From Disk, go to the directory that contains the material type that you want to add, select the material type, and click Open.
Kanzi Studio adds the material type and creates a material using that material type. You can create additional materials from the same material type. See Using materials.
Modifying the default material types
To modify a VertexPhong, FragmentPhong, PhysicallyBased, or Unlit material type:
Select or add to your project one of the default VertexPhong, FragmentPhong, PhysicallyBased, or Unlit material types. See Adding a material type to your project.
For example, in the Library > Materials and Textures > Material Types select the VertexPhong material type.
In the Properties in the Preprocessor Defines property set the properties of the material type. You can use this approach for the FragmentPhong, VertexPhong, PhysicallyBased, and Unlit material types that come with Kanzi. To modify the properties for other material types, you have to edit the shaders manually. See Editing shaders.
For example, to enable the use of a texture that contains the base color for the material, set the value of KANZI_SHADER_USE_BASECOLOR_TEXTURE to 1, and press the Enter key.
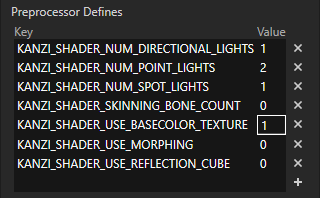
In the VertexPhong and FragmentPhong material types you can set these Preprocessor Defines:
KANZI_SHADER_NUM_DIRECTIONAL_LIGHTS sets the number of Directional Light nodes to use for the material. See Setting the number of lights for a material type.
KANZI_SHADER_NUM_POINT_LIGHTS sets the number of Point Light nodes to use for the material. See Setting the number of lights for a material type.
KANZI_SHADER_NUM_SPOT_LIGHTS sets the number of Spot Light nodes to use for the material. See Setting the number of lights for a material type.
KANZI_SHADER_SKINNING_BONE_COUNT sets the number of bones in a mesh for skinning. See Using skinned meshes.
Do not enable both skinning and morphing for the same material type.
KANZI_SHADER_USE_BASECOLOR_TEXTURE enables the use of a texture that contains the base color for the material.
KANZI_SHADER_USE_MORPHING enables morphing. See Using Morph resources.
Do not enable both skinning and morphing for the same material type.
KANZI_SHADER_USE_NORMALMAP_TEXTURE enables the use of a texture that contains a normal map for the material.
KANZI_SHADER_USE_REFLECTION_CUBE enables the use of cubemap reflections. See Creating cubemap reflections.
To learn about the Preprocessor Defines that you can set in the PhysicallyBased material types, see Physically-based material properties.
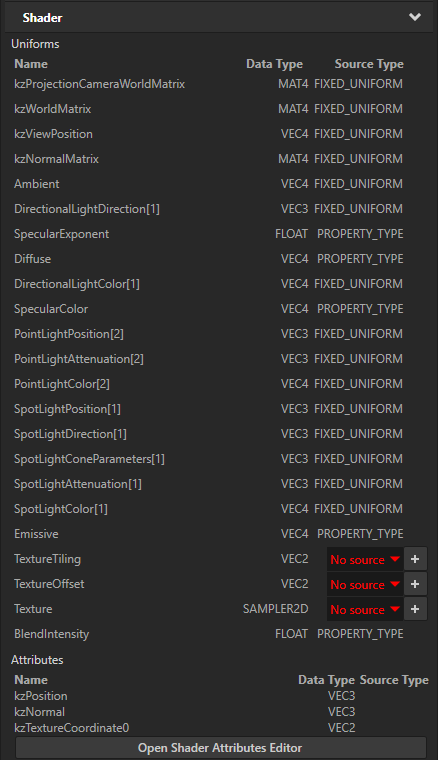
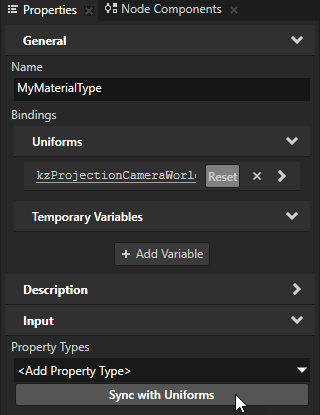
In the Properties in the Uniforms property Kanzi Studio automatically updates the uniform arrays and if any uniform source types are missing, Kanzi Studio marks them with red type.
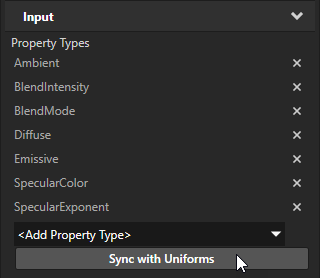
In the Properties under the Property Types click Sync with Uniforms to add the missing properties for the materials that use this material type.
Adding a property to a material type
Add a property to a material type to make it suitable for your needs. You can use the material type you customize or create to make it faster and easier to set the appearance of materials in your project. When you add a property to a material type, Kanzi Studio adds the property to all materials using that material type.
To add a property to a material type:
In the Library > Materials and Textures > Material Types in the material type to which you want to add a property, double-click the shader where you want to use the property.
In the Shader Source Editor add the property to the shader code and save the shader.
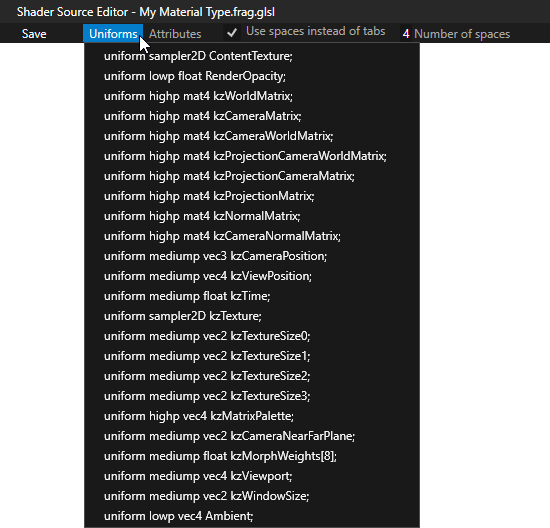
You can declare Kanzi default uniforms by selecting them from the Uniforms menu. See Editing shaders.
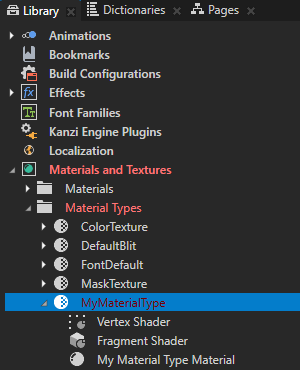
In the Library select the material type to whose shader you added the property, and in the Properties click Sync with Uniforms.
Kanzi Studio adds the property, which you defined in the shader, to the material type and the materials that use the material type. Kanzi Studio also adds to the material type a uniform binding whose result Kanzi writes to the render state and uses as the value of the property when rendering 3D nodes that use this material type. See Uniform bindings.
Reusing material types
When you create a material type in your Kanzi Studio project, you can reuse the material type in another Kanzi Studio project.
Note
When you want to reuse a material type whose shaders reuse code from other shaders, create an asset package. See Reusing shader code and Creating an asset package.
To reuse material types:
Save the material type:
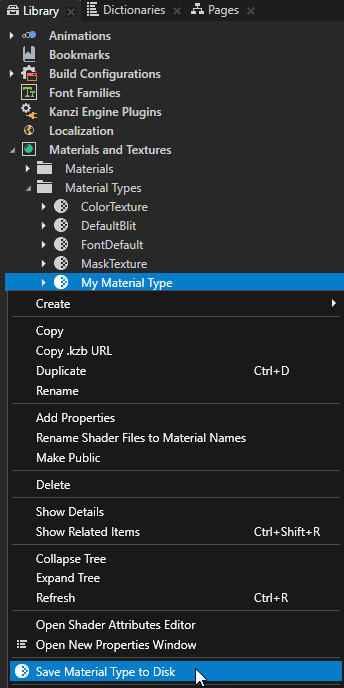
In the Library > Materials and Textures > Material Types right-click the material type that you want to use in another project, and select Save Material Type to Disk.
If you want to reuse a material type whose shaders reuse code from other shaders, create an asset package where you include a material which uses the material type that you want to reuse.
Select the name and location where you want to save the material type and click Save.
Reuse the material type:
In Kanzi Studio open the project to which you want to load the material type that you saved.
In the Library right-click Materials and Textures, select Load Material Type From Disk, go to the directory that contains the material type that you saved, select the material type and click Open.
Kanzi Studio adds the material type and creates a material using that material type. You can create additional materials from the same material type. See Using materials.
Material Type property types
For a list of the available property types for material types, see Material Type.