Using the Text Block nodes
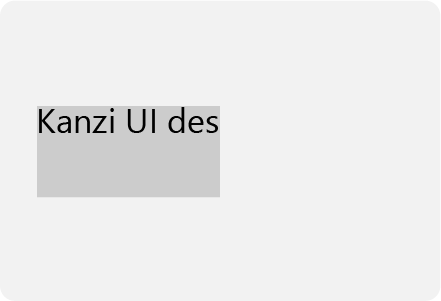
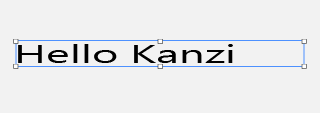
Use the Text Block nodes to show a small amount of text in your application.
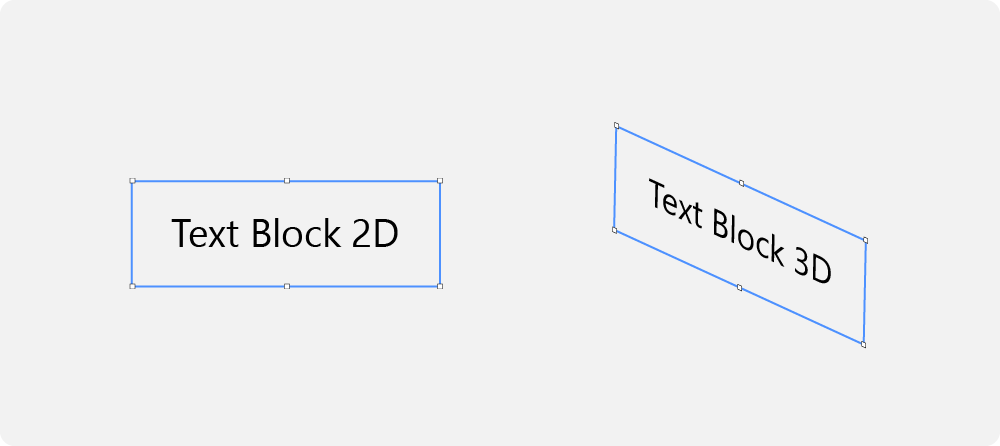
A Text Block node uses the font that you select to render the text. Use Text Block 3D to show text in 3D space and Text Block 2D to show text in 2D space.
Adding text to your application
To add text to your application:
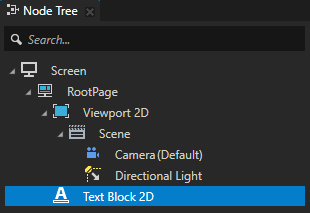
In the Node Tree press Alt and right-click the node where you want to show text and select either Text Block 3D, or Text Block 2D.
You can create a 3D node only in a 3D node, such as the Scene node, and a 2D node only in a 2D node.
Tip
In the Preview use the Text Block 2D tool
 to click and drag to create a Text Block 2D node. To position the Text Block 2D node in a layout, click and drag that Text Block 2D node, press and hold Ctrl, and drop the node on top of the cell where you want to place it.
In the Properties in the Text property enter the text that you want to show. To add a new line press Shift Enter.
Use the Text Block nodes to show a small amount of text in your application.
You can set how Kanzi wraps and truncates text. See Wrapping and truncating text.
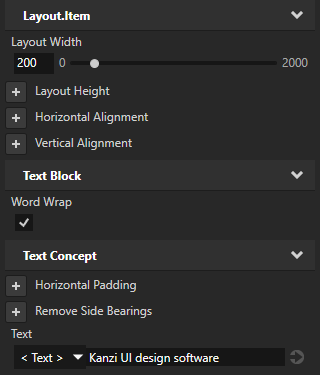
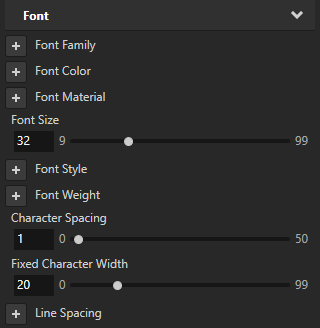
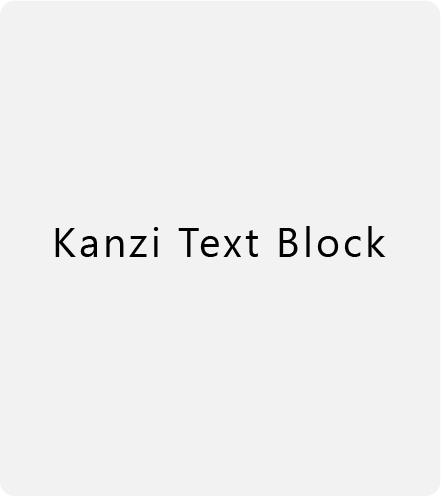
In the Properties set the Font properties to make the text look the way you want it to look. Kanzi applies all the settings that you set in a Text Block node to the entire node.
For example, in the Properties add and set:
Font Size to define the size of the text.
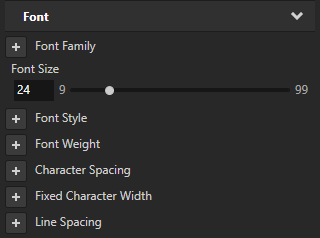
Font Family to the font family that you want to use.
The default font family in Kanzi is Fira Sans Regular. The font file is stored in
<KanziInstallation>/Studio/Asset Library/Fonts. When you want to use your own font, import it to your Kanzi Studio project.See Importing fonts.
Fixed Character Width to turn your font into a monospaced font.
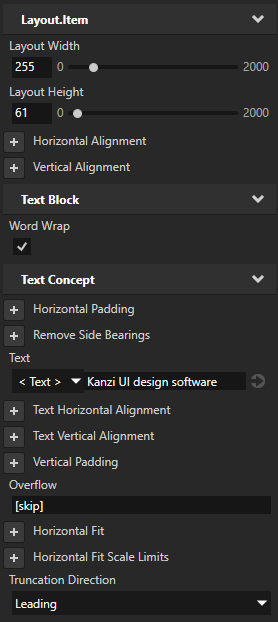
Wrapping and truncating text
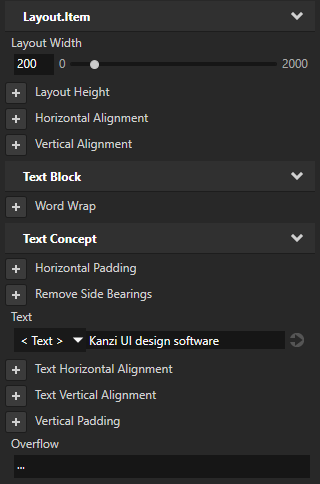
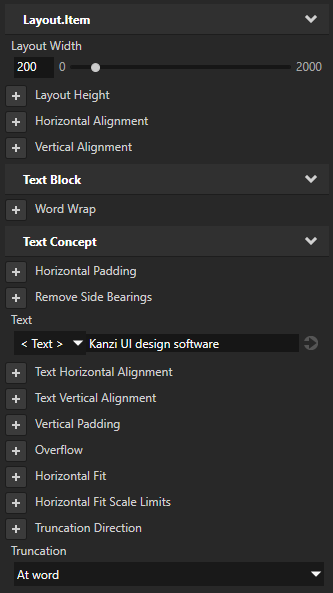
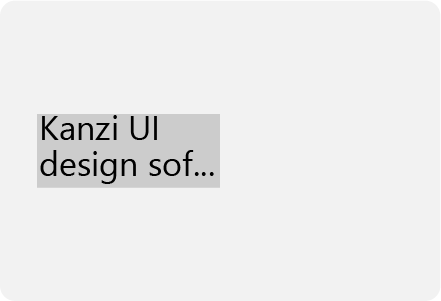
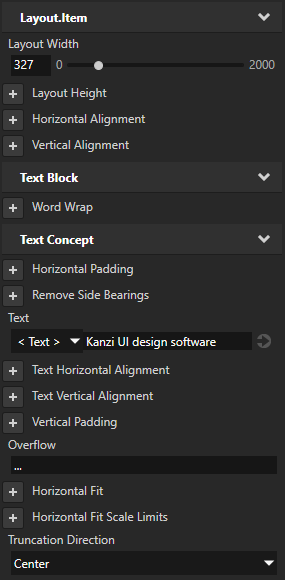
When you restrict the width of a Text Block node, Kanzi by default clips the text that is longer than the width of that Text Block node. You can:
Wrap the text into a new line by adding and enabling the Word Wrap property.
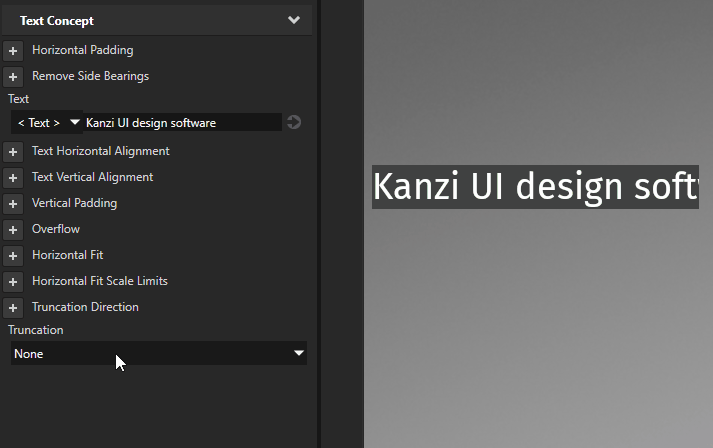
Truncate the text by adding either:
The Overflow property and setting the characters that indicate truncation
The Truncation property and setting the truncation:
At character to truncate text character by character
At word to truncate text by entire words
None to disable truncation
When you enable truncation, you can set which part of the text to truncate. Add the Truncation Direction property and set it to:
Trailing to truncate the end part of the text. Default value.
For multiline text, just like for single-line text, if the Word Wrap property is set to disabled, Kanzi truncates the remaining text that does not fit horizontally.
The value of the Overflow property indicates truncation at the end of the truncated line.
Center to truncate the middle part of the text.
If Word Wrap property is set to disabled, Kanzi horizontally clips multiline text. Kanzi completely truncates middle lines of a multiline or word-wrapped text.
The value of the Overflow property indicates truncation at the end of the line that precedes truncated lines.
Leading to truncate the beginning part of the text.
If Word Wrap property is set to disabled, Kanzi horizontally clips multiline text. Kanzi completely truncates leading lines of a multiline or word-wrapped text.
The value of the Overflow property indicates truncation at the beginning of the first visible line.

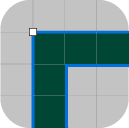
This table shows some options that you can use to set text layout.
Goal |
Required property values |
Result |
|---|---|---|
|
Default property values |

|
|
Layout Width to set the width of the node 
|

|
|
|
|
|
|

|
Truncate the text on a single line. By default, Kanzi truncates the end of the text that does not fit. |
|

|
Truncate the text on a single line and ensure, that only entire words are visible in Text Block node. By default, Kanzi truncates the end of the text that does not fit and uses ellipses to indicate truncated text. |
|

|
Wrap and truncate the text that is longer than the width and higher than the height of a Text Block node. By default, Kanzi truncates the end of the text that does not fit. |

|
|
Truncate the middle part of single-line text, when the text is longer than the width of a Text Block node. |
|

|
|
|

|
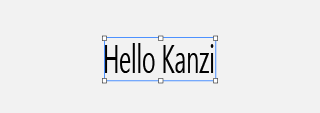
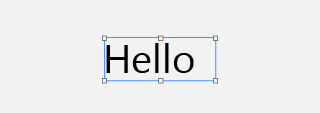
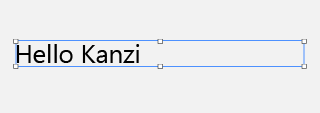
Fitting text into a Text Block node
When you want to make sure that the entire text of a Text Block node fits into the width of that node, use the Horizontal Fit and Horizontal Fit Scale Limits properties.
To fit text into a Text Block node:
In the Node Tree or Prefabs select the Text Block, and in the Properties add and set:
Layout Width to the width that you want to use for that Text Block node
Horizontal Fit to enabled
When you enable this property and the text does not fit into the width of that Text Block node as set by the Layout Width property, Kanzi automatically scales the glyphs to up to half their size.
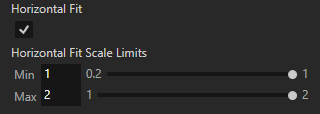
(Optional) To adjust the scaling of the glyphs, add the Horizontal Fit Scale Limits property and set its Min and Max property fields to the minimum and maximum scale ranges for the glyphs.
For example:
When you set the Min property field to:
1.0, Kanzi does not squeeze the glyphs
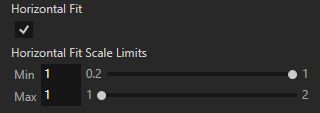
0.5, Kanzi allows squeezing the glyphs to up to half their size
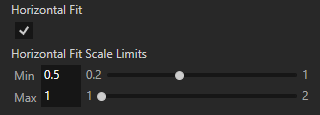
When you set the Max property field to:
1.0, Kanzi does not stretch the glyphs
2.0, Kanzi allows stretching the glyphs to up to double their size
Setting the size and layout of a Text Block 3D node
To render a Text Block 3D node, Kanzi first prepares the text as 2D text using pixels and then projects the prepared text to the 3D space.
To set the size and layout of a Text Block 3D node:
Use pixels to set the size and layout of the text in the Text Block 3D node.
For example, set the values of the Font Size, Character Spacing, and Fixed Character Width properties in pixels.
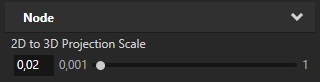
Use the 2D to 3D Projection Scale property to set the factor that Kanzi uses to scale the text from pixels to 3D units. The default value of the 2D to 3D Projection Scale property is 0.02.
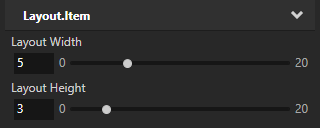
Use 3D units to set the size of the Text Block 3D node in the 3D space.
For example, set the values of the Layout Width and Layout Height properties in 3D units.
Setting the color of text in a Text Block 2D node
To set the color of text in a Text Block 2D or Text Box 2D node:
In the Node Tree create or select a Text Block 2D or Text Box 2D node.
In the Properties add the Foreground Brush property.
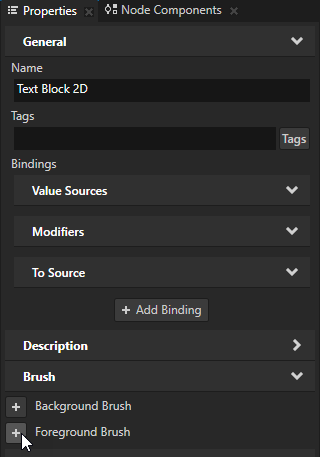
Set the Foreground Brush property to an existing Color Brush or select + Color Brush, name the brush, click
 next to the property, and set the color of the Color Brush you created.
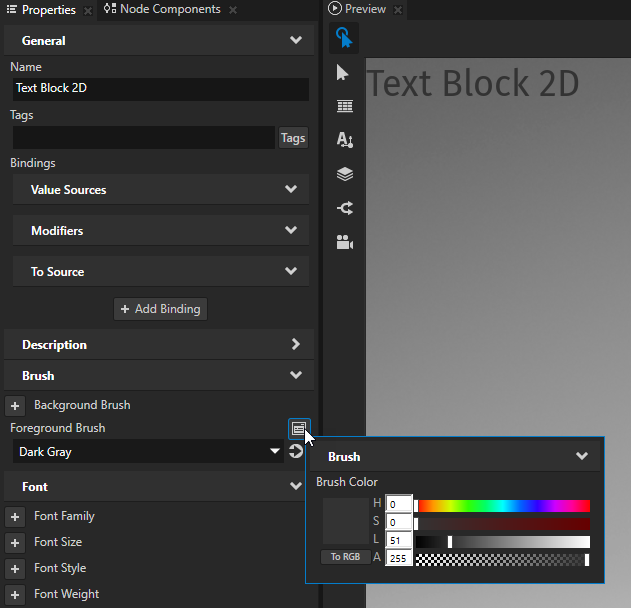
Tip
To quickly edit a brush, in the Properties next to the Background Brush or Foreground Brush property click
and edit the brush.
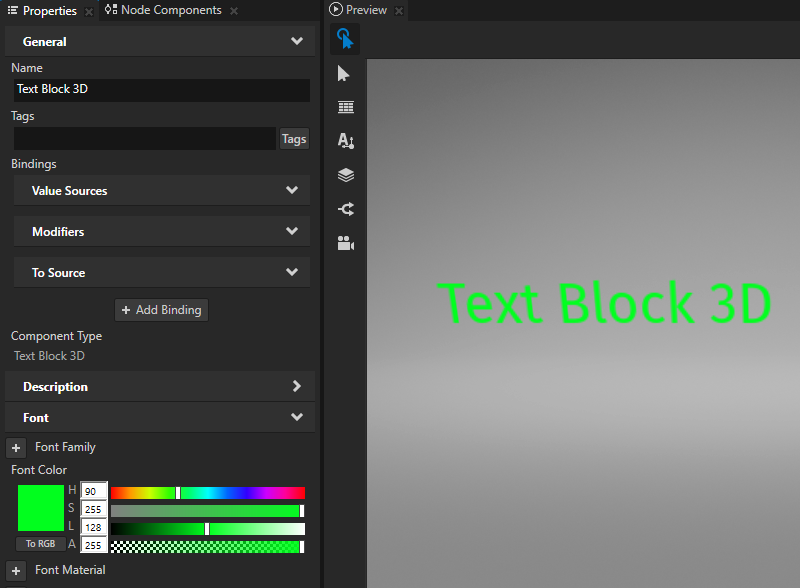
Setting the color of text in a Text Block 3D node
To set the color of text in a 3D text node:
In the Node Tree create or select a Text Block 3D or Text Box 3D node.
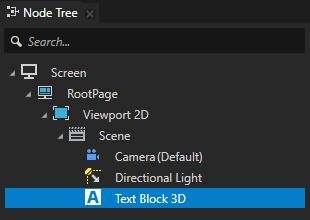
In the Properties add and set the Font Color property.
Changing the size of text dynamically
To dynamically change the size of text in a Text Block node, use the Scale property field of either Render Transformation or Layout Transformation properties, instead of the Font Size property. For example, use this approach when you want to animate the size of text in a Text Block node. When you use the Font Size property to dynamically scale the text, Kanzi creates multiple textures for different font sizes and does not release them from the memory.
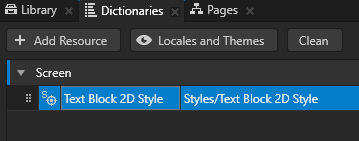
Rendering pixel-perfect text in a Text Block 2D node
When you create a project in Kanzi Studio, the Screen node has in its resource dictionary the Text Block 2D Style which enables the Snap to Pixel property for all Text Block 2D nodes in a Kanzi application.
The Snap to Pixel property rounds the translation and scale of a Text Block 2D or Text Box 2D node to a full pixel, which enables Kanzi to render pixel-perfect text.
To disable the Snap to Pixel property, select the Text Block 2D node for which you want to disable that property and in the Properties add and disable the Snap to Pixel property.
Setting the rendering of characters in a Text Block 2D node
You can set how Kanzi renders each character in 2D text. In a Text Block 2D node these properties are by default enabled:
The Snap Character To Pixel property rounds the translation and scale of each character to a full pixel.
This improves text sharpness, but some characters can shift by a fraction of a pixel.
The Fractional Character Width property enables the spacing between characters to vary and be a fraction of a pixel.
In most cases this provides the best text rendering result. Fractional widths can cause characters of small font sizes to run together or have too much space. This can make the text more difficult to read.
This table lists the options you can use to set the rendering of characters in a Text Block 2D node.
Goal |
Required property values |
Result |
|---|---|---|
Best text rendering result for most cases:
|
Default property values |
|
Render characters as the font designer intended. Do not round the translation and scale of each character to a full pixel. Depending on the screen resolution, anti-aliasing, and font size, this can make the text appear more blurry. |
Snap Character To Pixel disabled |
|
Improve the sharpness of small text. Round character widths to the nearest pixel. This prevents characters in small font sizes from running together and can make text appear sharper. |
Fractional Character Width disabled 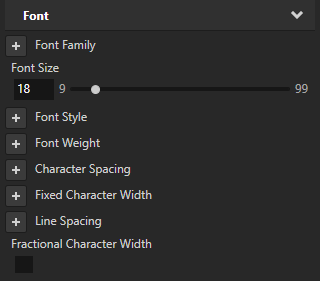
|
|
Manually set the space between the characters. |
Character Spacing to the amount of space you want between the characters 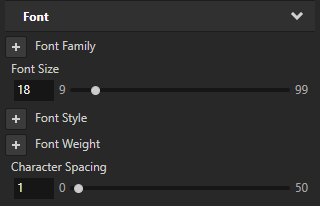
|
|
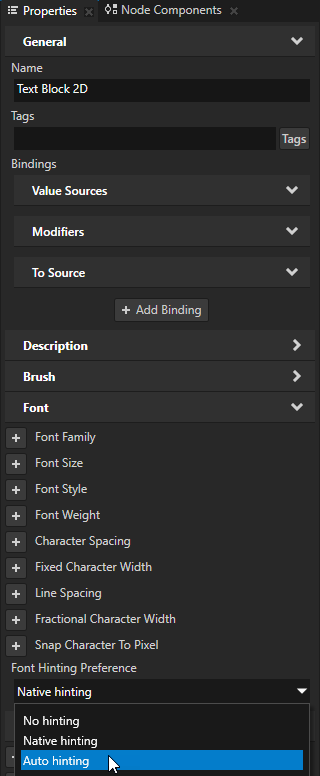
Setting font hinting for a Text Block node
Font hinting provides instructions for rasterization: mapping the outlines of fonts to screen pixels. Font hinting aims to both maintain the design aesthetic of a font and optimize the readability of the font at different sizes.
Text nodes in Kanzi by default use the font hinting data included in a font.
For example, font hinting can affect the height and width of characters, the width of lines, edge contrast, and the space between characters.
To set font hinting for a Text Block or Text Box node, in the Node Tree select that node, in the Properties add the Font Hinting Preference property, and set it to:
No hinting to render text without font hinting.
Native hinting to render text using the hinting data included in the font. If the font does not contain hinting data, Kanzi uses the hinter of the font engine rasterizer. This is the default value.
Auto hinting to render text using the hinter of the font engine rasterizer. See Setting the font engine for the Preview.
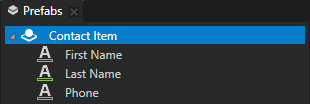
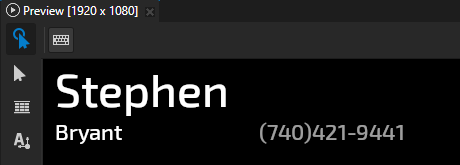
Splitting text into multiple Text Block nodes
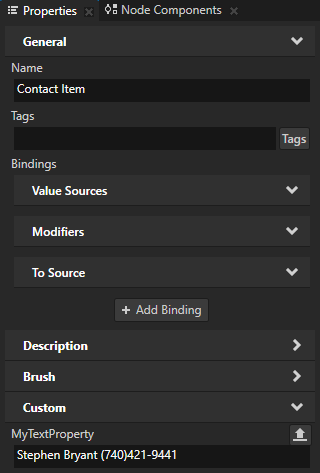
You can use bindings to split text into parts and access each part of the text. For example, split runtime data that you get from a data source. See Using a data source.
You can either:
Show the parts of text in multiple nodes in the order of those nodes in the Node Tree.
You store the collection of text parts in a property and in each node, where you want to show a part of the text, use a binding to advance the iteration of that collection and show the first element from the iterator.
Because the bindings iterate over the collection of text parts in the order in which Kanzi executes those bindings, the order of the nodes in the Node Tree determines which part of the text each node shows.
When you show the parts of text in this way, if you in Kanzi Studio change any property value in a node that shows a part of the text, the Kanzi Studio Preview re-instantiates the bindings in that node and advances the iteration beyond the end of the text that you split. When this happens, you must restart the Preview to see the correct text.
See Showing the text parts in multiple nodes in the node tree order.
Show the parts of text in multiple nodes in any order.
You store the locations of the text parts in separate properties and in each node, where you want to show a part of the text, use a binding to show the text part from a location stored in a specific property.
Rendering text with transparent background
When you want the background of the text block nodes to be transparent, you must render the nodes in the node tree of your Kanzi application in the correct order. See Rendering partially transparent nodes.
Setting the appearance of a Text Block 2D node
To set the appearance of 2D nodes:
You can fill 2D nodes with a solid color, a texture, or a material. See Adjusting the appearance of 2D nodes.


You can apply a post-processing effect to a 2D node. See Effects for 2D nodes.


You can rotate a 2D node around all three axes to create a 3D perspective effect. See Creating a 3D perspective effect for 2D nodes.

You can apply custom rendering to 2D nodes to create post-processing effects. See Applying custom rendering to 2D nodes.
You can render a 2D node as pixel-perfect. See Rendering pixel-perfect 2D nodes.
Using the Text Block 3D node in the API
To create a Text Block 3D node:
// Create a Text Block 3D node named Text Block.
TextBlock3DSharedPtr textBlock = TextBlock3D::create(this->getDomain(), "Text Block");
To set the font family for the text in the Text Block 3D node:
// Set the font family used by the Text Block node.
textBlock->setFontFamily(fontFamily);
To add the text shown by the Text Block 3D node:
// Set the text in the Text Block node to Hello world!.
textBlock->setText("Hello\nworld!");
To adjust the appearance of the text in the Text Block 3D node:
// Set the style of the text in a Text Block 3D node:
// Set the size of the font to 90 pixels.
textBlock->setFontSize(90.0f);
// Set the color of the font to blue.
textBlock->setFontColor(ThemeBlue);
// Set the width of the text block in 3D space to 4 3D units.
textBlock->setWidth(4.0f);
// Set the height of the text block in 3D space to 5 3D units.
textBlock->setHeight(5.0f);
// To break long text lines to multiple lines to make the text fit within
// the boundaries of the text block, set the Word Wrap property to true.
textBlock->setWordWrap(true);
// Align the text in the text block to the right.
textBlock->setTextHorizontalAlignment(TextFormat::TextHorizontalAlignmentRight);
// Enable hinting. Prefer native hinter of the font over the auto-hinter of the rasterizer.
textBlock->setHintingPreference(FontHintingPreference::NativeHinting);
To adjust the scaling factor of the 2D to 3D projection:
// To scale the final text in 3D space, set the 2D to 3D projection scaling factor to 0.04.
// The default value of the Node::Projection2DTo3DScaleProperty property is 0.02f.
textBlock->setProjection2DTo3DScale(0.04f);
For details, see the TextBlock3D class in the Kanzi Engine API reference.
Using the Text Block 2D node in the API
To create a Text Block 2D node:
// Create a Text Block 2D node named Text node.
TextBlock2DSharedPtr textNode = TextBlock2D::create(this->getDomain(), "Text node");
// Create a Text Block 2D node named Text node.
ObjectRef<TextBlock2D> textNodeRef = TextBlock2D.create(getDomain(), "Text node");
TextBlock2D textNode = textNodeRef.get();
// Create a Text Block 2D node named Text node.
val textNodeRef = TextBlock2D.create(domain, "Text node")
val textNode = textNodeRef.get()
To set the font family for the text in the Text Block 2D node:
textNode->setFontFamily(fontFamily);
textNode.setProperty(Node.FontFamilyProperty, fontFamily);
textNode.setProperty(Node.FontFamilyProperty, fontFamily)
To add the text shown by the Text Block 2D node:
// Set the text in the Text Block node to Hello world!.
textNode->setText("Hello\nworld!");
// Set the text in the Text Block node to Hello world!.
textNode.setText("Hello\nworld!");
// Set the text in the Text Block node to Hello world!.
textNode.text = "Hello\nworld!"
To adjust the appearance of the text in the Text Block 2D node:
// Set the style of the text in a Text Block 2D node:
// Set the line spacing to 1.5f.
textNode->setLineSpacing(1.5f);
// Set the size of the font to 36.0f.
textNode->setFontSize(36.0f);
// Set the color of the font to blue.
textNode->setFontColor(ThemeBlue);
// Align the text in the text block to the right.
textNode->setTextHorizontalAlignment(TextFormat::TextHorizontalAlignmentRight);
// Enable hinting. Prefer native hinter of the font over the auto-hinter of the rasterizer.
textNode->setHintingPreference(FontHintingPreference::NativeHinting);
// Set the style of the text in a Text Block 2D node:
// Set the line spacing to 1.5f.
textNode.setProperty(TextBlock2D.LineSpacingProperty, 1.5f);
// Set the size of the font to 36.0f.
textNode.setProperty(FontStyleConceptMetadata.SizeProperty, 36.0f);
// Set the color of the font to blue.
textNode.setProperty(
    TextConceptMetadata.FontColorProperty, new ColorRGBA(0.0f, 0.0f, 1.0f));
// Align the text in the text block to the right.
textNode.setProperty(TextBlock2D.TextHorizontalAlignmentProperty,
    1); // TextFormat::TextHorizontalAlignmentRight
// Enable hinting. Prefer native hinter of the font over the auto-hinter of the rasterizer.
textNode.setProperty(
    TextBlock2D.FontHintingPreferenceProperty, 1); // FontHintingPreference::NativeHinting
// Set the style of the text in a Text Block 2D node:
// Set the line spacing to 1.5f.
textNode.setProperty(TextBlock2D.LineSpacingProperty, 1.5f)
// Set the size of the font to 36.0f.
textNode.setProperty(FontStyleConceptMetadata.SizeProperty, 36.0f)
// Set the color of the font to blue.
textNode.setProperty(TextConceptMetadata.FontColorProperty, ColorRGBA(0.0f, 0.0f, 1.0f))
// Align the text in the text block to the right.
textNode.setProperty(TextBlock2D.TextHorizontalAlignmentProperty, 1) // TextFormat::TextHorizontalAlignmentRight
// Enable hinting. Prefer native hinter of the font over the auto-hinter of the rasterizer.
textNode.setProperty(TextBlock2D.FontHintingPreferenceProperty, 1) // FontHintingPreference::NativeHinting
For details, see the TextBlock2D class in the Kanzi Engine API reference.
Text Block property types and messages
For lists of the available property types and messages for the Text Block nodes, see Text Block 2D and Text Block 3D.