Step 1 - Interpolate the rotation of the compass dial
In this step of the tutorial you use a Property Target Interpolator to interpolate the rotation of the compass dial from the current direction to a target direction over time.
Assets for the tutorial
The starting point of this tutorial is the <KanziWorkspace>/Tutorials/Interpolate/Start/Tool_project/Interpolate.kzproj Kanzi Studio project.
You can find the completed tutorial in the <KanziWorkspace>/Tutorials/Interpolate/Completed directory.
The starting point project contains the content that you need to complete this tutorial:
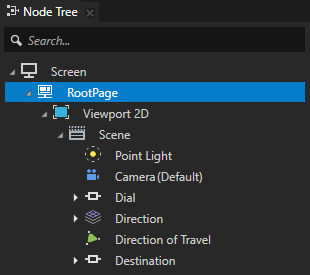
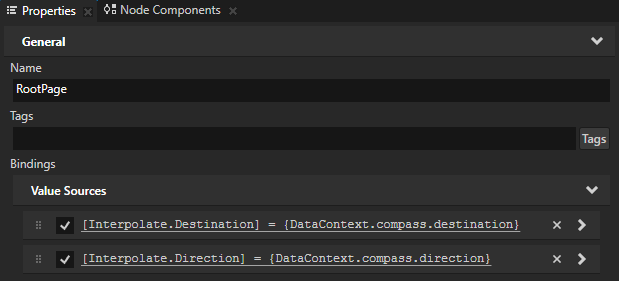
The RootPage node contains the data context and bindings to receive the compass destination and direction of travel, and a state manager.
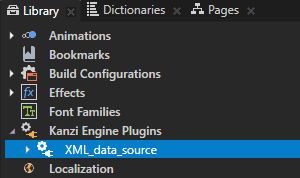
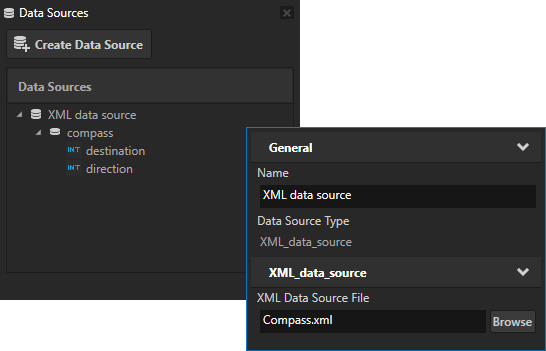
Data context. The project uses the XML_data_source plugin to get data from an XML data source.
In a text editor open the
<ProjectName>/Application/bin/Compass.xmlfile and change the values in the destination or direction XML elements. When you save the file the XML_data_source plugin updates the data objects in the project and shows the updated values in the Kanzi Studio Preview. To see the updated values in the Data Sources window, in the Data Sources window click next to the XML data source.
Kanzi Studio reloads the data for that data source and updates the data objects and their values.
With this setup the compass dial rotates based on the values it receives from the data source. However, the change is instant, not animated. In this tutorial you use the Property Target Interpolator to animate the rotation of the compass dial from the current direction to a target direction over time.
To view the Data Sources window, in the Kanzi Studio main menu select Window > Data Sources.
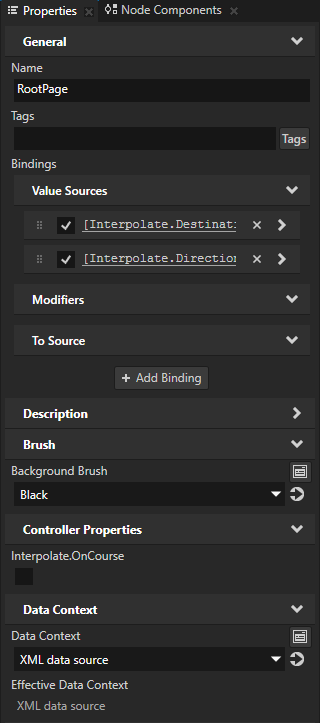
Bindings. The RootPage node has these bindings:
The Interpolate.Destination property is bound to the value of the destination XML element in the
Compass.xmlfile.The Interpolate.Direction property is bound to the value of the direction XML element in the
Compass.xmlfile.
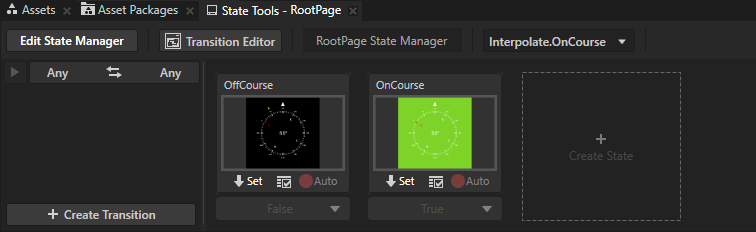
State manager. The RootPage State Manager sets the background color of the RootPage node. It uses the Interpolate.OnCourse custom controller property to achieve that. The state manager has two states:
The OffCourse state sets the background of the RootPage node to black when the value of the Interpolate.OnCourse property is set to false.
The OnCourse state sets the background of the RootPage node to green when the value of the Interpolate.OnCourse property is set to true.
You use the state manager in step 2 of this tutorial to set the compass background color.
The Dial node groups the elements that make the compass dial.
The Degrees node contains the nodes that show the degrees in 30 degree intervals.
The Cardinal Points node contains the nodes that show the cardinal points.
The Ticks node shows the tick marks.
The Dial node has a binding to the Interpolate.Direction property in the RootPage node that rotates the node based on the value of the direction XML element in the
Compass.xmlfile.
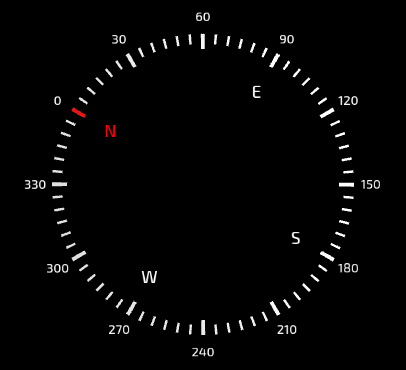
The Direction node contains the current direction of travel in degrees shown in the center of the compass.
The Text property of the Value node is bound to the value of the Interpolate.Direction property in the RootPage which gets the value from the direction XML element in the
Compass.xmlfile.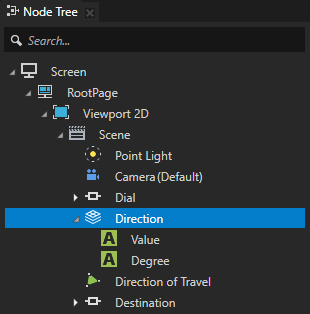

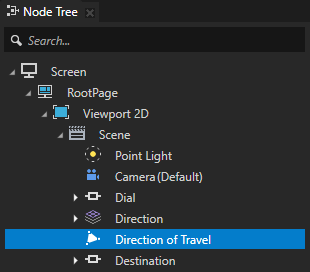
The Direction of Travel node contains the arrow indicating the current direction of travel, always pointing upwards.

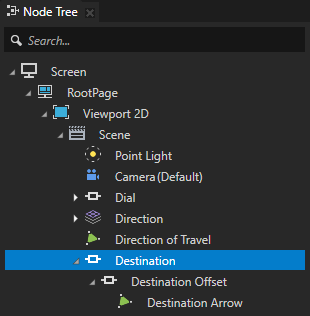
The Destination node contains the nodes that show the current destination:
The Destination node has a binding that rotates the node based on the value of the Interpolate.Direction property of the RootPage node.
The Destination Offset node has a binding that rotates the node based on the value of the Interpolate.Destination property in the RootPage node.
The Destination Arrow node contains the green arrow indicating the current destination.
The bindings in the Destination and Destination Offset nodes together make the Destination Arrow node rotate around the compass dial based on the values in the destination and direction XML elements in the
Compass.xmlfile.

Interpolate the rotation of the compass dial
In this section you animate the rotation of the compass dial so that when the direction of travel changes, the Property Target Interpolator interpolates the current value to the target value over time.
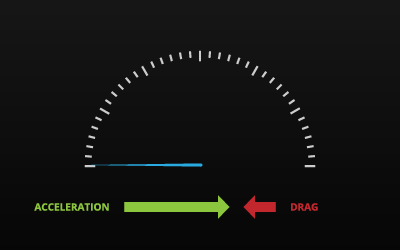
The Property Target Interpolator emulates the behavior of a spring-damper system which never overshoots. You use the Acceleration property to set the force with which the spring moves the object, and the Drag property to set the damping coefficient. The larger the value of the Acceleration property is, the faster the property reaches its new value. The larger the value of the Drag property is, the lower is the maximum interpolation speed.
To interpolate the rotation of the compass dial:
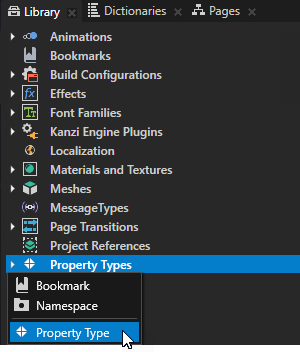
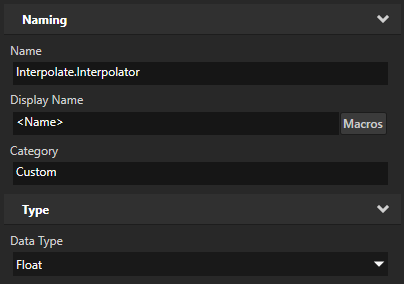
In the Library press Alt and right-click Property Types, select Property Type, and in the New Property Type window set:
Name to Interpolate.Interpolator
Data Type to Float
You create the Interpolate.Interpolator property type because you want to interpolate the Interpolate.Direction property whose data type is integer. To interpolate a property whose data type is not a float, you need to create a float property type and bind the property you want to interpolate to the float property you created.
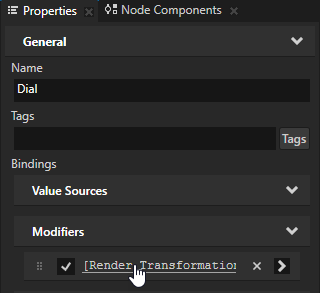
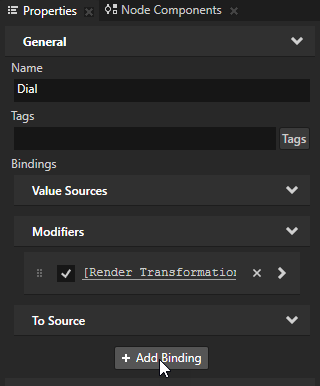
Bind the rotation of the Dial node to the property that you created in the previous step:
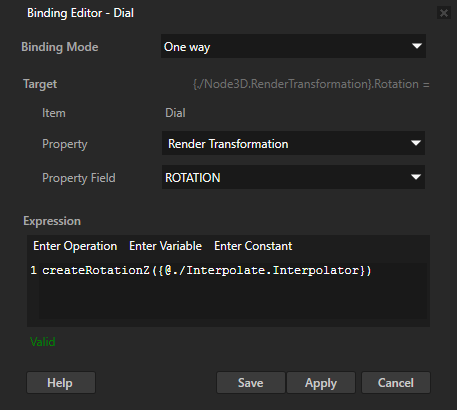
In the Node Tree select the Dial node, in the Properties in the Bindings click the existing binding to edit it, and in the Binding Editor set the Expression to:
createRotationZ({@./Interpolate.Interpolator})Click Save.
You use this binding to rotate the Dial node based on the value of the Interpolate.Interpolator property.
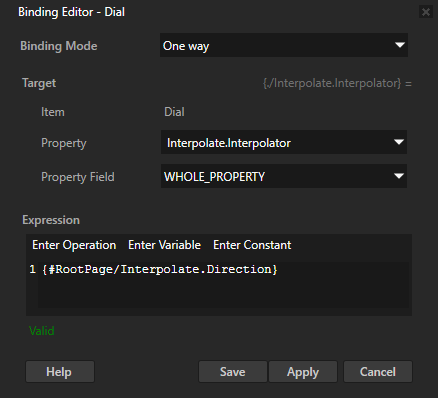
In the Properties click + Add Binding and in the Binding Editor set:
Property to Interpolate.Interpolator
Expression to
{#RootPage/Interpolate.Direction}
Click Save.
You bind the Interpolate.Interpolator property to the Interpolate.Direction property in the RootPage node with which you control the rotation.
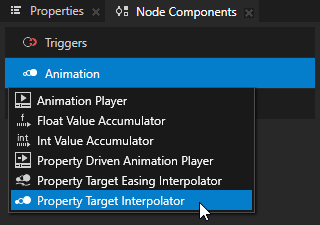
Add a Property Target Interpolator to the node the rotation of which you want to interpolate:
In the Node Tree select the Dial node, in the Node Components press Alt and right-click Animation, and select Property Target Interpolator.
You use the Property Target Interpolator to interpolate the value of the Interpolate.Interpolator property to a target value over time. The bindings you created in the previous step apply this change to the rotation of the Dial node.
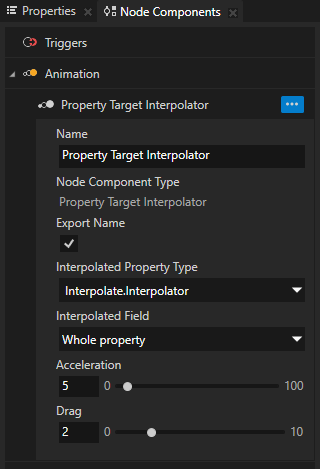
In the Create Property Target Interpolator dialog set the Interpolated Property Type to Interpolate.Interpolator.
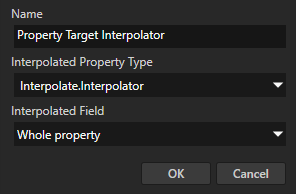
To set the interpolation behavior, in the Property Target Interpolator that you created set:
Acceleration to 5
Drag to 2
The Property Target Interpolator emulates the behavior of a spring-damper system which never overshoots. You use the Acceleration property to set the force with which the spring moves the object, and the Drag property to set the damping coefficient. The larger the value of the Acceleration property is, the faster the property reaches its new value. The larger the value of the Drag property is, the lower is the maximum interpolation speed.
Now when you change the value of the direction XML element in the <ProjectName>/Application/bin/Compass.xml and save the file, the Property Target Interpolator interpolates the rotation of the compass dial to the target value over time.
Tip
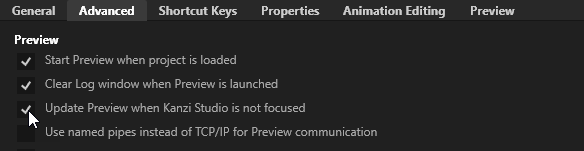
By default the Preview updates content only when the Kanzi Studio window is focused. To see the changes in your Kanzi Studio project when the Kanzi Studio window is not focused, in Kanzi Studio select Edit > User Preferences and in the Advanced tab enable the Update Preview when Kanzi Studio is not focused setting.