Step 1 - Use the Kanzi Engine API to load a Kanzi binary
In this step you learn how to use the Kanzi Engine API load a Kanzi binary.
Assets for the tutorial
The starting point of this tutorial is stored in the <KanziWorkspace>/Tutorials/Programmer tutorial/Start directory:
Tool_projectdirectory contains the Kanzi Studio project which contains the application structure and resources you use in this tutorial. Whenever you make changes to this project, to see the result in your application, export the project to a kzb file. See Using kzb files.Application/bindirectory contains theProgrammer_tutorial.kzbbinary file generated from the Kanzi Studio project, and PNG image files that the application you create in this tutorial uses.
You can find the completed tutorial in the <KanziWorkspace>/Tutorials/Programmer tutorial/Completed directory.
Use the Kanzi Engine API to load a Kanzi binary
To use the Kanzi Engine API to load a Kanzi binary:
In Kanzi Studio open the
<KanziWorkspace>/Tutorials/Programmer tutorial/Start/Tool_project/Programmer tutorial.kzprojKanzi Studio project and select File > Export > Export KZB.Kanzi Studio creates the kzb file and configuration files from your Kanzi Studio project. Kanzi Studio stores the exported files in the
<ProjectName>/Application/bindirectory or the location you set in Project > Properties in the Binary Export Directory property. The kzb file contains all nodes and resources from your Kanzi Studio project, except the resources you mark in a localization table as locale packs.When you run your Kanzi application from Visual Studio, your application loads the kzb file and configuration files.

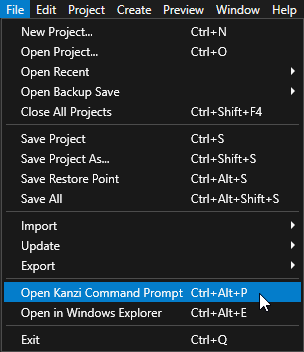
In Kanzi Studio, select File > Open Kanzi Command Prompt.
The Kanzi Command Prompt opens the Windows Command Prompt with the Kanzi environment variables set for the version of Kanzi for which you open a Kanzi Command Prompt.
Use the Kanzi Command Prompt to access Kanzi utilities and build tools, such as Gradle, SCons, and CMake, without using absolute paths or setting environment variables.
Tip
You can find the Kanzi Command Prompt in the Windows Start Menu in the Rightware directory.
When you have more than one version of Kanzi installed, make sure that you launch a Kanzi Command Prompt for the version of Kanzi with which you want to work in that command prompt.
In the Kanzi Command Prompt in the
<KanziWorkspace>/Tutorials/Programmer tutorial/Start/Applicationdirectory run the script that generates a Visual Studio solution for the tutorial application.For example, if you use Visual Studio 2019, run
generate_cmake_vs2019_solution.bat
This script generates a Visual Studio solution for the application in the directory
<KanziWorkspace>/Tutorials/Programmer tutorial/Start/Application/build_vs2019.In Visual Studio open the
<KanziWorkspace>/Tutorials/Programmer tutorial/Start/Application/build_vs<Version>/Programmer_tutorial_start.slnVisual Studio solution.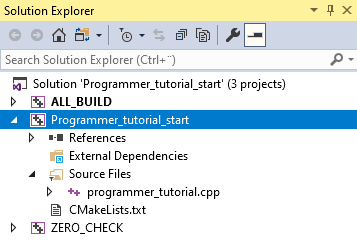
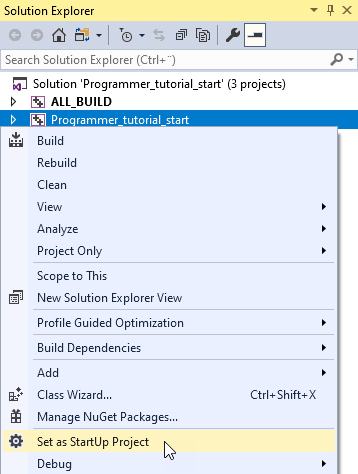
In Visual Studio in the Solution Explorer right-click the Programmer_tutorial_start project and select Set as StartUp Project.
Open the
programmer_tutorial.cppfile.The
programmer_tutorial.cppfile contains the minimum amount of code required for loading a Kanzi application. In this tutorial you create the logic of your application in this file.// The kanzi.hpp header includes all Kanzi Engine functionality. // To fine-tune your application you can include only the relevant headers. #include <kanzi/kanzi.hpp> using namespace kanzi; class ProgrammerTutorialApplication: public ExampleApplication { // In the onConfigure function you can tell your Kanzi application which kzb file // to load, enable performance information in your application, and set how many threads // you want to use for loading the application resources. void onConfigure(ApplicationProperties& configuration) override { configuration.binaryName = "Programmer_tutorial.kzb.cfg"; } }; // To work with the main function in the Application framework you need to // return your application in the createApplication function. The main // function then passes the control to the main loop defined in your // Application class. Application* createApplication() { return new ProgrammerTutorialApplication; }
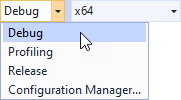
Select the solution configuration that you want to use and run your application.
During development, select the Debug configuration. When you are ready to create a version for production, select the Release configuration.
When you build and run the program, Kanzi loads the kzb file and shows the application content.

During an application launch Kanzi:
Calls the
onConfigureentry point function, where you specify the configuration. For example, which Kanzi Studio project kzb files you want the application to load and the application window size.Loads the kzb file to memory, which makes it available to the application.
When Kanzi completes the loading of the project, it calls the
onProjectLoadedfunction. In the next steps of this tutorial you add the application functionality in this function.
See also
To learn more about developing Kanzi applications, see Application development.
To learn about the available configuration options for your Kanzi application, see Application configuration reference.
To learn more about kzb files, see Kzb files.
To learn how to deploy your Kanzi application to different platforms, see Deploying Kanzi applications.